This weekend I put up a new gallery and I am just tickled with how it turned out.
It started last week when I got our son's first preschool photo.
I was trying to think of the best way to display his photo (and the photos to follow over the next fourteen years). I found inspiration in our
anniversary gallery. We have frames celebrating various milestones from engagement to our 45th wedding anniversary. We hung up all the frames at once, putting labels to mark future milestones.
So I bought some inexpensive 8x10 frames from the Flower Factory--only $2.55 each! Then I played around in Word to make labels with the grade and year from preschool (our son has one more year) to twelfth grade.
I had some clear labels, but decided I liked the white ones better. I glued each one onto a green notecard.
Next, I went through my stacks of scrap paper and pulled out 14 different pages. I love that this project cost nothing other than the frames! I lined up the papers and played around with the order. My vision isn't great to see the gradient colors, but it works for me.
Next I cut out 8x10s of each page, using the glass from one of the frames as a template.
First one done.
And framed.
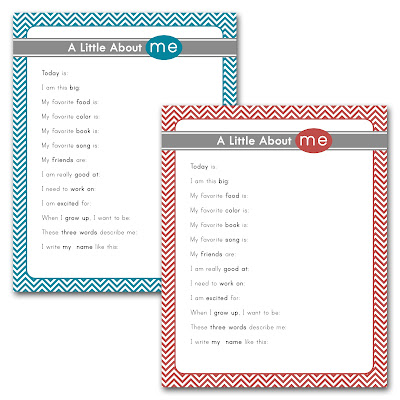
Each September, I do a little interview with D, similar to this one. My next project is to make pretty version for each grade and stick them in the back of the frames as a prompt to do the interview each year when I put the new photo in the frame.
Updated:
I found these super cute interview printables from Precious Announcements on Pinterest.
Then I brought all the finished inserts and frames up to the empty wall.
I still had four empty frames, so I put in a photo from his birth day, and then fall photos from each year til now.
When I laid them all out, I realized that even though my receipt said I bought 20 frames, I only had 19.
The last photo is one I had forgotten was taken. (It was a very sentimental night going through all these photos!) It was a few weeks before D was born. I was sitting in the nursery with our dog when D kicked me. Bailey had her paw on my tummy. D's kick startled her so she licked my belly. Such a sweet moment with a sweet dog. We lost Bailey twenty months ago.
I really liked how bright and colorful the frames looked.
By this time it was pretty late. My original thought was to hang the frames in a large square. Something like this:
Niels didn't like the idea of the photos being so close to the floor, and since I needed his help to put them up, I decided to sleep on it.
At about 3am, inspiration struck. Knowing that I couldn't rely on my brain to remember it in the morning, I drew it up on PowerPoint.
When I woke up, I pulled the frames out of the hallway to see how it looked with frames. I loved it. And, so did Niels!
I was still missing a frame, so first we had to make another trip to Flower Factory.
Finally, we were ready to get started! Here is the before photo. It's the space just at the top of the stairs. On the other side, going up the stairs, is
our anniversary wall.
To start, I put a long strip of masking tape on the wall to mark the line on which I wanted the end photos to sit.
It took a few tries to get it exactly level all the way across.
I measured the wall and was quite relieved to see that I have 5" to spare.
I marked 2.5" out from the linen closet frame to start with the 12th grade frame. I figured it I got off a little, at least I could go out above the stairs.
Earlier in the afternoon, I decided that I would try the
Command Hook picture hangers instead of nails. It turned out to be a fantastic decision. First of all, the odds of making a bajillion extra holes when the frames had to fit exactly together was high. Secondly, this allowed me to finish a project by myself.
The command strips were super easy to use. (
This is no ad. Sadly, I don't yet know enough about blogging to make any money here. Although, if someone wants to educate me, I'm an eager learner!) First, I put two pieces of velcro together and pushed down.
Then I removed one piece of protective paper so the sticky part was revealed.
For the first frame, I put two strips on either side of the top of the frame. For the rest, I put one strip on top and one on the bottom.
After I removed the top strip, I was ready to hang the frame.
As soon as I found the exact place I wanted, all I had to do was push down.
For the first frame, I did not remove the stand.
But the frame was a little uneven against the wall, so I took it down and removed it. Along with the other 19.
Next, I found the midpoint of the frame so I knew where to place the next column.
The frames went up really fast.
And when I got to the last frame, I was thrilled to see that it was still level!
I finished just before our little guy went to bed. He loves
his new gallery.
I can't express how happy it makes me to have photos of my family up. And just as I love having a visual way to see the years ahead in our marriage, this gallery reminds me to savor every short moment I'll have with my little boy. He'll be leaving the nest before I know it.
He's not even four and we're six frames in!
The view coming up the stairs.
I find beauty in order.
A few artsy shots by my hubby:
Bliss.