Friday, November 16, 2012

Tips for Healthy Living

I had grand plans to reveal my newly organized pantry and freezer, but The Crash came. Living with a traumatic brain injury means you can never take your memory, endurance, ability to communicate, etc. for granted. I had a nice run of about two weeks where I was able to organize, declutter, and decorate. 

This morning, my brain needed a break. 

It's hard to explain what it's like when I'm in crash mode. If I catch it early and give myself the rest I need, it's a moderate headache, sensitivity to light and sound, fatigue, and a foggy mind for a day or so. If I push too hard, it's a severe headache, inability to tolerate any light or sound, exhaustion, and aphasia (loss of ability to find the words you want to speak). When I get to the point where I'm easily frustrated and I don't seem to be communicating well (because I'm asked to repeat what I'm saying, or I have to re-type as sentence four times to correct typos and make it clear, or my family look at me like I'm speaking a new language), I know it's time to put myself to bed.

I've learned to listen to my body. Or, at least I'm learning. A few days ago, I made this reminder to hang on our frig. The words came from a friend's Facebook wall. Life giving advice.

Wednesday, November 14, 2012

DIY Dinette Decor


For the past ten months(!), our dinette looked like this:

I knew I wanted to put something on the wall above the sliding doors, but wasn't sure if it would be the frame of our wedding invitation and vows, which were signed all our family and friends, a vinyl art quote, or my own word art, like this:
Traditional Meets Casual
BHG
I've seen the "Eat" letters all over Pinterest (like here and here and here and here) and only recently learned that they are inspired by the kitchen in "Cougar Town." While "eat" is fitting, I was drawn to the word "savor."

Savor.  [Sey-ver]. verb. 
1. to perceive by taste or smell, especially with relish: to savor the garden's odors. 
2. to give oneself to the enjoyment of: to savor the best in life. 

I cook most meals from scratch each night, and we eat almost every meal together as a family in the dinette. Eat, to me, implies too much "shovel in your food as quickly as you can so we can do the next thing." Savor, to me, conveys a sense of enjoyment, not only of your food, but also of your conversation and company. Savor is about slowly appreciating the food that is nourishing you and strengthening your relationships with your dinner companions. I want my son to have a healthy relationship with his food. I want him to learn to listen to his body telling him if he is hungry or full or bored. I want him to appreciate the time and effort his mommy takes to make a nourishing, satisifying meal for him. A lot of pressure for five letters, but I like the idea of intentional decor, and for our dinette, this is it.

I found the five wood letters at Flower Factory:

I liked that the letters were clean and thin.

I'm still working on my spray painting skills. No drips on these letters. (I can't say the same for the other project I was spraying, the A Z bookends, in the photo below.

The top coat was super easy.

I took a little more effort to get the sides painted.

I love how my drop cloth reminds me of projects past and present.

I ran out of steam so the letters hung out on the frame for a few days.

After a good night's rest, it was easy to put the letters up. I thought I bought more Command Velcro Strips, but I bought the sticky ones instead. No matter.

After a few calculations, I decided to eyeball it.

I put four strips on each letter. I had to hold them down a bit because the adhesive doesn't love wood.

I started in the middle and worked my way out. 

I love it.

P.S. If you'd like to know more about our light fixture, which is one of my favorite lights in the whole house, check out this post.

Linked to:

Monday, November 12, 2012

Growing Up Gallery

This weekend I put up a new gallery and I am just tickled with how it turned out.

It started last week when I got our son's first preschool photo.


I was trying to think of the best way to display his photo (and the photos to follow over the next fourteen years). I found inspiration in our anniversary gallery. We have frames celebrating various milestones from engagement to our 45th wedding anniversary. We hung up all the frames at once, putting labels to mark future milestones.

So I bought some inexpensive 8x10 frames from the Flower Factory--only $2.55 each! Then I played around in Word to make labels with the grade and year from preschool (our son has one more year) to twelfth grade. 

I had some clear labels, but decided I liked the white ones better. I glued each one onto a green notecard.

Next, I went through my stacks of scrap paper and pulled out 14 different pages. I love that this project cost nothing other than the frames! I lined up the papers and played around with the order. My vision isn't great to see the gradient colors, but it works for me.

Next I cut out 8x10s of each page, using the glass from one of the frames as a template.

First one done.

And framed.

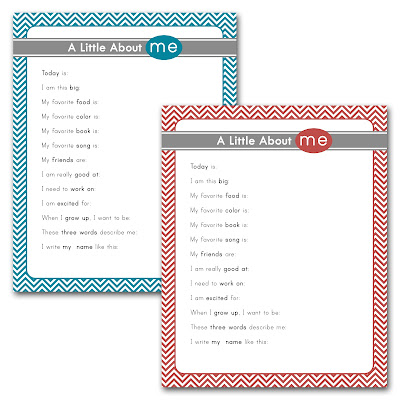
Each September, I do a little interview with D, similar to this one. My next project is to make pretty version for each grade and stick them in the back of the frames as a prompt to do the interview each year when I put the new photo in the frame.

Updated: 
I found these super cute interview printables from Precious Announcements on Pinterest.

Then I brought all the finished inserts and frames up to the empty wall.

I still had four empty frames, so I put in a photo from his birth day, and then fall photos from each year til now.

When I laid them all out, I realized that even though my receipt said I bought 20 frames, I only had 19.

The last photo is one I had forgotten was taken. (It was a very sentimental night going through all these photos!) It was a few weeks before D was born. I was sitting in the nursery with our dog when D kicked me. Bailey had her paw on my tummy. D's kick startled her so she licked my belly. Such a sweet moment with a sweet dog. We lost Bailey twenty months ago.

I really liked how bright and colorful the frames looked.

By this time it was pretty late. My original thought was to hang the frames in a large square. Something like this: 

Niels didn't like the idea of the photos being so close to the floor, and since I needed his help to put them up, I decided to sleep on it.

At about 3am, inspiration struck. Knowing that I couldn't rely on my brain to remember it in the morning, I drew it up on PowerPoint.  

When I woke up, I pulled the frames out of the hallway to see how it looked with frames. I loved it. And, so did Niels!

I was still missing a frame, so first we had to make another trip to Flower Factory.

Finally, we were ready to get started! Here is the before photo. It's the space just at the top of the stairs.  On the other side, going up the stairs, is our anniversary wall.

To start, I put a long strip of masking tape on the wall to mark the line on which I wanted the end photos to sit.

It took a few tries to get it exactly level all the way across.

I measured the wall and was quite relieved to see that I have 5" to spare.

I marked 2.5" out from the linen closet frame to start with the 12th grade frame. I figured it I got off a little, at least I could go out above the stairs.

Earlier in the afternoon, I decided that I would try the Command Hook picture hangers instead of nails. It turned out to be a fantastic decision. First of all, the odds of making a bajillion extra holes when the frames had to fit exactly together was high. Secondly, this allowed me to finish a project by myself.

The command strips were super easy to use. (This is no ad. Sadly, I don't yet know enough about blogging to make any money here. Although, if someone wants to educate me, I'm an eager learner!) First, I put two pieces of velcro together and pushed down.

Then I removed one piece of protective paper so the sticky part was revealed.

For the first frame, I put two strips on either side of the top of the frame. For the rest, I put one strip on top and one on the bottom.

After I removed the top strip, I was ready to hang the frame.

As soon as I found the exact place I wanted, all I had to do was push down.

For the first frame, I did not remove the stand.

But the frame was a little uneven against the wall, so I took it down and removed it. Along with the other 19.

Next, I found the midpoint of the frame so I knew where to place the next column.

The frames went up really fast.

And when I got to the last frame, I was thrilled to see that it was still level!

I finished just before our little guy went to bed. He loves his new gallery.

I can't express how happy it makes me to have photos of my family up. And just as I love having a visual way to see the years ahead in our marriage, this gallery reminds me to savor every short moment I'll have with my little boy. He'll be leaving the nest before I know it.

He's not even four and we're six frames in!

The view coming up the stairs.

I find beauty in order.

A few artsy shots by my hubby:


Bliss.

Updated: In case you missed our other galleries, here are the links:
  1. Great Room Great Memories Gallery
  2. Mini-Great Room Gallery
  3. Anniversary Gallery
  4. Heritage Gallery
  5. We Do Gallery
  6. Visual Guest Book Gallery
  7. Boy's Room Printable Galley
Updated: 
It's been nearly three years since I first put up the growing up gallery. Here's an updated picture. I can't believe I'll be putting up his first grade picture this year!


Do you have photo galleries in your home? Link them up below!

Linked to:
36th Avenue * At the Picket Fence * Balancing Home * Between Naps on the Porch * Capturing Joy * Craft-o-Matic * Create Craft Love * Creative Muster * Crystal & Co (featured) * The CSI Project * Diana Rambles * Folk * Glitter, Glue & Paint * The Grant Life * Home Stories A to Z * Hope Studios* House of Hepworths * I Heart Naptime * It's Overflowing * Just Us Four * Life After Laundry * Little Miss Celebration * Liz Marie Blog * Miss Information * Mums Make List * My Life According to Pinterest *  My Uncommon Slice of Suburbia * New Nostalgia* Not Just a Housewife * Organize Your Stuff Now * Organizing Made Fun * Practically Functional * Real Coake * Serenity Now * Sew Much Crafting *   Sparkles & a Stove * And Sew We Craft * Sugar Bee Crafts * This Silly Girl's Life * Tatertots & Jello * Thrifty Nifty Things * Tossed Salad Life * Uncommon Designs * Who Needs a Cape * Will Cook for Smiles

Visit thecsiproject.com It's Overflowing
Related Posts Plugin for WordPress, Blogger...