Showing posts with label toddler room. Show all posts

Thursday, April 19, 2012

Project of the Day: Updated Night Stand

When I was pregnant with our son, over three years ago, we decided to buy a transitional bed: one that starts as a crib, then transitions into a toddler bed, then transitions to a full bed. For the most part, it's been a good decision. It would have been better if we had put the bite guard on the crib before we realized that our son has started nibbling on the rail, but we'll just call that patina. 

We made the splurge to buy the matching armoire and dresser, but chose not to buy the night stand. About two years later, we realized that we would need one and kicked ourselves when we learned that our set has been discontinued. We looked in all the regular places and couldn't find one anywhere. 

When we moved into the new house, our best option was to repurpose a little cabinet we had previously used in our media room.

I'm not sure when I picked up this cabinet, but I used it as a night stand in my townhouse, before I was married, so I'd say I've had at least eight years, and I'm sure I bought it used. It's well used. And the stain matches nothing in our house. See how I hide it from view in D's new room?

Since we've started to get D's room decorated, I decided it was time to bust out the spray paint. Full disclosure: I will never be a professional tagger. I need a community ed glass in spray painting, but I'm pretty sure cities don't prefer to offer that knowledge. So I'm left on my own.

Last look at the orange-y night stand.

First coat of the primer. I used Rustoleum Ultra Cover 2x Primer. I bought it at Walmart, and I'm not sure why I bought the red primer when the black probably would have been a better choice.
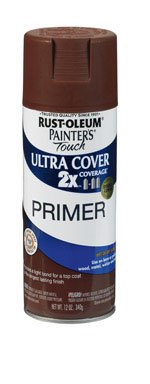
I'm glad I started on the back because I immediately made a nice streak of drips. I'm thinking a steady back and forth motion makes for a smoother application. 

I was happy with how quickly it dried--about fifteen minutes.

Next, I applied Rustoleum Ultra Cover in Satin Dark Walnut.
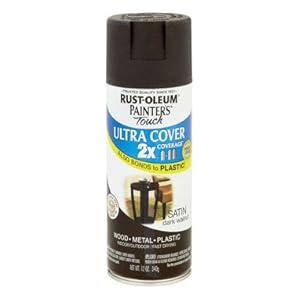
Rust-Oleum Corp/Zinsser 257462 "Painter's Touch" 2X Ultra Cover Spray Paint 12 Oz - Satin Dark (Pack of 6)
I had originally bought another color, but my hubby wisely suggested that the dark walnut would be a better match for espresso. (Note to self: return other can). The paint was just dry when our son woke up from his nap and, rather than admiring my work, asked why his night stand couldn't stay orange...or be yellow. (He loves yellow).

The other thing I wanted to change was the wooden knobs.

The rest of his furniture has silver accents, so I was able to use two extra silver knobs I had from another project.

The knobs are Target Home Scoop knobs in Satin Nickel.

D has adjusted to his matching furniture and the night stand is now overflowing with books again (he is my son, after all!), but here's a photo of the finished produce in a messy post-nap toddler room.
with yellow curtain
without yellow curtain
I need to make another post about D's room because we're close to being finished in there. At least, finished for now. Especially now that I found the perfect piece of art for above his bed. Stay tuned...

Linked to: 

Friday, April 6, 2012

Project of the Day: Naming Trains

Our three-year-old son loves Thomas the Tank Engine. LOVES. If it was up to him, he would do nothing but play with Thomas and his friends all day long.


It all started about a year and a half ago when visited his cousin, CJ, who has quite an impressive collection of Thomas toys. Shortly before visiting Thomas Mecca, some friends of friends were selling of their son's collection and we were asked if we wanted to buy some. At that point, we were in the naive "trains are kind of nice" stage, and had no idea how much wooden Thomas trains cost new. The family was selling trains for $3 each. Since I was thinking garage sale toy prices, we bought only three trains and a few tracks. (I'm thinking the family was raising money for an adoption, so we wanted to be supportive).

When we got back home from our trip, D became obsessed  with his trains. We looked at Target and were shocked to learn that each train was selling for $8-$12! Not the kind of money we wanted to spend!

Fast forward to today. D has a sizeable train collection, but not many of the Thomas brand. We stick to the wood tracks, which work well with Ikea's train sets, Target's Circo line, and Melissa & Doug trains. We've picked up a few here and there for gifts and potty training incentives, and now he has a nice hodge podge of wooden trains and tracks.

One unique feature of the Thomas trains, other than the creepy faces, is that they each have names, which are written on the bottom of the train. It's amazing to us how D knows the name of each train in the Thomas collection. We've also noticed that he's started to name the other train.

Meet Owenini.
We're not sure when (or why!) D started to refer to this black Target train as Owenini, but once he had a meltdown over this train with that name, we knew it had stuck. 

Since I have not inherited the gene that enables me to tell all the trains apart, I had the idea to use my sticker letters to label the bottom of Owenini to look like Thomas. I already had my sticker letters out from this project. But when I removed the sticker, I saw these holes.
So, I decided to play around on PowerPoint to make a label instead. (I'm sure there's an easy, better way, but this works). I compared the text to Thomas' label, and came up with Ariel with font size of 20.

Then I cut out the label to make sure it fit. Whew! It did. I really need to find my ruler.

Next, I got out my Mod Podge and some q-tips.

I applied Mod Podge to the back of the label first.

I secured it to the bottom of the train, smoothing out the label as best as I could with the other side of the q-tip.

Then, I applied another coat of Mod Podge over the top, so young fingers wouldn't try to peel the label off.

It took about two hours for the Mod Podge to dry completely.

Here's Thomas with his (new) friend. (If your child is into trains, did you sing that line?)

When I showed Owenini to D, he ran away. I wasn't sure what to think until he plopped a handful of trains on my command center and say, "These trains don't have names either."

Fortunately for me, it takes time to come up with a good name. However, I have already made a label for Bobby this morning.

Friday, February 10, 2012

The carpet is IN!

A few weeks ago, D and I were visiting some of our future neighbors. They said that their house felt like home on the day their carpet went in. Our carpet went in today. I totally agree. 

In-law suite, from the bathroom.
In-law suite, from the closet.
Great Room, from the kitchen.
Great Room, from the dinette.
Great Room, from the stairs.
Niels' office.

Lighted stairs, now with carpet.
Lighted stairs, looking down.

Guest Room.
D's room.

Hallway, from D's bathroom.
Our bedroom.
Niels' side of the closet.
My side of the closet.
The carpet was one of the big compromises for us. In the no-budget plan, we would have had all cork floors in the non-tile rooms. Alas, we had a budget, and our quotes came back over our allowance after we settled on carpet made of corn or recycled plastic. But, it was easy to scale down here because we know that we want to replace the carpet within 3-5 years. Harold from Northport Flooring America was wonderful to work with, and helped us make our budget with flooring with this choice.

The crew from Northport has been great to work with, and the carpet crew was especially fun. They oohed and ahhed over our new home and it was really fun to see what caught their eye, and show them how our house doesn't just look nice, but is nice to the earth, too.

Thursday, February 9, 2012

Carpet is going down!

A new crew of guys joined Tim and Jim today: the carpet crew! I didn't venture upstairs where they working, but here's what the first level looks like:
in-law suite
great room (view from kitchen)
great room (view from stairs)
Niels' office
Stairs.
The plan today is for them to get all the grippers and padding down. Tomorrow, they'll lay the carpet down.

Carpet is one area where we compromised. If money were no object, we would have likely put cork in all the bedrooms, office and great room, and used a rug runner on the stairs. But since we do have a budget,  we decided to use carpet. We had originally planned to use carpet made of corn and recycled bottles, but we got a really great deal on the carpet we're putting in. The plan has never been to have the original carpet in long term because A) it's carpet, and even if it looks nice, you don't want to think about what it's hiding, and B) we'll be bringing a puppy home soon and then you really don't want to think about what's in the carpet! :-) So, when we realized we're looking at something for only the next 3-5 years, we decided to go cheap and not go over our allowance on flooring.

Another day closer!

My descriptions have been a little shorter lately because I've been battling the flu. Fun times. We'll do room by room posts after we move in where we give more details about specific finishes and selections.

I know I've raved already about my backsplash, but I really, REALLY love it! Today, Tim put the grout on and I'm very pleased with the choice. It's just the right white. 

When we first started thinking of a backsplash, I fell in love with Ann Sacks Matchstick Mosaic on Houzz.com. It took awhile to track it down, and at $65/square foot, I fell out of love. Even though I still think Ann Sacks' tiles are gorgeous, I'm so glad I went with the Solistone...and saved a ton of money!

Solistone Mardi Gras glass tile in Carrollton, with Snow White non-sanded grout.


Here's a close up of one of the tile remnants. The lines are on a grayish-green piece of paper attached to the back of the glass.

Moving on to another favorite selection: my pendant lights! We bought these ET2 Fizz pendants from Whitmer's Lighting. ET2 has really cool modern lights. Our vanity lights are from ET2, as well. So fun!

The lights were installed last week, but tonight they were finally turned on!

In addition to being mesmerizing to look at, they put out a good amount of light. Niels and I were saying that between the pendants, dining room light, command center lights and under cabinet lights, we probably didn't even need the cans above. But, I'm sure we'll be happy to have them as we age.

The pantry light is working now, too. There's a sensor on the door, so the light comes on when the door is opened. A nice energy saving feature. And convenient, too!

We also got to see the light in D's room for the first time.

And Jim Duffie, our electrician has been busy in the basement, too. Although we aren't finishing the basement yet, we are doing a few things to make it functional until we do.

Yesterday, we saw the water line in the house. And here's the front yard evidence:

But I like this evidence even better!

Along those lines, John, our plumber, was busy with fixtures. Here's the Moen Eva faucet installed in D's bathroom, without the base, which we think is a more modern look.

The Moen Eva shower fixtures were installed, too.

And our port-a-potty days are over! Here's one of our Toto Aquia II dual flush toilets. Toilet seats will be installed shortly.

The painters were back, too. They had a little tiny drywall patch to do in the in-law closet:
 

 The first floor laundry platform was painted white:

And the mantle was painted espresso. I think that was a really good choice. 

We weren't at the house very long last night because Tim, the tile installer, was there quite late sweeping up and getting the floor ready for the carpet crew to get started today! We're really grateful for his hard work. 
Related Posts Plugin for WordPress, Blogger...