Monday, August 12, 2013

Guest Post at Just Us Four

Do you know what this is?

Head over to Just Us Four today and find out! I'm happy to be guest posting over on Shannah's blog today and if you go visit here today, you'll find a little goody there for you--a free download to make your own Dutch birthday and anniversary calendar. 

Saturday, August 10, 2013

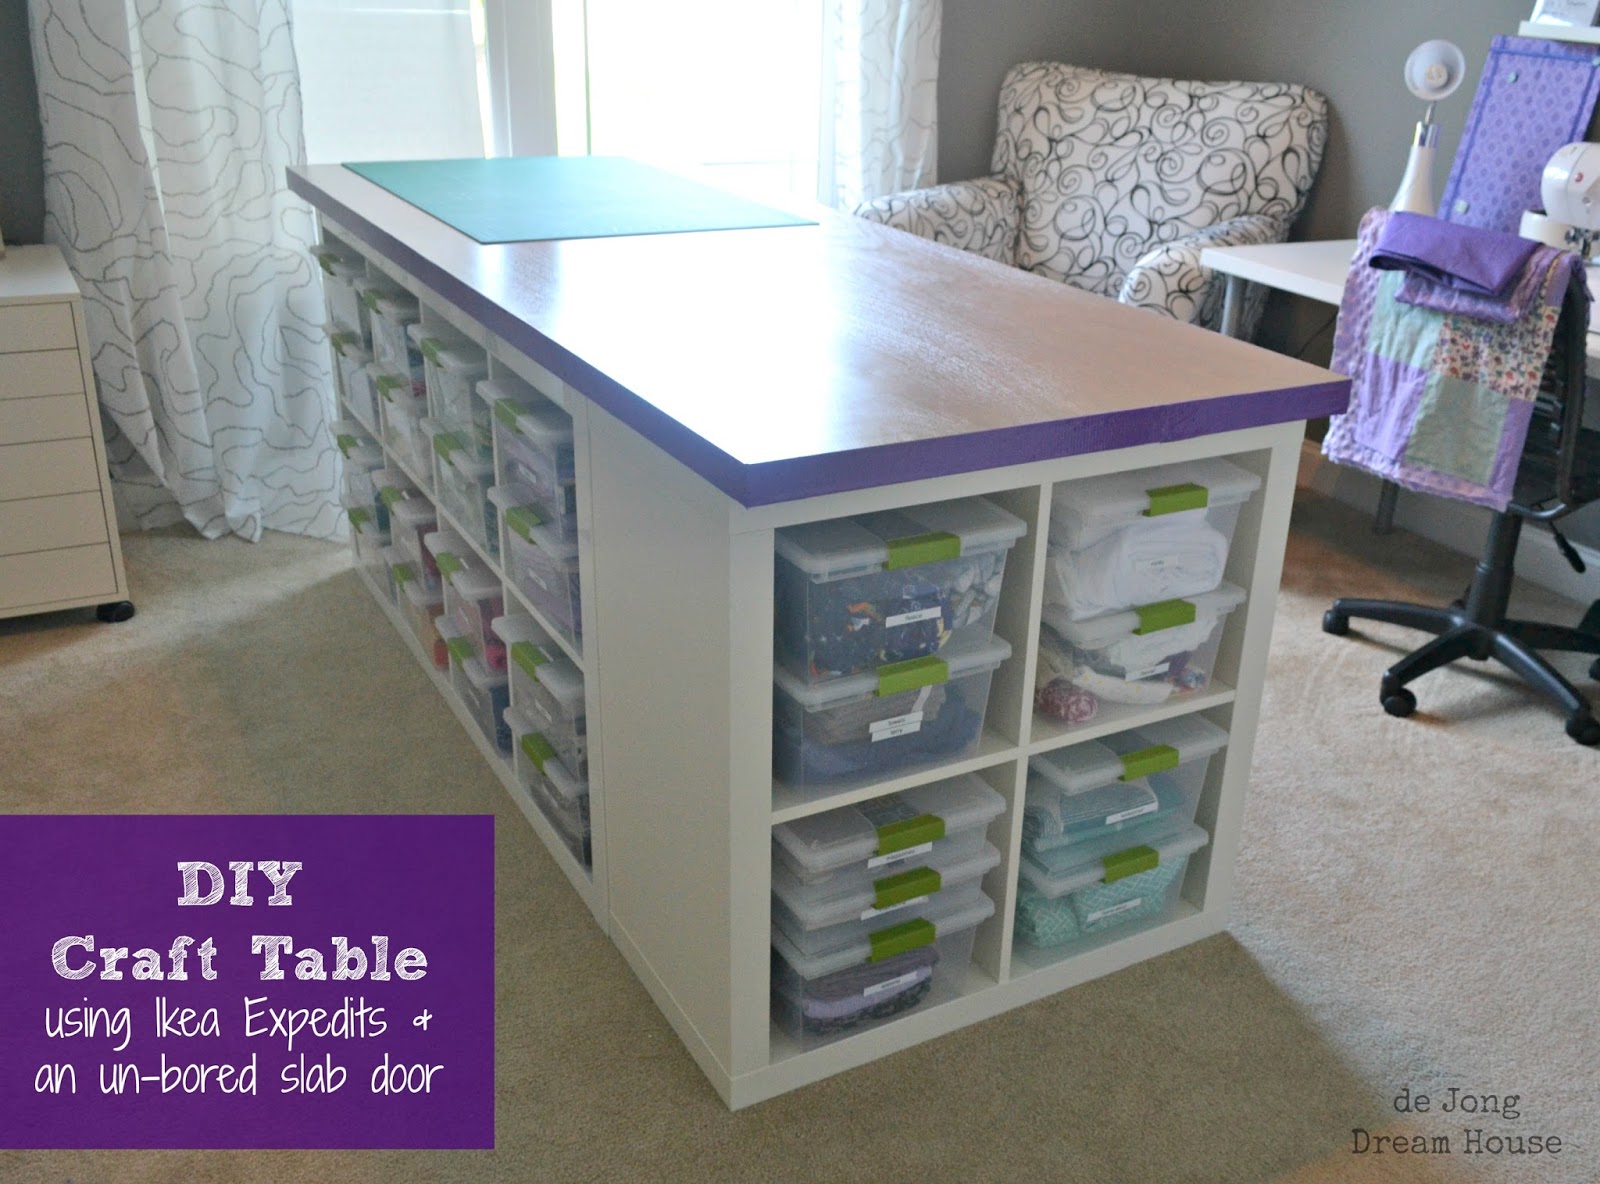
DIY Craft Table

***Updated June 29, 2016***
Since first sharing this post 3 years ago, I have made several changes to my craft room, but my table has stayed the same. Since there has been renewed interest in my table, I thought it would be a good time to share a full craft room tour. 


In the weeks before our exchange student, Marissa, headed back to her Dutch parents, I found myself thinking about how sad it would be to walk by her empty room every time I went up and down the hallway. In situations when I'm dealing with grief of some sort, I find it helpful to give myself something to look forward to doing. (After our second miscarriage, we planned an Alaskan cruise for our due date). 

My sewing experiment has quickly become a sewing passion so I decided that her room would make a great craft room. At the time, I had bins of fabric stacked up in the dining room, and part of prepping for dinner was clearing off whatever project I was immersed in that day. And if company came over, it had to be moved upstairs to our room, like this.


Not quite ready for quilting! Marissa left on a Thursday, and housekeeper (who comes every other week) was coming the next morning. I really wanted her to be able to deep clean in there. After all, a teenager was living there for a year! (Marissa was actually pretty neat and very respectful of her room). 

I did a little bit of brain storming before Marissa left. My original idea was to use Ikea Lack tables, like Brooke from Custom Style. I also saw lots of ideas like what Stef from The Girl Inspired did with a table top over to cubby shelves. I knew I would be standing at the table, so I didn't want to lose the storage space. Finally, I saw an Ikea Hack table using Expedits. It still had space underneath it, but it got me excited. Then I found this Hack using two 4x2 Expedits and I was inspired. (By the way, how cool is using a Ribba shelf for a pencil holder?

After we dropped Marissa off at the airport, we consoled ourselves with our Ikea trip. And when we got home late that night, we took nearly every last thing out of her room. This would have been a great time to replace the carpet with cork, but that we will save that for another day.


The next day, Niels set to work on putting together the Expedits. We bought two 4x2s (currently $69/each) and two 2x2s (currently $39 each) because I wanted the storage on each end. We realized when we started putting it together that we bought glossy white 4x2 and regular 2x2s. Bummer, not only because the glossy is more expensive, but it also shows chips and scratches easier--things that are prone to happen when you are working with scissors, rotary cutters, and seam rippers! However, Ikea is more than hours to our nearest Ikea, we decided to keep it.


Since we'd be making a racket across the hall, D got to stay up late and watch the progress. He thought the Expedit made an excellent mini book nook. 


If you're going to travel more than two hours and have to rent a bigger vehicle to buy furniture, it's generally recommended that you know the dimensions of the room. We didn't. We love Expedits and will probably continue to add to our collection as we finish our basement, so I knew I could put them to good use somewhere else if they didn't work in the craft room. 

First two Expedits done.


So we put the first 2x2 on the end and realized we wouldn't have room for the other one. 


I knew I was going to use some of the Sterilite clip boxes  (<---Amazon affiliate ad) I used in my pantry. I can stack two perfectly in one of the Expedit cubbies, which means there is lots of room to built my fabric stash!


Originally, we bought casters at Ikea to make the table a tad higher, but I realized I wanted a table top for a uniform flat surface instead. (I'm short, so I couldn't have both). I really had my heart set on butcher block, but I vastly underestimated the cost. I did find two reasonable options at Ikea and Menards, but they didn't come in a size large enough to cover the table. 

It took me a few weeks to figure out a solution. I was walking up and down the aisles at Home Depot looking for inspiration when I saw an unfinished, un-bored door (just the slab, no frame, no hole). We opted for the solid core door so that it would stay on the Expedits better. Only $59 

As we wheeled the door to the register, we say this teeny tiny little chip on the edge. I asked if we could get a discount, and we were able to get the door for $45. Score!


Niels helped me pick out the gray stain, and it's perfect: Varathane Sun Bleached Stain + Poly

It was my first time staining wood, so I was a little nervous. But five coats later, I had a pretty gray door table top. 


I love how it turned out!


And I have a craft table!

I probably did something wrong, but I couldn't figure out how to get the edge to take to the stain. I had the idea of trimming it with this super cool purply-gray metallic ribbon, but it was catching on fabric so it had to go. (Don't mind the purple masking tape on the walls marking where I want to put things!)


Plan B was good ol' fashioned duct tape. In my favorite color, purple. 


Tour of the final craft table. This side is where I store my fabric stash. Soon I'll show you how I organize my scraps on the wall side. 

It's a little scary how addicting it is to build your fabric stash!


The end unit holds my non-cotton fabric, like minky, fleece, flannel, terry, etc.


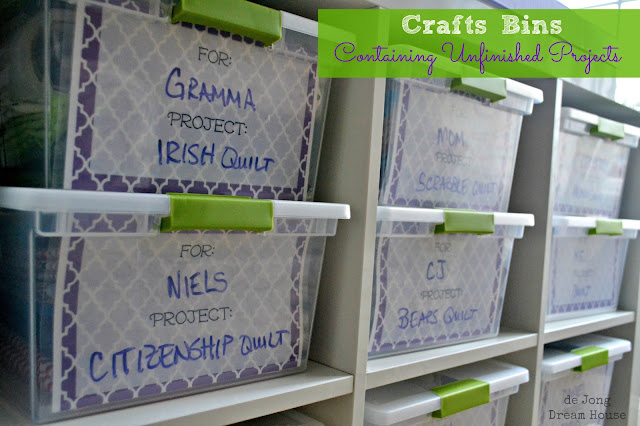
The other side has my project bins. You can see how I use index cards to note the recipient and type of project. You can also see that I have room for one more bin! 


At the far cubby, I have my rulers and smaller bins with scissors, tape, pins, etc.


Finally, on the flat short side, I used Command Hooks to hang my rotary cutter, scissor, and rag quilt snipper. (<-- Amazon affiliate link) 


Now I get back to quilting!

Updated: I'm made some pretty re-usable project labels!


Linked to:
http://www.dejongdreamhouse.com/2016/06/my-new-improved-craft-room.html

It's Overflowing  Will Cook For Smiles
  The DIY Dreamer  
Kitchen Table Art Glitter, Glue & Paint

Wednesday, August 7, 2013

Speculaas Spice Mix

We spent a little more than three weeks in the Netherlands visiting Niels' family this summer. We've only been back a few weeks so I still have Dutch on the brain. (Look for posts on my Dutchified granola and one of my husband's favorite comfort foods soon!) Since we only get back to the Netherlands every other year, we do our best to stock up on our favorite food items while we are there.

This past year, we hosted an exchange student from the Netherlands. Marissa introduced us to all the Dutch goodies that have come out in the ten years since Niels lived there. Our son is especially fond of schudde buikjes, which are little speculaas cookies. Think Cookie Crisp cereal in gingerbread flavor.

Speculaas is a very popular spice in the Netherlands and used in a lot of sweets and treats, especially around the holidays. My favorite is gevulde speculaas (gingerbread bars stuffed with a layer of almond paste). You may have heard of speculoos, which is the Belgian word for speculaas. Belgians love their gingerbread, too!

Before our trip, I used up the last of my speculaas spice so I did some experimenting and made up my own spice mix, which I'm going to share with you today.  

Ingredients:

  • 8 teaspoons cinnamon
  • 2 teaspoons nutmeg
  • 2 teaspoons cloves, ground
  • 1 teaspoon white pepper
  • 1 teaspoon ginger, ground
  • 1 teaspoon cardamom, ground
  • 1/2 teaspoon allspice, ground
  • 1/4 teaspoon coriander, ground
  • 1/4 anise seed, ground

Instructions:

1. Gather your spices. All the spices above are staples in my spice drawer, but may not be in yours.

2. If you have whole spices of any of the above, you can grind them in a coffee grinder or mortar and pestle. You don't need to buy a separate jar of ground spice.

3. Add the ground spices in a bowl.

4. Mix until well blended.

5. Store in an airtight glass jar. The amount I make lasts about 3 months. You may want to half it if you aren't sure you'll use it as often. Or you can keep it in the freezer to make it last longer.

I've made a printable version of this recipe for you to download, if you'd like:


 Now that you have this wonderful spice, what shall you make? Here are a few recipes to get started.

Linked to:


Monday, August 5, 2013

The December List: free Christmas wishlist printable


I know it's barely August, and my four-year-old doesn't even start pre-K for another month, but today we were shopping and I got a lot of this:
I will say, that since we started using his spend/save/share jars, D has been a lot better about asking for things, but will instead ask how much something costs, and if he has enough to buy it. 

But today's shopping excursion reminded me that it's about time to bring out the December List. December is an insanely busy time for us, not only because of Christmas, but also because it's D's birthday Sinterklaas, which is Dutch Christmas on December 5, and a pretty big deal, too because Sinterklaas has lots of traditional foods and activities, and treats he likes to give good little boys. 

As you can imagine, December has the potential to be a little crazy with gifts for our little boy. (Kind of a bummer for him the rest of the year, but we tend to buy what he needs when he needs it, and give him opportunities to earn money for the times when he finds something he wants but we don't think he needs). Even before D was born, we decided that we would limit his gifts. 

For each of the big three December holiday, he gets:
  • Something he wants: a toy usually
  • Something he needs: a new item of clothing
  • Something to read
  • Something to experience: a special movie, a trip to a museum, etc....generally something to do with his current interests. For the last two years, it's been a train ride. 
In addition, he chooses something to give. We semi-regularly go through his clothes, toys, and books. This is something that he chooses for another boy his age, and pays for part of it with his own money. In the past, it's been a train set.
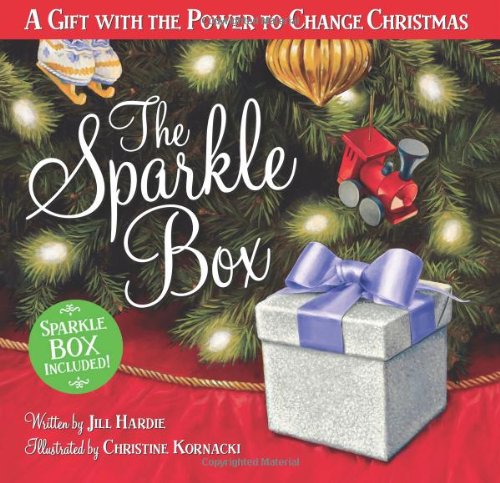
The Sparkle Box (<--affiliate link)
We do other giving at Christmas, using The Sparkle Box as our inspiration, like filling out boxes for Operation Christmas Child, but the "Something to give" gift is selected by D and then we drop it off at Toys for Tots, which is really cool around here because we get to drive through a blimp hangar to do it.

All that to say, we came up with "The December List" as a way for our son to write down all the fun things he sees and wants starting around this time of year. He has seen me take photos of things I like in stores because I have no memory, so now he asks me to take photos of the things he likes, like in the photos
above.

With the December List, he has a place to write down his suggestions. Closer to Thanksgiving, he'll prioritize the list because he knows his gifts are limited. It's also nice for grandparents looking for ideas!

I realize that not everyone has three major events to celebrate in December, so I made a free printable wish list for those of you who celebrate only Christmas at the end of the year.


You can thank my friend Lauren from The Thinking Closet for introducing me to Box as a way to share printables. In fact, I have gone back and made all my printable available on Box.

Original post | Download
 I hope you enjoy these! Feel free to pin away! Or better yet, follow me on Pinterest. Or whatever your favorite means of social media. You can find me on Facebook, Twitter, Hometalk, Bloglovin', and Google+.

Linked to: 36th Avenue *   Balancing HomeThe Chicken Chick * DIY Dreamer * Feeding BigFluster Buster  * Crystal and Co.  * Fearlessly Creative Mammas  * Frugality Gal  *  House of Hepworths * I Put a Bird on It *  It's Overflowing *  Just Us Four * Kiddie Foodies * Life After LaundryA Little Clarification *  Memories By the  Mile  * Mums Make ListsMy Uncommon Slice of SuburbiaNew NostalgiaNY Melrose Family  * Nifty Thrifty Things Practically Functional *  Pursuit of a Functional HomeSew Much CraftingSowdering about in Seattle * Sparkles & a Stove That's What Che Said  * This Silly Girl's LifeThrifty Decor Chick *  Tumbleweek Contessa  * VMG206Will Cook for SmilesYellow Bliss Road 

Related Posts Plugin for WordPress, Blogger...