Showing posts with label family traditions. Show all posts

Wednesday, November 6, 2013

Teaching Our Child to Give Thanks

Thankful Tree: teaching kids about gratitude

A decade ago, I was single and living in Michigan. I was "adopted" by some friends of mine who had a beautiful family with four young kids. In addition to being a wonderful model of marriage to me, Dan and Sara taught me a lot about parenting, as well. 

I spent countless hours with the Kennedys, celebrating holidays and birthdays, playing Catan, discussing my woeful love life, and in general, just sharing our lives together. After I sustained my brain injury, the Kennedy family helped me with my therapies, made sure I had food to eat and that I actually ate it, and in general, generously loved on me. 

I was writing my book, Generation Ex (<--Amazon affiliate link) during this season, and I often tucked little marriage and parenting ideas away. Some I mention in my book. Others I noted internally, for someday, if God would bring me a spouse and children.

One tradition I just loved was their Thankful Tree. I will never forget how loved I felt when I came over one day and saw a leaf with "Auntie Jen." on it. I knew that I would have a Thankful Tree in my house.

We started our Thankful Tree last year when our son was three and able to articulate the things for which he was thankful.

I bought the foam tree on clearance at a craft store on clearance. I think the reason it was so cheap is that one section is slightly discolored. But we don't mind. We like to save money!

It took a bit of searching, but I did find a site that still sells this. 
We put up our Thankful tree on November 1. Our particular tree is basically a foam puzzle. 


We match the numbers on the back, and then tape the seams. This is a lesson learned from last year, when tree limbs fell down toward the end of the month!


Ready to start adding our leaves of gratitude! We put the tree in our dining room so we can talk about gratitude at dinner.


For leaves, I picked out some pre-cuts at a local curriculum store. You can also cut out your own, or--if you have one and know how to use it (ahem, I'm still working on that), you can use a Silhouette cutting machine, if you have one. (<--Amazon affiliate link). Next year, I'm going to use the file One Creative Mommy shared.

Each day, we add a new thing for which our son is thankful. Last year, we had a definite train theme to our thankful tree. 


This year, we've made to tweaks to our tradition. The first is that our 4-year-old now writes on the leaves himself. (Sneaky handwriting practice!). 


The second change is that I've added a frame with thoughts about gratitude. 


I love this one from Ink Happi. 


There are several great printables on Pinterest, so I think I will be swapping out quotes each week. Next week I'll put up this one from Balancing Home.

LOVE this free printable :)
Please do NOT pin this image from our site. Instead, pin from the source, Balancing Home. 
You can find more gratitude printables on my November board. 


At the end of the month, keep your leaves because it will be fun to see how your child's interests change over the years.


Friday, September 13, 2013

Back to School Traditions

1. Celebrate Plate. 2. Annual "Class of" Shirt. 3. Lunch Box Note. 4. First Day Photo. 5. Growing Up Gallery. 6. Lunch List. 7. Driveway Message. 8. First Day Interview
Our son just finished his second week back at school. We're still getting into the swing of things. All day school is pretty rough on a four-year-old who still needs a nap, but we'll get there. 

Since he is currently taking his much-needed post-school nap right now, I thought I better round up the school traditions we started this year, so I can remember to keep up with them next year!

1. Celebrate Plate. We kicked off a new family tradition last week with our "Celebrate Plate." It's a way of marking special days and milestones.

2. Annual "Class of" Shirt. Take a picture of your child at the beginning of each school year to see how he (or she) grows into the shirt.

3. Lunch Box Note. I wrote a pretty basic note, but these free printables from A Little Clairification are adorable.

4. First Day Photo. I took the obligatory first day of school photo in front of our new purple door with D holding a free printable from Yellow Bliss Road.

5. Growing Up Gallery. I made a special photo gallery to showcase D's school photos. I actually started with a photo of myself a few weeks before D was born. I put up all the frames when I designed the layout so that it is a piece of art in progress.

6. Lunch List. One of our son's responsibilities is to pack his own school lunch. I made this free printable as a guide for him to make sure he packs everything he needs.

7. Driveway Message. Art is not my strong suit, but it was fun to write a welcome home message for D to see when he arrived home that first day.

8. New Year Interview. Each year we do a written and video interview on D's birthday. This year we started using these slightly different questions from Precious Designs for the new school year. The written version of D's back to school interview goes in the frame behind his school picture in his growing up gallery.

Thanks to Pinterest, there are a ton of great back to school ideas out there. How to you celebrate back to school with your family?

Linked to:
Craft-o-Matic * Creative Muster * DIY Showoff  * Girl Creative * Hope Studios *  Mums Make Lists * Nifty Thrifty Things * Sew Can Do * Sugar Bee Crafts * Tatertots & Jello


Wednesday, September 11, 2013

Celebrate Plate


One last back to school tradition to share as we kick off the new year. Actually, this isn't just a back to school tradition, although we will certainly be using it. I'm talking about the Celebrate Plate. 

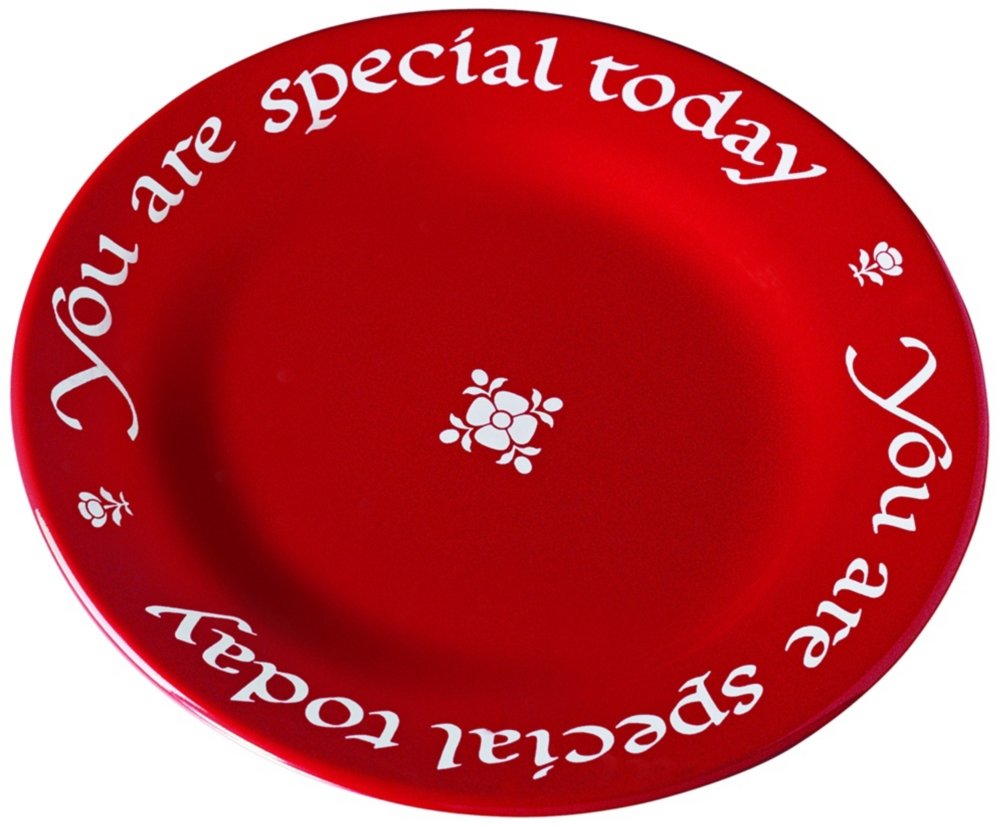
Many moons ago...pre-kiddo, pre-hubby, pre-Ohio, pre-brain injury, I worked for a Christian bookstore. One of my friends was a buyer and came up with a custom "You are Special" plate based on the German original. 
Waechtersbach Plate (<--Affiliate link)

It stuck with me because I was writing my first book (<--Affiliate link) at the time, and was researching family traditions. While I loved the idea of having a special plate to celebrate birthdays and other milestones, I wasn't crazy about the verbage, "You are special today." I like to think my family is special every day. I looked on Pinterest for ideas and found both "the Happy Place" and "Celebration Plate." I liked the way "Celebrate Plate" sounded so I had my phrase.

I used the tutorial from Darling Doodles Design, who made a super fun set of dinnerware using a Sharpie instead of a special pen. (Seriously, I'm not posting a photo here so you'll go check it out on her page).

I bought a square white ceramic plate from Target (from the Threshold collection). Then used Sharpies to freehand the design.

I had fun with the word "celebrate."


To "seal" the ink, I turned the oven to 425 degrees and put in the plate while it was still cold, set the timer for 30 minutes after the oven was preheated, and kept the plate in until the oven was completely cool


Here's the plate after cooling in the oven.


Our son was very excited to be the first recipient of our celebrate plate, as we commemorated the completion of his first week of school. (Because a certain mama didn't have the plate done by the first day of school!)

We had our own version of bubble & squeak for dinner, which was just begging to be shaped into a heart.


I've always loved to watch D eat. He makes the best facial expressions. Look at those eyebrows!


On ordinary days, we keep the plate in the window sill above our hutch.


Linked to:
The  36th Avenue * Cherished Bliss  * The Dedicated House * DIY Showoff *  Life After Laundry * Serenity Now * Tatertots & Jello 

Friday, September 6, 2013

Annual "Class of" Shirt


One of the reasons we chose to build on our particular street is that it is positively teeming with kids our son's age. We aren't able to give him a sibling, or even a dog due to his allergies, so we gave him the next best thing, a street full of adopted brothers and sisters. Our street is pretty amazing, actually, with parents and kids out nearly every night playing together and socializing. Two of the kids on the street started kindergarten this year and D and I had a lot of fun watching A and O board the bus on that first exciting morning. 

All our summer talk of our kids starting their school careers got me thinking about school traditions. When I first bought my Silhouette Cameo (<--Amazon affiliate link), I searched Pinterest for ideas. I feel in love with this "class of" annual shirt tradition. 
Put the child's graduation year on a large t-shirt. Take a picture each year with same shirt to watch the kid grow into the shirt.
The original source of this pin is an online message board that I can't view. 
Alas, I'm still having trouble getting the hang of my Silhouette, and since the school year was starting, I took an iron-on short cut.

Supplies needed:
  • a t-shirt in a size that your child may wear when he or she is a high school senior. Our son is very tall, so I bought an XL.
  • iron-on letters
  • iron and ironing board
  • cotton cloth. I used a fabric remnant, but a pillowcase would work as well.
I bought the shirt for $3.99 (before a coupon!) at Hobby Lobby. To give you an idea of how long I've been thinking of doing this, I bought this shirt in Florida when I first met Lauren from The Thinking Closet. 


Clearly, it needed a little ironing after all this time. I was excited to try out my new magnetic ironing mat (<--Amazon affiliate link). We have a cool ironing board drawer in our laundry room, but I wanted a large flat surface for ironing fabric for my quilts.


I bought my iron-ons from Walmart. I chose two styles from Next Style for the letters and numbers. 


First I cut out the letters I needed. I trimmed them pretty close to the edge and took care for the bottom to be straight so I could line them up well. 


I used my ruler to line up the letters and numbers.


I used a fabric scrap to protect the iron-ons. 


I ironed for about a minute before turning the shirt inside out and ironing again for another minute. 


After ironing the top side again, I slowly peeled the plastic away. 

I found that the flocked letters secured more easily than the vinyl numbers. I had to iron the latter for an extra minute or so. 


All ready for the first photo shoot!


So, I'm really happy with how it it turned out. With one exception. Here's a hint: When I was cutting out the numbers, I looked at the growing up gallery. 


Can you figure out my mistake?

The growing up gallery has fall photos in it. D will graduate in the spring. So, instead of 2026, I just have put 2027. So, it's a good thing I made this tutorial because it looks like I will be making another shirt!


Updated:
I made a second shirt with the correct year. I bought another shirt at Hobby Lobby, this time I went with a size large. I also bought individual iron on letters and numbers for $.69 (small) and $.99 (large) each.

I'm thinking that on the back, I'll print his class picture onto fabric and iron it on. He'll end up of with his own mini-growing up gallery.

Linked to:
30 Handmade Days * The 36th Avenue * Cherished Bliss *  Craft-o-Matic * DIY Showoff * Girl Creative * Keep It Simple Crafts * House of Hepworths * Liz Marie Blog * Memories By the Mile * Naptime Creations * Serenity Now * Tatertots & Jello * Uncommon Designs

Wednesday, December 12, 2012

Busy Birthday Week

It's been a busy week here at the de Jong dream house. On December 5, we celebrated Sinterklaas day. (As a Dutch family, Sinterklaas is a big deal!). On December 9, our son turned four. Jen has been nursing a pretty decent headache for nearly a week, so posts are slow for the time being. She did make a few fun graphics using picmonkey. Enjoy!


And, as requested, we made a train cake for D...again. We're getting good money out of this Wilton Puzzle Cake mold.


I think we did pretty well for using dairy-free ingredients, even it wasn't quite a impressive as last year's:


Tuesday, August 14, 2012

Visual Guest Book Shelf


When we designed our home, we planned for a spacious guest suite on the first floor for our friends and family all around the world.  Some loved ones may simply stay overnight as they are passing through town, but for those who consider the new and improved de Jong Resort and Spa as their final travel destination, we wanted to offer a comfy home away from home.

The room is actually a hair larger than our master bedroom, has a walk-in closet, fully accessible attached bathroom, a laundry room just outside the door, and has a slider out to the back porch. Because it's on the first floor, it's ideal for our parents, who will stay for longer periods of time, and in many, many years, will become our bedroom as our own mobility declines. (I'll post a tour of the entire space once it's finished).


We joke about our house being the de Jong Resort and Spa, but it is fun to add as many resort features as we can. We have a fully stocked bathroom with everything a forgetful traveler might need, a TV and DVR, we just added a luggage rack to the closet, and a basket full of tourist info. 

There's also a big blank wall. Inspiration hit when I found this vinyl art on a clearance rack.

I've toyed around with the idea of a guest book, and while I still like that idea, I also know that I'm visual (thank you, Facebook albums and Pinterest!) so I had the idea of a visual guestbook. The idea is to take (at least) one photo that helps me remember the gist of each visitor's stay. Hopefully, it will also remind me to take photos!

At our last trip to Ikea, we picked up a few Ribba Photo Shelves.

I found some cheap-but-cool copper frames at Ollies. They do a nice job blending the espresso finishes in the room with the black Ribba frame.

Then rounded up some frames and printed out photos from our first four overnight guests, with "reservation" frames for our next two sets of guests.

Our first visitor was Erin, so I put her photo in an 8x10. I added a sticker "1" to remember that she was the first to stay at the new and improved de Jong Resort & Spa.

Then I did the same thing with visitors #2, #3 and #4.


I've already reserved frames for our next visitors.

As one shelf fills up, we'll simply add another. We have plenty of space to expand!

I love this idea because it's such a visual reminder of the important relationships in our life. And because hospitality is a virtue we want to teach our son, it's another way to incorporate our values into our decor. I look forward to seeing this wall fill up with happy memories as the years go by.


Linked to:
Capturing Joy
DebbieDoo
Fox Hollow Cottage
House of Hepworths
I Heart Naptime
My Uncommon Slice of Suburbia
Related Posts Plugin for WordPress, Blogger...