Showing posts with label decor. Show all posts

Wednesday, June 5, 2013

Goin' Places Ticket Stub Memory Box


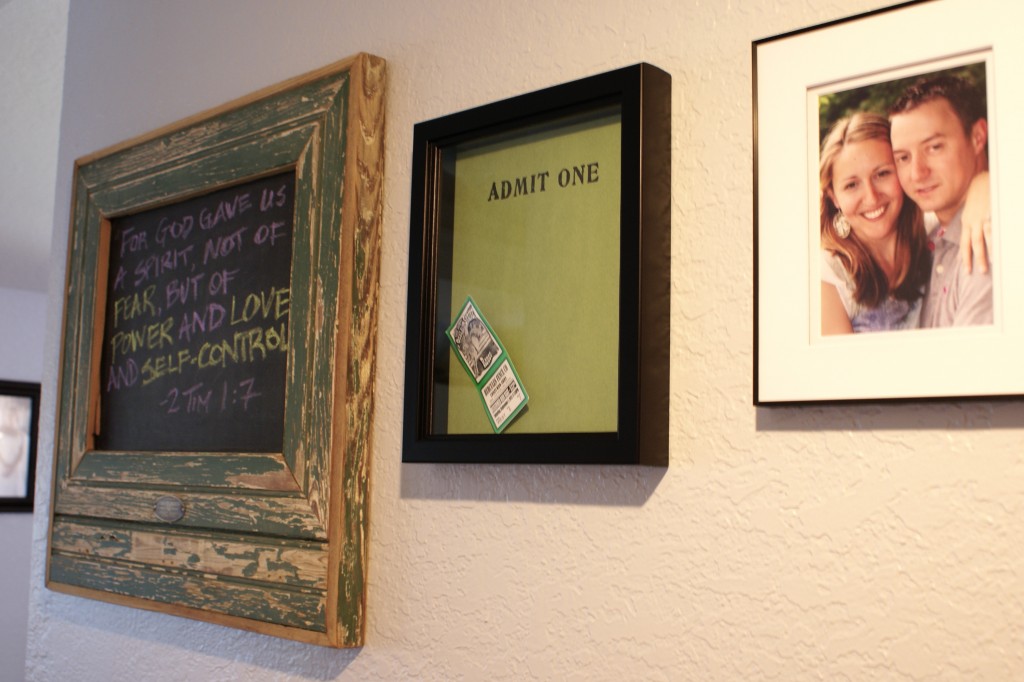
Last month, we spent two weeks in Florida. Niels had back to back conferences, and I found (mostly) cheap entertainment for the kiddos. (No Mouse for us. Disney is not a brain-injured mama's best friend)! While our space-obsessed four-year-old's favorite day was at the Kennedy Space Center, my favorite day was my craft fest with Lauren from The Thinking Closet. I'll be posting more about our day together in upcoming posts, but today I want to show you my new ticket stub memory box inspired by the one Lauren has on her wall. 
Ticket Stub Memory Box Tutorial by The Thinking Closet
PLEASE do not pin this image from our site. Please pin from the source: The Thinking Closet.

Lauren cut a slit on the top of her shadow box. We don't have those kind of power tools (yet?), so we had to improvise. I bought a fabric shadow box from Target that opens up. 

It's an 8x10 box, but the interior was not quite 8x10. Usually, I like to use the glass as a template to cut photos or scrapbook paper, but in this case, made a template by folding over a sheet of paper until it fit nicely in the box. 

I used my straight edge and exacto knife to cut my scrapbook paper to the size of my template. 

I used paper I had on hand. It's a very subtle pattern of gray and green. 

It also has a pattern on the flip side. 

Once I was sure that it fit well, I doubled some tape to attach it. (Double-sided tape would work, too).

I was going to use my Silhouette to make my letters, but I feel in love with these Thickers stickers.
 

How cool are these map-themed chipboard letters?

Marissa, our exchange daughter, came up with the idea of using "Goin' Places" for the title. We like that it covers most any ticket opportunity. It also fits our travel-loving family.

I like to use the plastic the letters come in to line up and space my letters.  

Then I can place the letters in one fell swoop. Of course, this is much easier with stickers than chip board.

So, I used the fake family photo as a ruler instead.

Add the apostrophe and we're done...with that part.

I could have used the hooks to hang it up, but we love our command hooks. (Seriously, if the fine folks at 3M would want to hook me up with a bunch of these, I would have no objections!) Because we tend not to move things around, I removed the stand from the back.

I wasn't very careful this time, so it left a mark. Nothing a Sharpie can't fix. 

To create the slot for tickets to fall through, I put Command Hooks at the top and bottom of the open frame.  (I ran out of black strips, so I had to use the white ones I had laying around).

And voila! We have a slot. 

Level and press.  

I placed it above our son's artwork display frame in our mudroom.

 I like the idea of being able to put our ticket stubs in the memory box as soon as we walk through the door.

The best part of this project is that Marissa made one, too! It was our last big project together before she heads back to her family in the Netherlands tomorrow. (Yes, there will be many tears tomorrow. We have LOVED having her here with us this year). 

I love the idea that we will each be filling up our memory boxes in the years ahead with the memory of making these boxes together. 

Linked to:

Reader Showcase: Spring 2013 | The Thinking Closet

Friday, March 22, 2013

Stacked Letters


At the beginning of the year, I picked 13 Pinterest Projects that have been pinned in my Project board for awhile and gave myself a goal of completing all 13 by the end of the year. 

I've already posted about my first completed project, the unpaper towels, which also introduced me to my sewing machine. 

This second project has taken nearly as long to complete, mostly because we've had an unseasonably cold winter which has keep me from spray painting. In fact, here we are, first week of spring, and it's snowing! Fortunately, I took advantage of a nice day a few weeks back and sprayed. It only took a few more weeks of procrastination to hang it up, and voila! I'm back on schedule!

The inspiration for my stacked letter art was this photo:
Oliver1_rect540
Please do NOT pin this photo from our site. Pin from the original source: Apartment Therapy
When I first wrote about this project, I said:

Stacked Letters. I will be adding a glue gun to my craft collection this year. My first project will be do make a "de Jong" stack for the corner of our great room. I think I may paint the letters silver or purple.

The photo above links to some cute photos of Oliver's nursery. It does not, however, include a tutorial. It was easy enough to buy the cardboard letters. We bought ours at Hobby Lobby, but most craft stores have them.

The first thing we needed to decide is where we were going to put them. My first thought was the great room, but we really didn't have a spare corner, so I considered the fireplace mantle:

Niels vetoed this idea, and I agreed because it wouldn't really be the stacked letter idea, even if I glued the letters sideways. We definitely like this look better. Note: the letters aren't glued yet. You can tell they are a little off kilter as we considered putting it in the window sill. 
This would be a great tutorial if I showed you all the types of glues and adhesives I tried that didn't work. But it's been too long for me to remember which did what! (This photos were taken exactly two months ago!). 

I know that my new glue gun didn't work. Neither did magnets or velcro. Tacky glue didn't hold. Neither did wood glue. The general problem is that most adhesives would work for one letter, but when I tried the third letter, the weight of the cardboard work against it. Over the course of about two weeks, I'd buy a new glue, try it, watch it fail miserably, grumble about it, be mad at the letters for a day or so, find a new glue...rinse, lather, repeat.

Finally, I had the brilliant idea to ask for help. I asked an employee at Pat Catan, a local craft store, and she recommended both Gorilla Glue and Weld Bond. I was skeptical at this point, but tested both.

Wouldn't you know, both worked! (In the photo above, Gorilla Glue is on the left and Weld Bond is on the right). 

As recommended, I let the glue dry for 24 hours before moving it.  

The next day (or so) we moved up to our bedroom, where we thought we would put it in the corner between our We Do gallery and our album shelves (which we still need to post about).

But as we were coming up the stairs, we had the idea of putting it on this corner, across from our heritage gallery.

As it turned out, it did end up in the corner of our master bedroom for a couple months while we worked on other things, like D's printable gallery. See how sad and neglected it looks in the corner?

Finally we had a nice tease of spring. I took full advantage to spray paint a few things. (Good thing I did since it's been cold ever since!) I used Krylon Dual Paint + Primer.


Once the painted dried, we brought the letters upstairs to sit in the corner for a few weeks until I remembered to buy command strips. I really should buy them in bulk.

The letters are actually pretty light compared to a frame so I only used four for the whole name.

And done!

Thursday, February 21, 2013

Printable Gallery Wall


A couple weeks ago I wrote about the newest gallery in progress. Today is the big reveal! 

We had a big wall in our son's bedroom that looked a little sad and disjointed. When we first moved in, we put the mirror above his dresser. A few months later I made the good night art and we quickly hung them up so they would be easy for him to see from his bed. 

I've been waiting for inspiration to strike. It came one day when I noticed how our little word-obsessed guy was reading every sign and note around us. I thought I could take advantage of his eagerness to read by making a gallery wall with some of the great printables with scriptures and words of wisdom I've pinned on Pinterest. I love the idea of him pondering these thoughts as he dozes off.

When I last left off--why is it that gallery walls always turn into long, drawn-out projects?!--I had printed off the printables I wanted. (Click here for my printable pinterest board). 

I knew I wanted to use the bright Nyttja frames. Since our nearest Ikea is two hours away, I had to wait a bit until we could take a road trip. I really like these frames in kids areas because they have plastic instead of glass.


Once everything was framed , we took the printables, the mirror, and the good night art to our room where we had space to determine our layout. (To the right you can see another project in process, the cardboard stacked letters.)

Once we thought we had a final layout (we ended up flipping the top and bottom rows), Niels drew out the measurements. 

First we centered the dresser and mirror.  

Next, we added the good night art. And wondered why we didn't do this in the first place.  

Once again, we used command strips. We used large strips, but medium would have been better. 


I think to command strips hold the frames more securely than hooks. Important for a boy's room, where said boy has learned to climb on his dresser. 

I kind of eyeballed the placement so it's not perfect. Niels was manning the camera and the only photo he took of this part of the process was a nice close up of my backside. We'll just keep that to ourselves.

Side view. I think I did pretty well with lining up the frames.  


The gallery matches the frames we already put up on D's armoire.


The six frames on top were all found online. You can find the corresponding links below the photo.


The bottom five prints were created by me. I wrote about them in my previous post, but I've included the non-photo ones here for your convenience. You can right click to save these for personal use. 


Here are a few other printables I considered:

Now we have everything from Pink Puppy Paper Company
you-are-always-responsible-for-how-you-act
Responsible via ZeroDean
Pinned Image
I prayed for this child from Enduring Arts
Be Strong by Clingspiration
So, for those keeping track at home, this is gallery number eight. (Number nine is currently laid on our kitchen island, number ten is sketched out, and number eleven is still in the photo-gathering stage). I really do have an addiction. I blame Pinterest.

Related Posts Plugin for WordPress, Blogger...