
Last month, we spent two weeks in Florida. Niels had back to back conferences, and I found (mostly) cheap entertainment for the kiddos. (No Mouse for us. Disney is not a brain-injured mama's best friend)! While our space-obsessed four-year-old's favorite day was at the Kennedy Space Center, my favorite day was my craft fest with Lauren from The Thinking Closet. I'll be posting more about our day together in upcoming posts, but today I want to show you my new ticket stub memory box inspired by the one Lauren has on her wall.
PLEASE do not pin this image from our site. Please pin from the source: The Thinking Closet.
Lauren cut a slit on the top of her shadow box. We don't have those kind of power tools (yet?), so we had to improvise. I bought a fabric shadow box from Target that opens up.

It's an 8x10 box, but the interior was not quite 8x10. Usually, I like to use the glass as a template to cut photos or scrapbook paper, but in this case, made a template by folding over a sheet of paper until it fit nicely in the box.

I used my straight edge and exacto knife to cut my scrapbook paper to the size of my template.

I used paper I had on hand. It's a very subtle pattern of gray and green.

It also has a pattern on the flip side.

Once I was sure that it fit well, I doubled some tape to attach it. (Double-sided tape would work, too).

I was going to use my Silhouette to make my letters, but I feel in love with these Thickers stickers.

How cool are these map-themed chipboard letters?

Marissa, our exchange daughter, came up with the idea of using "Goin' Places" for the title. We like that it covers most any ticket opportunity. It also fits our travel-loving family.
I like to use the plastic the letters come in to line up and space my letters.

Then I can place the letters in one fell swoop. Of course, this is much easier with stickers than chip board.

So, I used the fake family photo as a ruler instead.

Add the apostrophe and we're done...with that part.


I wasn't very careful this time, so it left a mark. Nothing a Sharpie can't fix.

To create the slot for tickets to fall through, I put Command Hooks at the top and bottom of the open frame. (I ran out of black strips, so I had to use the white ones I had laying around).

And voila! We have a slot.

Level and press.

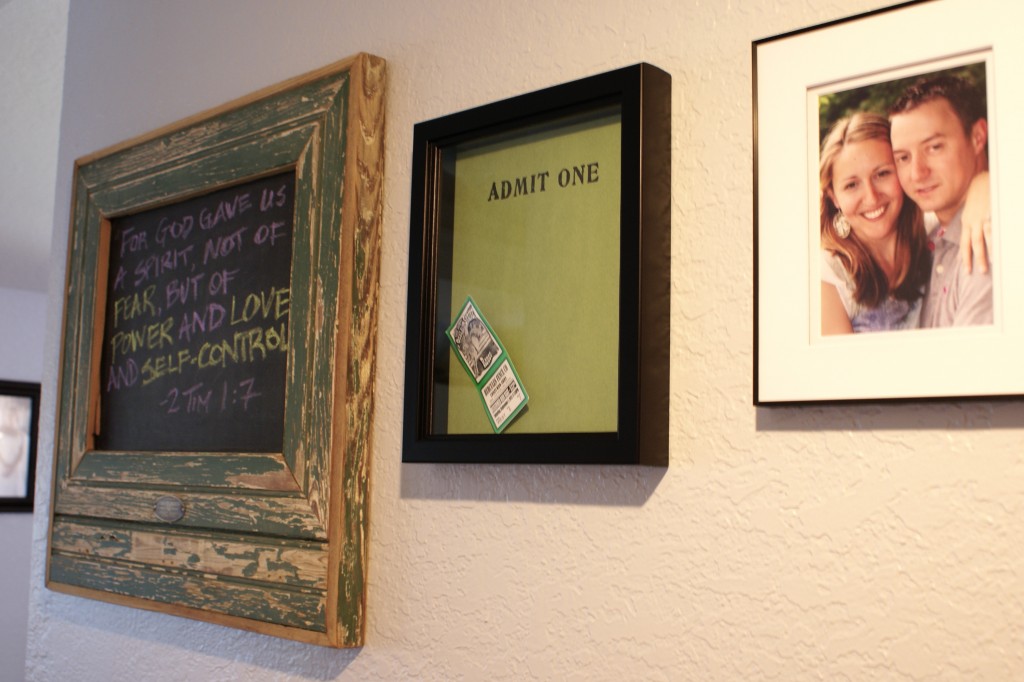
I placed it above our son's artwork display frame in our mudroom.


The best part of this project is that Marissa made one, too! It was our last big project together before she heads back to her family in the Netherlands tomorrow. (Yes, there will be many tears tomorrow. We have LOVED having her here with us this year).

I love the idea that we will each be filling up our memory boxes in the years ahead with the memory of making these boxes together.
Linked to:
I Heart Naptime * Just Us Four * Mommy on Time Out * Mums Make List * On Sutton Place * Pursuit of a Functional Home * Practically Functional * Sew Can Do * Silly Girl's Life * Snap! * Sparkles and a Stove * Tutus & Tea Parties * Will Cook For Smiles

This turned out wonderfully, Jen! I love the way yours turned out...from the map chipboard letters to your inventive way of creating a slit. Genius, I tell you! And thanks for the shout-out to my tute. That was one of the first projects ever on The Thinking Closet...so it's fun for me to go back and revisit that project, too!
ReplyDeleteHugs,
Lauren
The Thinking Closet
I knew as soon as I saw those chipboard letters I had to use them! As far as the design, desperation leads to innovation! Marissa raved about your box when we were at your house, so we had to do this before she left. But with no power tools, we had to improvise. Imagine what I could do if I could cut things!
DeleteYay! I see you've already grabbed your "Featured" button! Thanks for being so awesome, Jen, and rocking my world with your awesome ticket stub memory box.
DeleteReader Showcase: Spring 2013
Warmly,
Lauren
The Thinking Closet
You bet! Wearing my badge with pride! Thanks so much for the love!
DeleteThat's such a cool idea and I love chipboard letters you found, they are perfectly for the box! I definitely have to see, if I can find some space on one of my walls, so I could hang a box… (I fear, there's no space left in my little apartment……)
ReplyDeleteLove, Midsommarflicka
Love this idea - and the map letters are perfect!
ReplyDeleteKelly