Showing posts with label hallway. Show all posts

Thursday, January 24, 2013

Heritage Gallery

If you've been following along with our decorating adventures, it will not surprise you to know that we put up another photo gallery. (If you're new to our blog, check out our anniversary, mini, great room, growing up, visual guest book, and we do galleries).

Our newest gallery is our Heritage gallery. Our immediate family is spread out across America and in the Netherlands. We wanted to have an easy way to keep our family's faces familiar to our son, so this gallery is right outside his bedroom door. 

For perspective, this new gallery is in the same hallway as the growing up gallery. 

Here's a little before and after comparison.

Once again, we used Ikea Ribba Shelves for this gallery. We LOVE these shelves. If Ikea was closer, we'd really be in trouble. We've also used them for:


For this project, we used four 45-1/4"shelves to make the two long shelves. We really like the flexibility photo shelves offer for photos that may change around. I had a hard time narrowing down the photos, and we don't even have room for our siblings...yet!
I used a mix for black and white 5x7 and 8x10 frames, with two additional square frames. I would have preferred all black frames, but the store was out of black. Here's a closer look.

Here's a closer look at some of my favorites. This first one was taken in Amsterdam on the day that Niels asked my dad for his blessing. After the big question, we all took a boat tour of the city. I love how our dads are looking at each other like they are celebrating that they finally are getting their kids married off. 

I've only recently found this photo of my mom and I from when I was about three months old. I made the mat out of scrapbook paper and affixed the photo with washi tape. Also, I bought the frame for $2 at a thrift shop and spray painted it from bright blue to black.  

The last time I was in my Gramma's house, she had been put in the hospital and I had a feeling it would be the last time I would ever be in her home. I spent several hours looking through her photo albums and just fell in love with this one. It is such a great representation of who she is. I think this could have been a Minnesota postcard in the 50s. Mom gave me the photo for Christmas this year. 

One of my favorite photos from our wedding is this photo of our parents and siblings.

My dad is Santa Claus! When D was just a few days old, Santa Dad came to meet him. He brought his Santa suit and took my favorite photo of him with D. 

This is my absolute favorite photo of my absolute favorite Dutchie. I need to ask his mom, but I think Niels is three in this picture. 

And this is my absolute favorite baby photo of our little Dutch boy. D was four months old and he was wearing a super cute bunny outfit for his first Easter. 

These two photos both include my mom's dad. I love the picture on the left because I make that same face, and so does our son. The photo on the right is their wedding photo.

Our son is the first born son, of the first born son, of the first born son. This three generation photo was taken on D's second trip to Holland. 

The small photo is a picture of D with his overgrootmoeder, Niels' Oma. She is 84, living in the Netherlands, so we never take our time with her for granted. And it's another thrift store frame that I repainted. The photo on the right is Niels' mom and dad on our wedding day. 

One last view of the gallery from our bedroom shows the wedding frame on the short wall outside our door. We had our wedding invite and vows matted and we used it for the guest book at our wedding. I love that it's the first thing we see when we step outside our bedroom. 

I keep thinking we are about done with galleries, but then I think of more. I still have plans for a gallery of printables in D's room, and a build gallery with photos like this from the day we broke ground.

Do you have a photo gallery in your house? Post a link below if you'd like to share. You can also see more of my gallery inspiration on Pinterest.

Linked to:
Alderberry Hill * Blissful & Domestic * Clean & Scentsible * The Grant Life * Happy Hour Projects * Home Stories from A to Z * House of Hepworths  * I Heart Naptime * It's Overflowing * Made in a Day *  Miss Information * My Uncommon Slice of Suburbia * Nifty Thrifty Things * A Night Owl * Serenity Now * Shabby Creek Cottage  * Shabby Nest * Simply Designing * Sumo's Sweet Stuff (featured) * That's What Che Said * DIY Dreamer * Bowl Full of Lemons * Kurtz Corner * New Nostalgia * Crystal & Co  * We Are That Family * Rainbows & Honeysuckles * The Dedicated House * Happy Go Lucky * Capturing Joy  * Thrifty Decor Chick

Monday, November 12, 2012

Growing Up Gallery

This weekend I put up a new gallery and I am just tickled with how it turned out.

It started last week when I got our son's first preschool photo.


I was trying to think of the best way to display his photo (and the photos to follow over the next fourteen years). I found inspiration in our anniversary gallery. We have frames celebrating various milestones from engagement to our 45th wedding anniversary. We hung up all the frames at once, putting labels to mark future milestones.

So I bought some inexpensive 8x10 frames from the Flower Factory--only $2.55 each! Then I played around in Word to make labels with the grade and year from preschool (our son has one more year) to twelfth grade. 

I had some clear labels, but decided I liked the white ones better. I glued each one onto a green notecard.

Next, I went through my stacks of scrap paper and pulled out 14 different pages. I love that this project cost nothing other than the frames! I lined up the papers and played around with the order. My vision isn't great to see the gradient colors, but it works for me.

Next I cut out 8x10s of each page, using the glass from one of the frames as a template.

First one done.

And framed.

Each September, I do a little interview with D, similar to this one. My next project is to make pretty version for each grade and stick them in the back of the frames as a prompt to do the interview each year when I put the new photo in the frame.

Updated: 
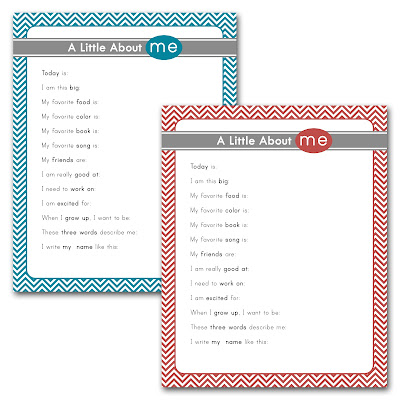
I found these super cute interview printables from Precious Announcements on Pinterest.

Then I brought all the finished inserts and frames up to the empty wall.

I still had four empty frames, so I put in a photo from his birth day, and then fall photos from each year til now.

When I laid them all out, I realized that even though my receipt said I bought 20 frames, I only had 19.

The last photo is one I had forgotten was taken. (It was a very sentimental night going through all these photos!) It was a few weeks before D was born. I was sitting in the nursery with our dog when D kicked me. Bailey had her paw on my tummy. D's kick startled her so she licked my belly. Such a sweet moment with a sweet dog. We lost Bailey twenty months ago.

I really liked how bright and colorful the frames looked.

By this time it was pretty late. My original thought was to hang the frames in a large square. Something like this: 

Niels didn't like the idea of the photos being so close to the floor, and since I needed his help to put them up, I decided to sleep on it.

At about 3am, inspiration struck. Knowing that I couldn't rely on my brain to remember it in the morning, I drew it up on PowerPoint.  

When I woke up, I pulled the frames out of the hallway to see how it looked with frames. I loved it. And, so did Niels!

I was still missing a frame, so first we had to make another trip to Flower Factory.

Finally, we were ready to get started! Here is the before photo. It's the space just at the top of the stairs.  On the other side, going up the stairs, is our anniversary wall.

To start, I put a long strip of masking tape on the wall to mark the line on which I wanted the end photos to sit.

It took a few tries to get it exactly level all the way across.

I measured the wall and was quite relieved to see that I have 5" to spare.

I marked 2.5" out from the linen closet frame to start with the 12th grade frame. I figured it I got off a little, at least I could go out above the stairs.

Earlier in the afternoon, I decided that I would try the Command Hook picture hangers instead of nails. It turned out to be a fantastic decision. First of all, the odds of making a bajillion extra holes when the frames had to fit exactly together was high. Secondly, this allowed me to finish a project by myself.

The command strips were super easy to use. (This is no ad. Sadly, I don't yet know enough about blogging to make any money here. Although, if someone wants to educate me, I'm an eager learner!) First, I put two pieces of velcro together and pushed down.

Then I removed one piece of protective paper so the sticky part was revealed.

For the first frame, I put two strips on either side of the top of the frame. For the rest, I put one strip on top and one on the bottom.

After I removed the top strip, I was ready to hang the frame.

As soon as I found the exact place I wanted, all I had to do was push down.

For the first frame, I did not remove the stand.

But the frame was a little uneven against the wall, so I took it down and removed it. Along with the other 19.

Next, I found the midpoint of the frame so I knew where to place the next column.

The frames went up really fast.

And when I got to the last frame, I was thrilled to see that it was still level!

I finished just before our little guy went to bed. He loves his new gallery.

I can't express how happy it makes me to have photos of my family up. And just as I love having a visual way to see the years ahead in our marriage, this gallery reminds me to savor every short moment I'll have with my little boy. He'll be leaving the nest before I know it.

He's not even four and we're six frames in!

The view coming up the stairs.

I find beauty in order.

A few artsy shots by my hubby:


Bliss.

Updated: In case you missed our other galleries, here are the links:
  1. Great Room Great Memories Gallery
  2. Mini-Great Room Gallery
  3. Anniversary Gallery
  4. Heritage Gallery
  5. We Do Gallery
  6. Visual Guest Book Gallery
  7. Boy's Room Printable Galley
Updated: 
It's been nearly three years since I first put up the growing up gallery. Here's an updated picture. I can't believe I'll be putting up his first grade picture this year!


Do you have photo galleries in your home? Link them up below!

Linked to:
36th Avenue * At the Picket Fence * Balancing Home * Between Naps on the Porch * Capturing Joy * Craft-o-Matic * Create Craft Love * Creative Muster * Crystal & Co (featured) * The CSI Project * Diana Rambles * Folk * Glitter, Glue & Paint * The Grant Life * Home Stories A to Z * Hope Studios* House of Hepworths * I Heart Naptime * It's Overflowing * Just Us Four * Life After Laundry * Little Miss Celebration * Liz Marie Blog * Miss Information * Mums Make List * My Life According to Pinterest *  My Uncommon Slice of Suburbia * New Nostalgia* Not Just a Housewife * Organize Your Stuff Now * Organizing Made Fun * Practically Functional * Real Coake * Serenity Now * Sew Much Crafting *   Sparkles & a Stove * And Sew We Craft * Sugar Bee Crafts * This Silly Girl's Life * Tatertots & Jello * Thrifty Nifty Things * Tossed Salad Life * Uncommon Designs * Who Needs a Cape * Will Cook for Smiles

Visit thecsiproject.com It's Overflowing
Related Posts Plugin for WordPress, Blogger...