Monday, July 8, 2013

Vught Concentration Camp

Like most Americans, I was horrified as a student to learn about the atrocities of WW2. As a high school student, the second world war that happened far away, mostly to people I didn't know. My grandfather fought in the war, like most men of his generation, but he didn't talk to me much about it.

When I married my Dutch Niels, the war became personal. The Netherlands was occupied by Germany during the war, and his grandparents survived the Hunger Winter. Only one Oma is still alive. The generation who lived through those terrible days are coming to the end of their days, and my generation is quickly losing the opportunity to hear their stories. Niels' Oma has never spoken to him about the war, and has made it clear that she never will. While disappointed for the loss in our family history, I certainly respect her wishes. (I was able to find answers to many of my questions and learn a lot about life in occupied Holland through Diet Eman's excellent memoir, Things We Couldn't Say. I can't recommend the book highly enough as it is one of only a handful of books that changed me).

This is my fourth trip to the Netherlands. Each trip, I have wanted to visit a concentration camp to pay my respects to all the lives that were lost during that senseless time. But, each time we returned home and somehow, we never managed to fit it in our schedule. I was starting to fear it was going to drop off the list this time, too, until we learned that it was open on Sunday and our son had just fallen asleep at Oma and Opa's house.

I know that there was one camp in the Netherlands, Vught, which is about an hour away from my in-law's home. Most of the former camp is gone. A small portion remains as a national monument, the former officer barracks are now being used as part of a Dutch army base. Much of the rest was leveled and a prison for those who have committed actual crimes has been built in its place.

A little bit of history. Vught was the only concentration camp in the Netherlands. When it was first put into use in 1942, the prisoners themselves bore the burden of completing its construction. Another distinction is that Vught was truly a concentration camp, or holding camp. For the most part, prisoners were placed at Vught on their way somewhere else. That's not to say that prisoners were not maltreated, starved, and even killed, but most people who were housed there died elsewhere. The two most well-known residents of the camp were Corrie and Betsie Ten Boom, who were there in 1944, before heading to Ravensbrück.

I was glad to have Niels with me because everything was in Dutch and he was a willing, if somber, translator. 

Camp Vught. If they would not have been here, they would have been somewhere else as there is lots of room under heaven. But they were here. And still are.


In the first exhibition hall. Along the far wall is a large number of letters, papers, photos, and other documents. In the center of the room were mementos from prisoners, both those who survived and those who did not.

Sobering fact. A little over 100,000 of the 140,000 Jews living in pre-war Netherlands were murdered, the highest percentage of Jewish population of any country. The writing on the klompen (wooden shoes) translates, If you have something of value, even if its a functional spoon, a pair of clogs or even a pencil, always carry it on you and especially bring it to bed with you."


These wire names were among mementos donated by a survivor who was in the Dutch Resistance. It really hit home for me because this is a hobby of my dad's. When I was in second grade, my dad my wire name pins for all the kids in my class. Twentyish years later, when I joined Facebook and connected with friends from school, many for the first time since graduation, more than a few said they still had their pins. Seeing these wire names reminded me how easily, in a different time and place, at the hands of a different monster, my dad's name could be on a memorial wall.

This chart shows how prisoners were categorized in the camp. (Click once to see a larger version of the photo). Note that "untermensch" translates into "less than human."

Depending on how a prisoner was categorized, they were given a specific patch to wear on their uniform. This way, guards could immediately tell why that person was being held.

Niels and I talked a bit about how the camps are viewed by the Dutch, and what would be an appropriate use of the land, especially in a country that is so cramped and where every square inch of ground is zoned. A memorial is definitely necessary, but we understand that the time and money necessary to preserve such a shameful place doesn't seem quite right either. As we were driving to the camp, not more than a mile from the memorial, was a lake and recreational area. It seems so out of place, but then, it's a beautiful area and one can understand the desire to want to re-claim it again. The area needs to bask in joy again. As we pondered what would be both respectful and appropriate, we came upon the former office barracks and administration buildings, which are now being used as an army base for the Dutch army. When we parked the car, we saw the prison. Respectful and appropriate.

To the left is the new prison. To the right is a replica of one of the barracks.


Each barrack houses 240 prisoners. This was the "living area" for all 240 prisoners.


Each bed was fitted with a burlap mattress thinly stuffed with straw, with a matching burlap pillow. Prisoners were given one sheet, which was not ever washed.

Crematorium. Because this was not a extermination camp, each body was autopsied and cremated individually. In the eighteen months that the camp was in operation, of the more than 30,000 people who were imprisoned here, only 749 people died in this location. (Many, if not most, were killed elsewhere). Of those who died at Vught, most were in the Resistance. When the camp was liberated, on October 26-27, 1944, there was a pile of 500 bodies, executed that morning.


Niels stands in reconstructed cell 115, where 74 women were forced to stand for over 14 hours as punishment for revolting against one woman's punishment in what was called the Bunker Tragedy. Ten women died overnight and many others suffered ill effects from the lack of oxygen.

The 74 woman had a  little more than the space of one of these tiles to stand on for 14 hours.


We found this little Canadian flag on the grounds. Fitting as it was the 4th Canadian Armor Division, and the 96 Th Battery of the 5th Anti -Tank Division who liberated the camp.

The children's memorial honors the memory of the 1,200 children sent to their deaths from Vucht.

Both Niels and I placed stones at the memorial.


This large slabs were originally a wall listing the names of those who were killed at Vught. In the 1990s, neo-Nazis desecrated the wall with tar, which seeps into the stone and cannot be removed. The wall was taken down and the slabs moved into this room where they are safe. 


The last room we were able to visit was this very high-ceiling room where visitors penned their thoughts.

I had no words.

Linked to:
52 Mantels * I Heart Naptime *  Made In A DayMom on Time Out * Will Cook for Smiles 

Friday, July 5, 2013

Guest Post: Lauren from The Thinking Closet


Hey there, dreamers!

As you know, we are in the Netherlands enjoying the company of our Dutch family. We didn't want you to think we forgot about you, so I invited my blogger buddy, Lauren to say hello and share her pretty turquoise pantry with you. I first "met" Lauren when I commented on her post that encouraged me to create an "About Us" page. (If you've checked out our "about us" page--and our stats tell us that lots of you have--you can thank Lauren!) When I found out we would be going to Orlando, Lauren was kind enough to offer lots of fun, inexpensive non-Disney things for our family to do. In fact, my favorite day of our entire two week Florida trip was spending the day with Lauren and her husband Mark at her beautiful lakefront home where we enjoyed a yummy homemade lunch and got our craft on!

Here's Lauren...

Lauren from The Thinking Closet

Hi everyone! My name is Lauren and I blog over at The Thinking Closet where I share all manner of things crafty and d.i.y. I'll have you know that I am a huge fan of the de Jongs and their amazing dream house!

As Jen shared with y'all in her 3-2-1 Blast Off Shirt post, we had the honor of meeting and crafting together this past May during her family's visit to Orlando. (If you were curious, Jen really is as warm and friendly in person as she is on her blog...and her son just as adorable and precocious as you might imagine.)

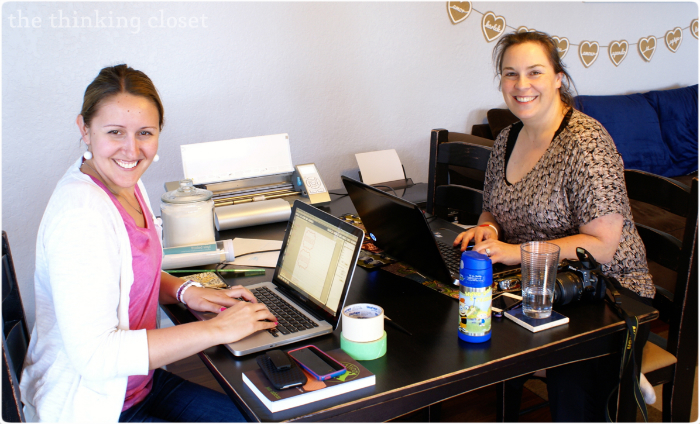
Jen & Lauren Busy at Work!
When Jen invited me to stop by and "meet" her readers through a guest post, I clicked my heels with glee and decided to dig through my archives for a post worthy of the task. I landed on an oldie but a goodie, one from first week of blogging that is ready for its "second spring" here at the de Jong Dream House. So, here you have it, from The Thinking Closet vault, DIY Wooden Chalkboard Labels (or the tute formerly known as "If You Like it Then You'd Better Put a Label On It"). Because we really can't get enough chalkboard in our lives, now can we? Enjoy!

  Blog Divider - Pennants 


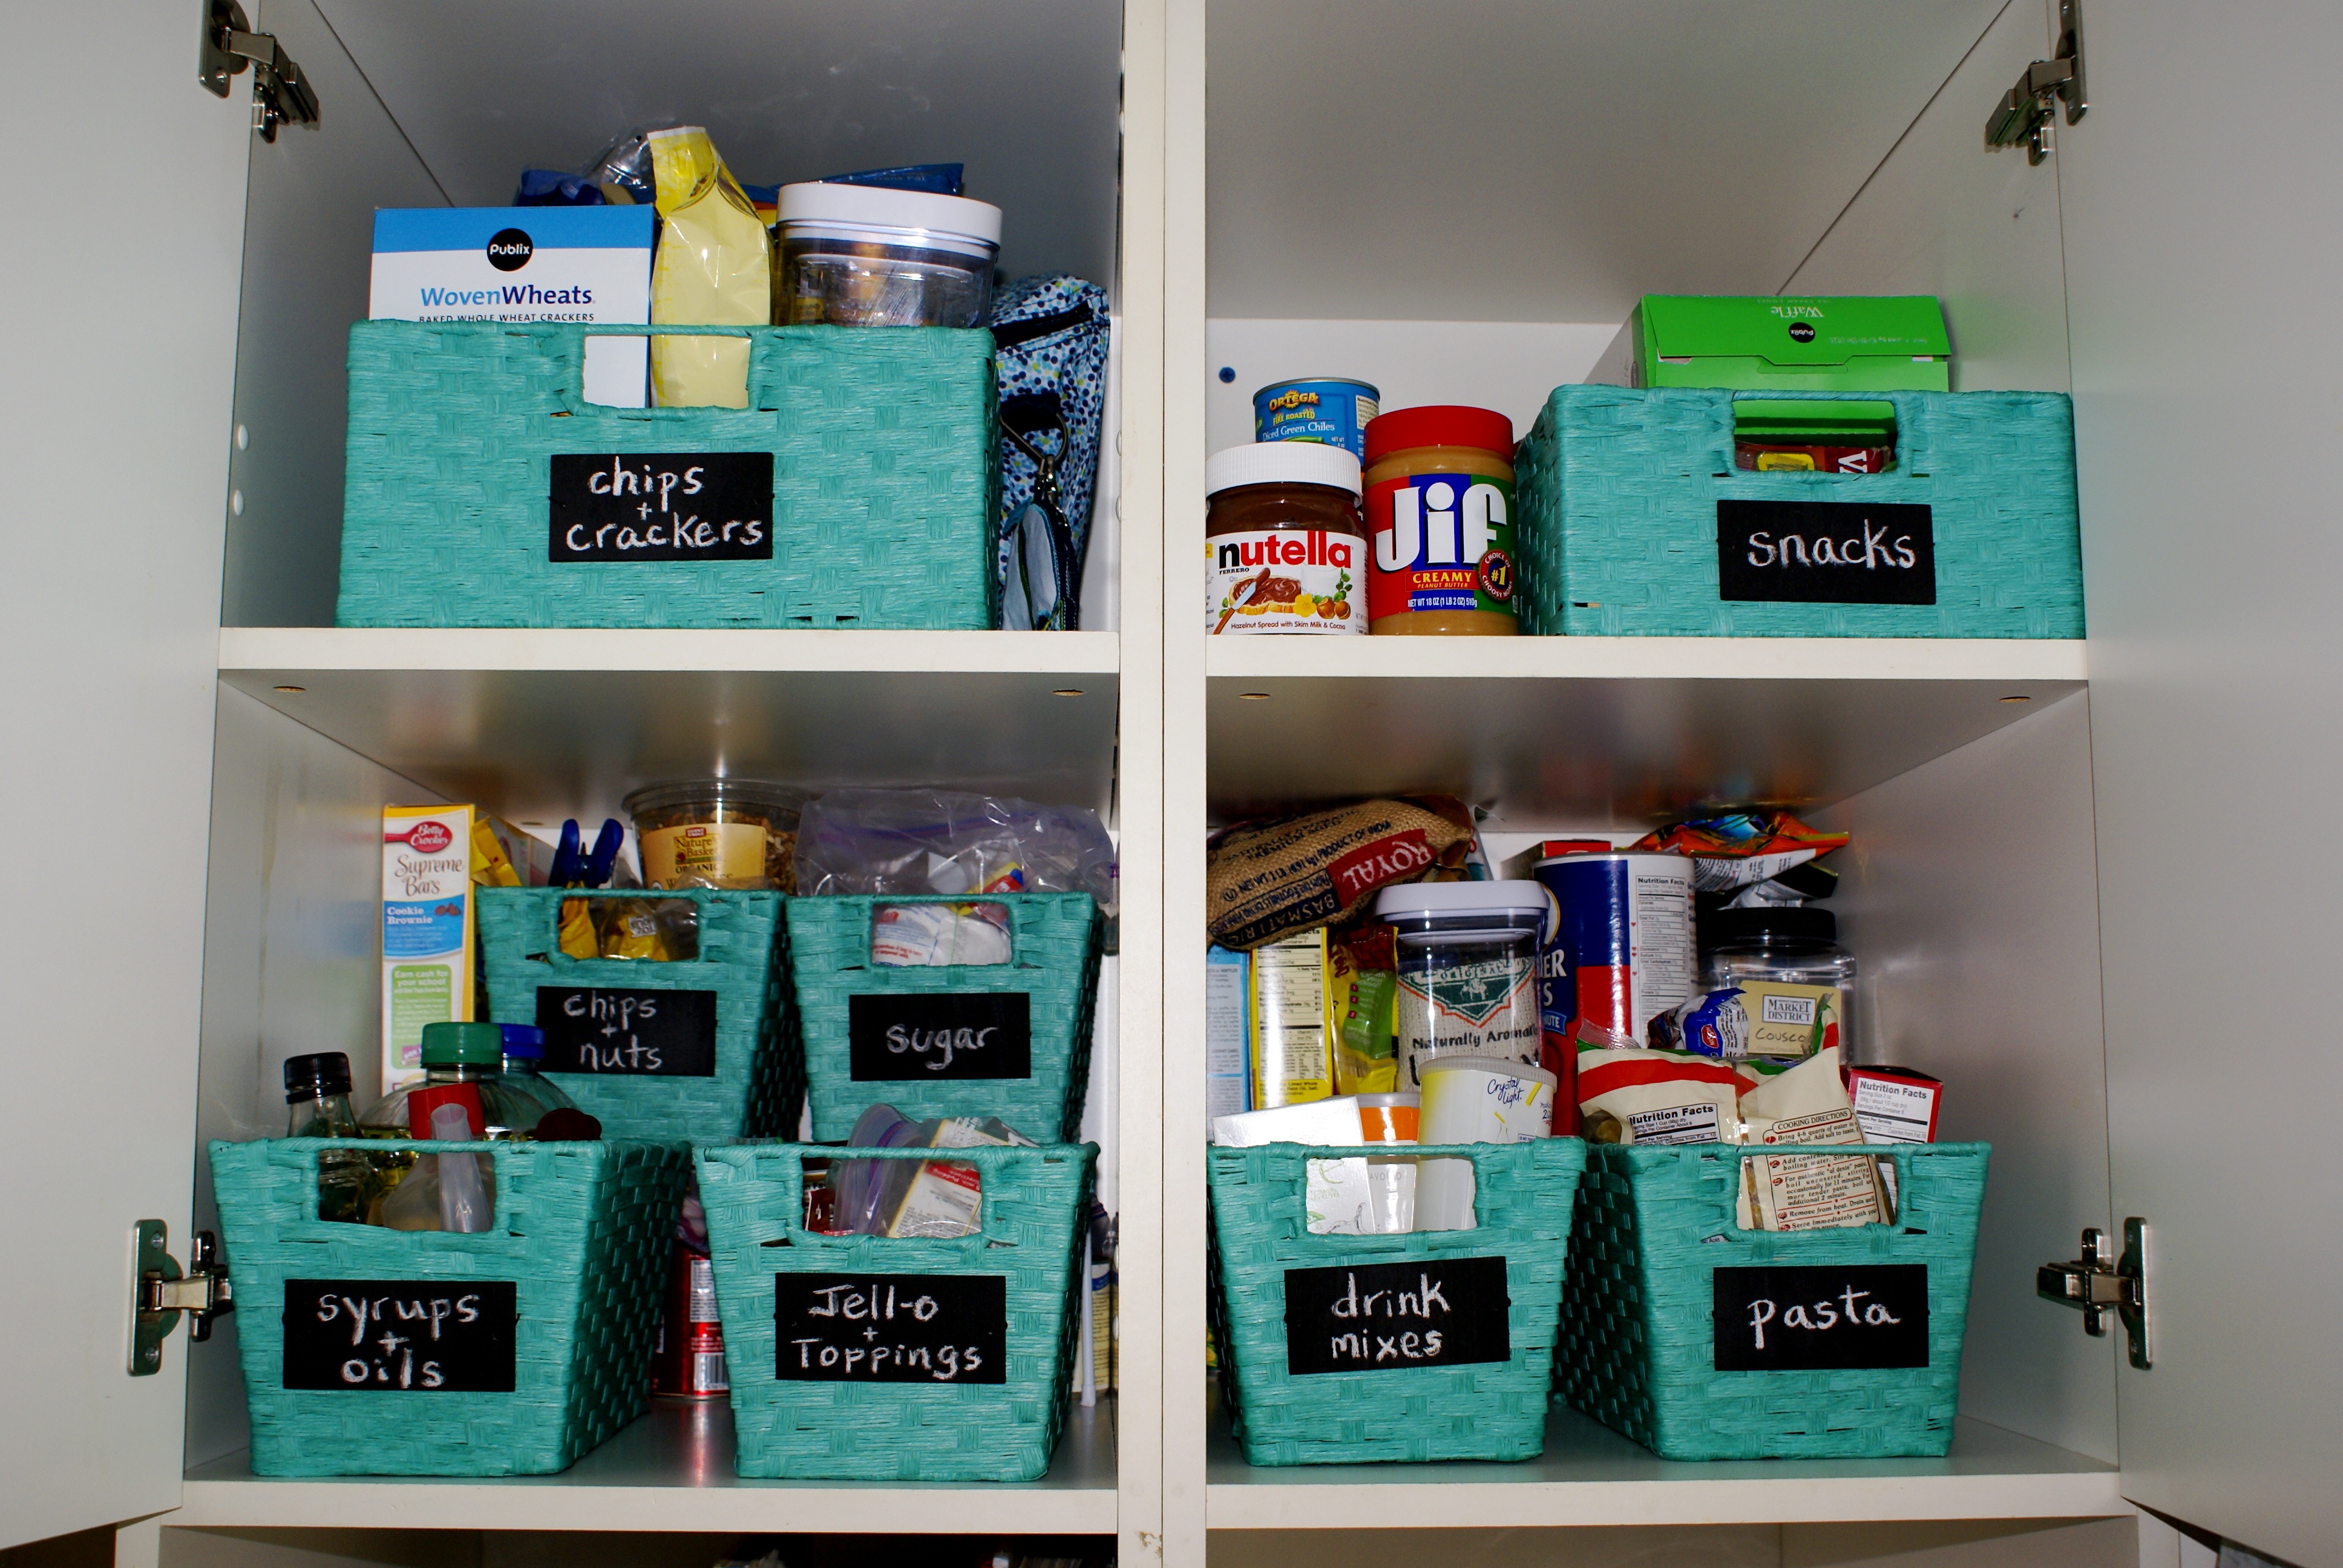
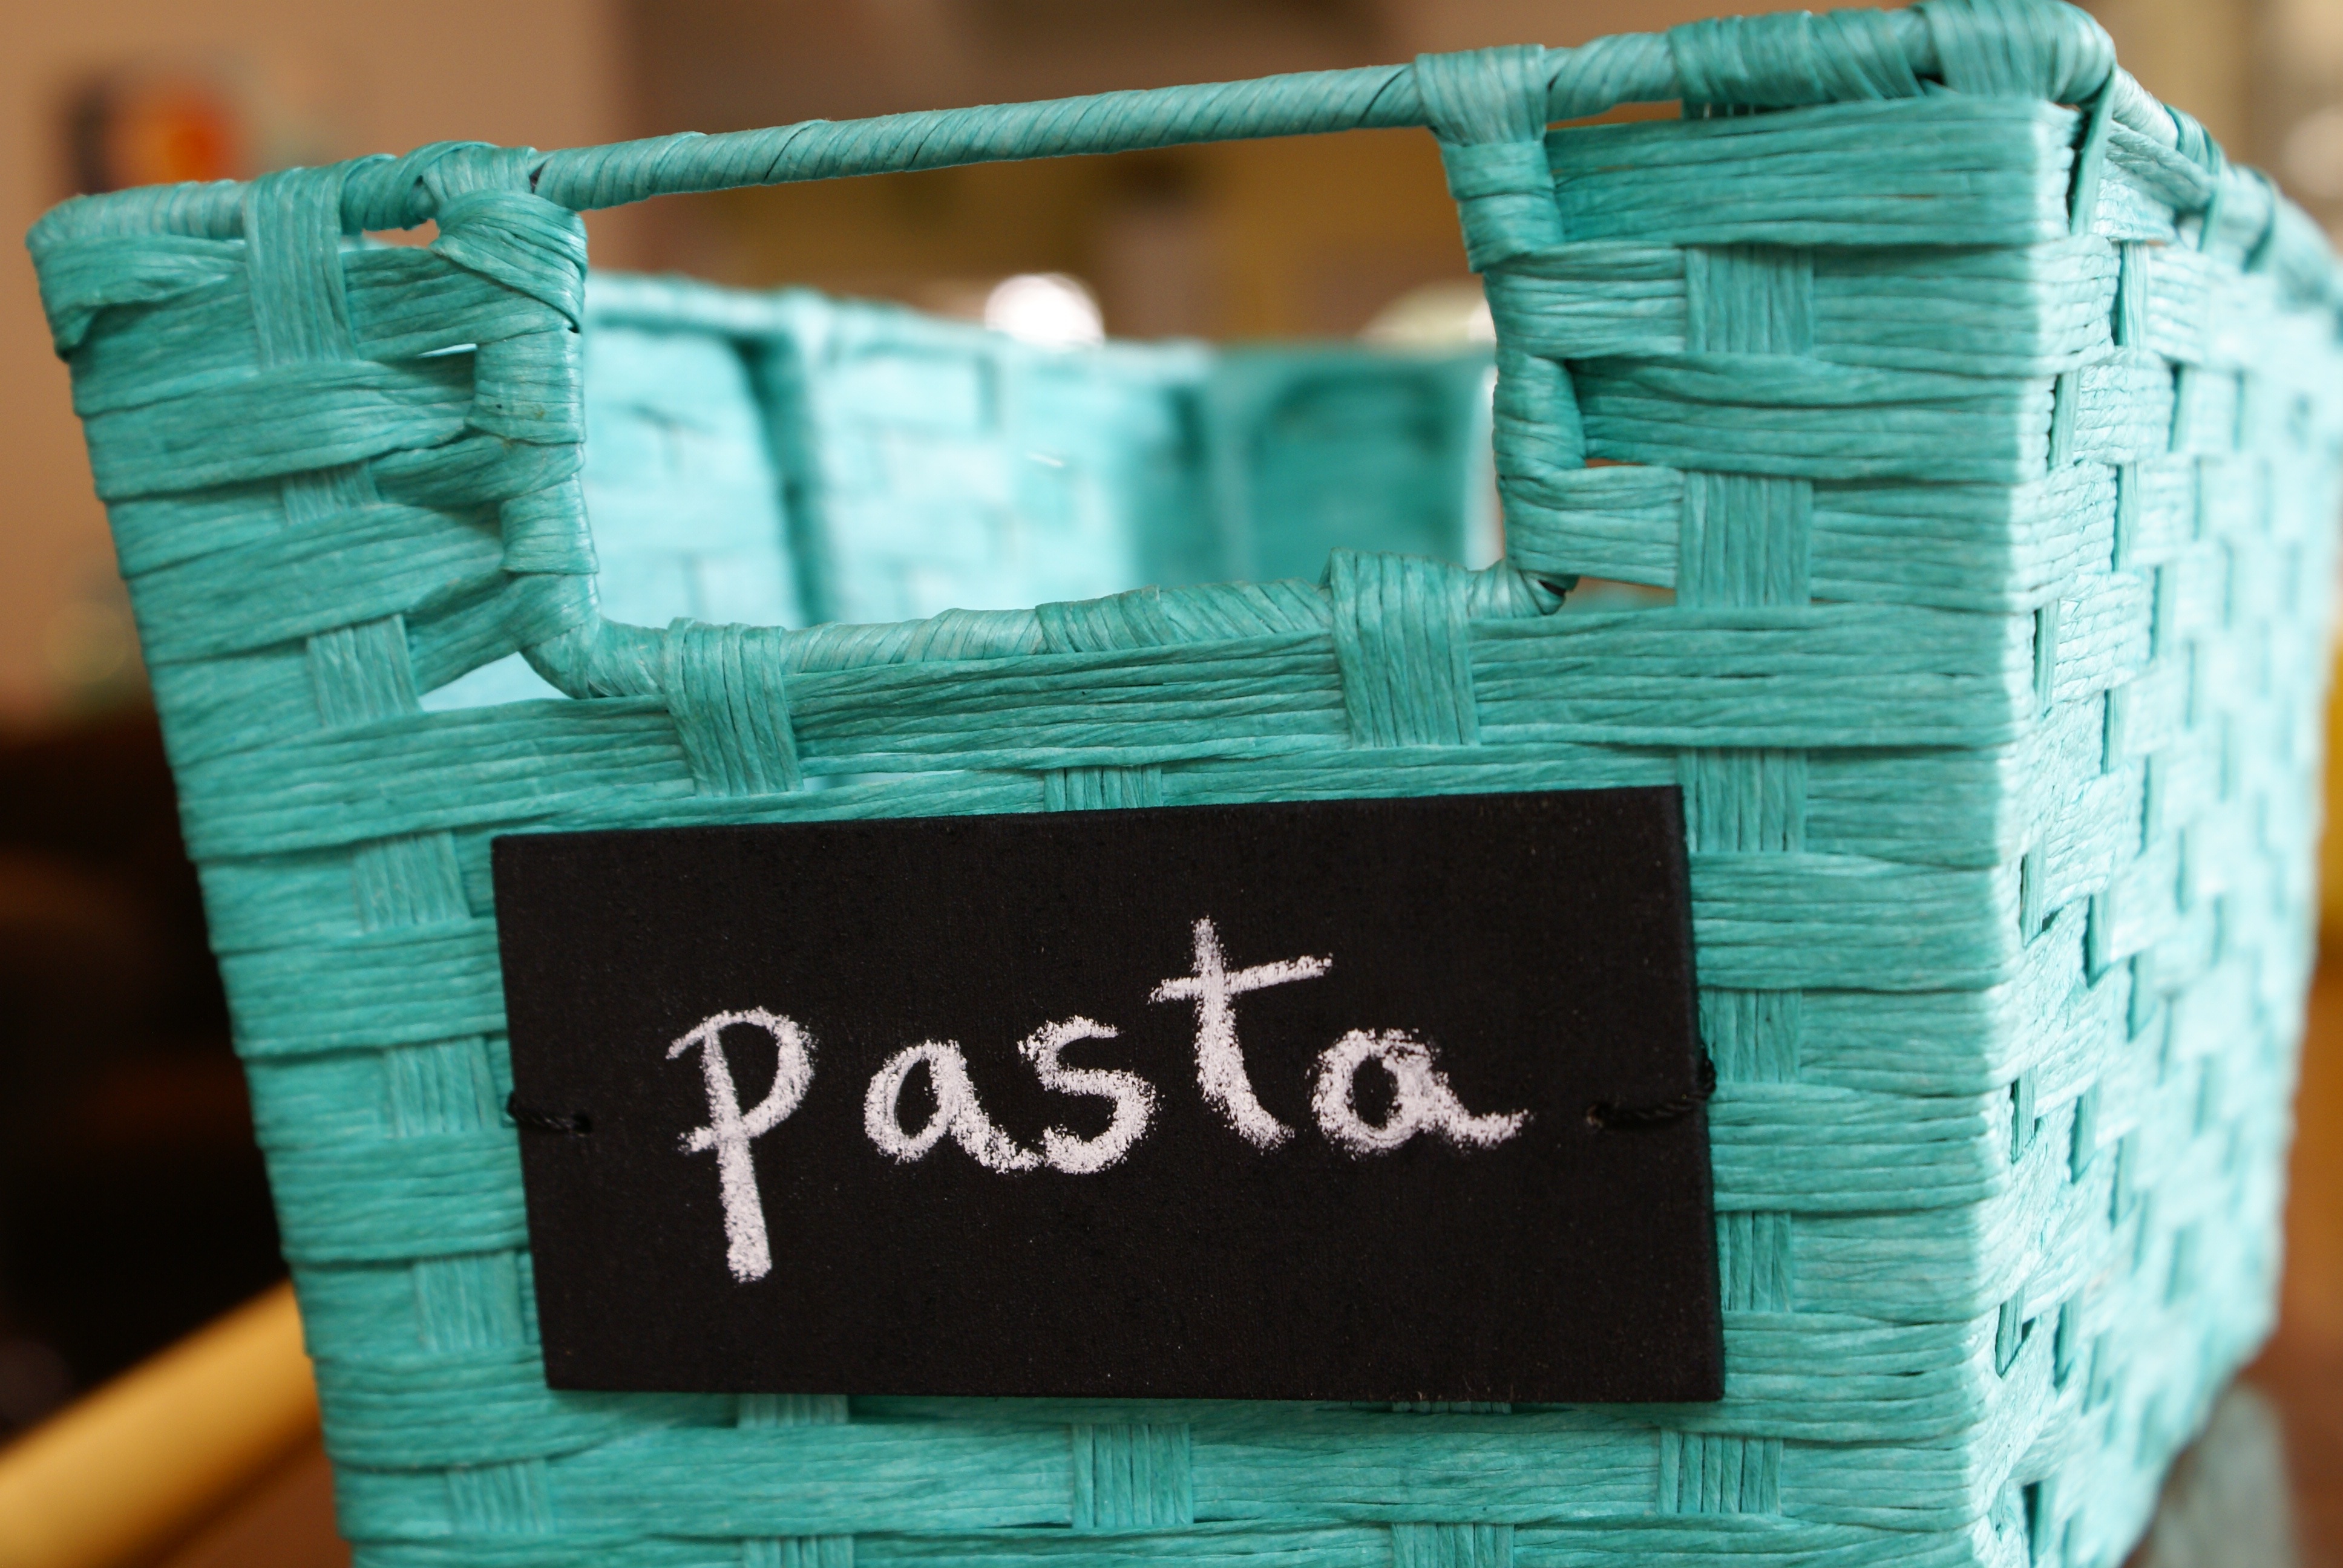
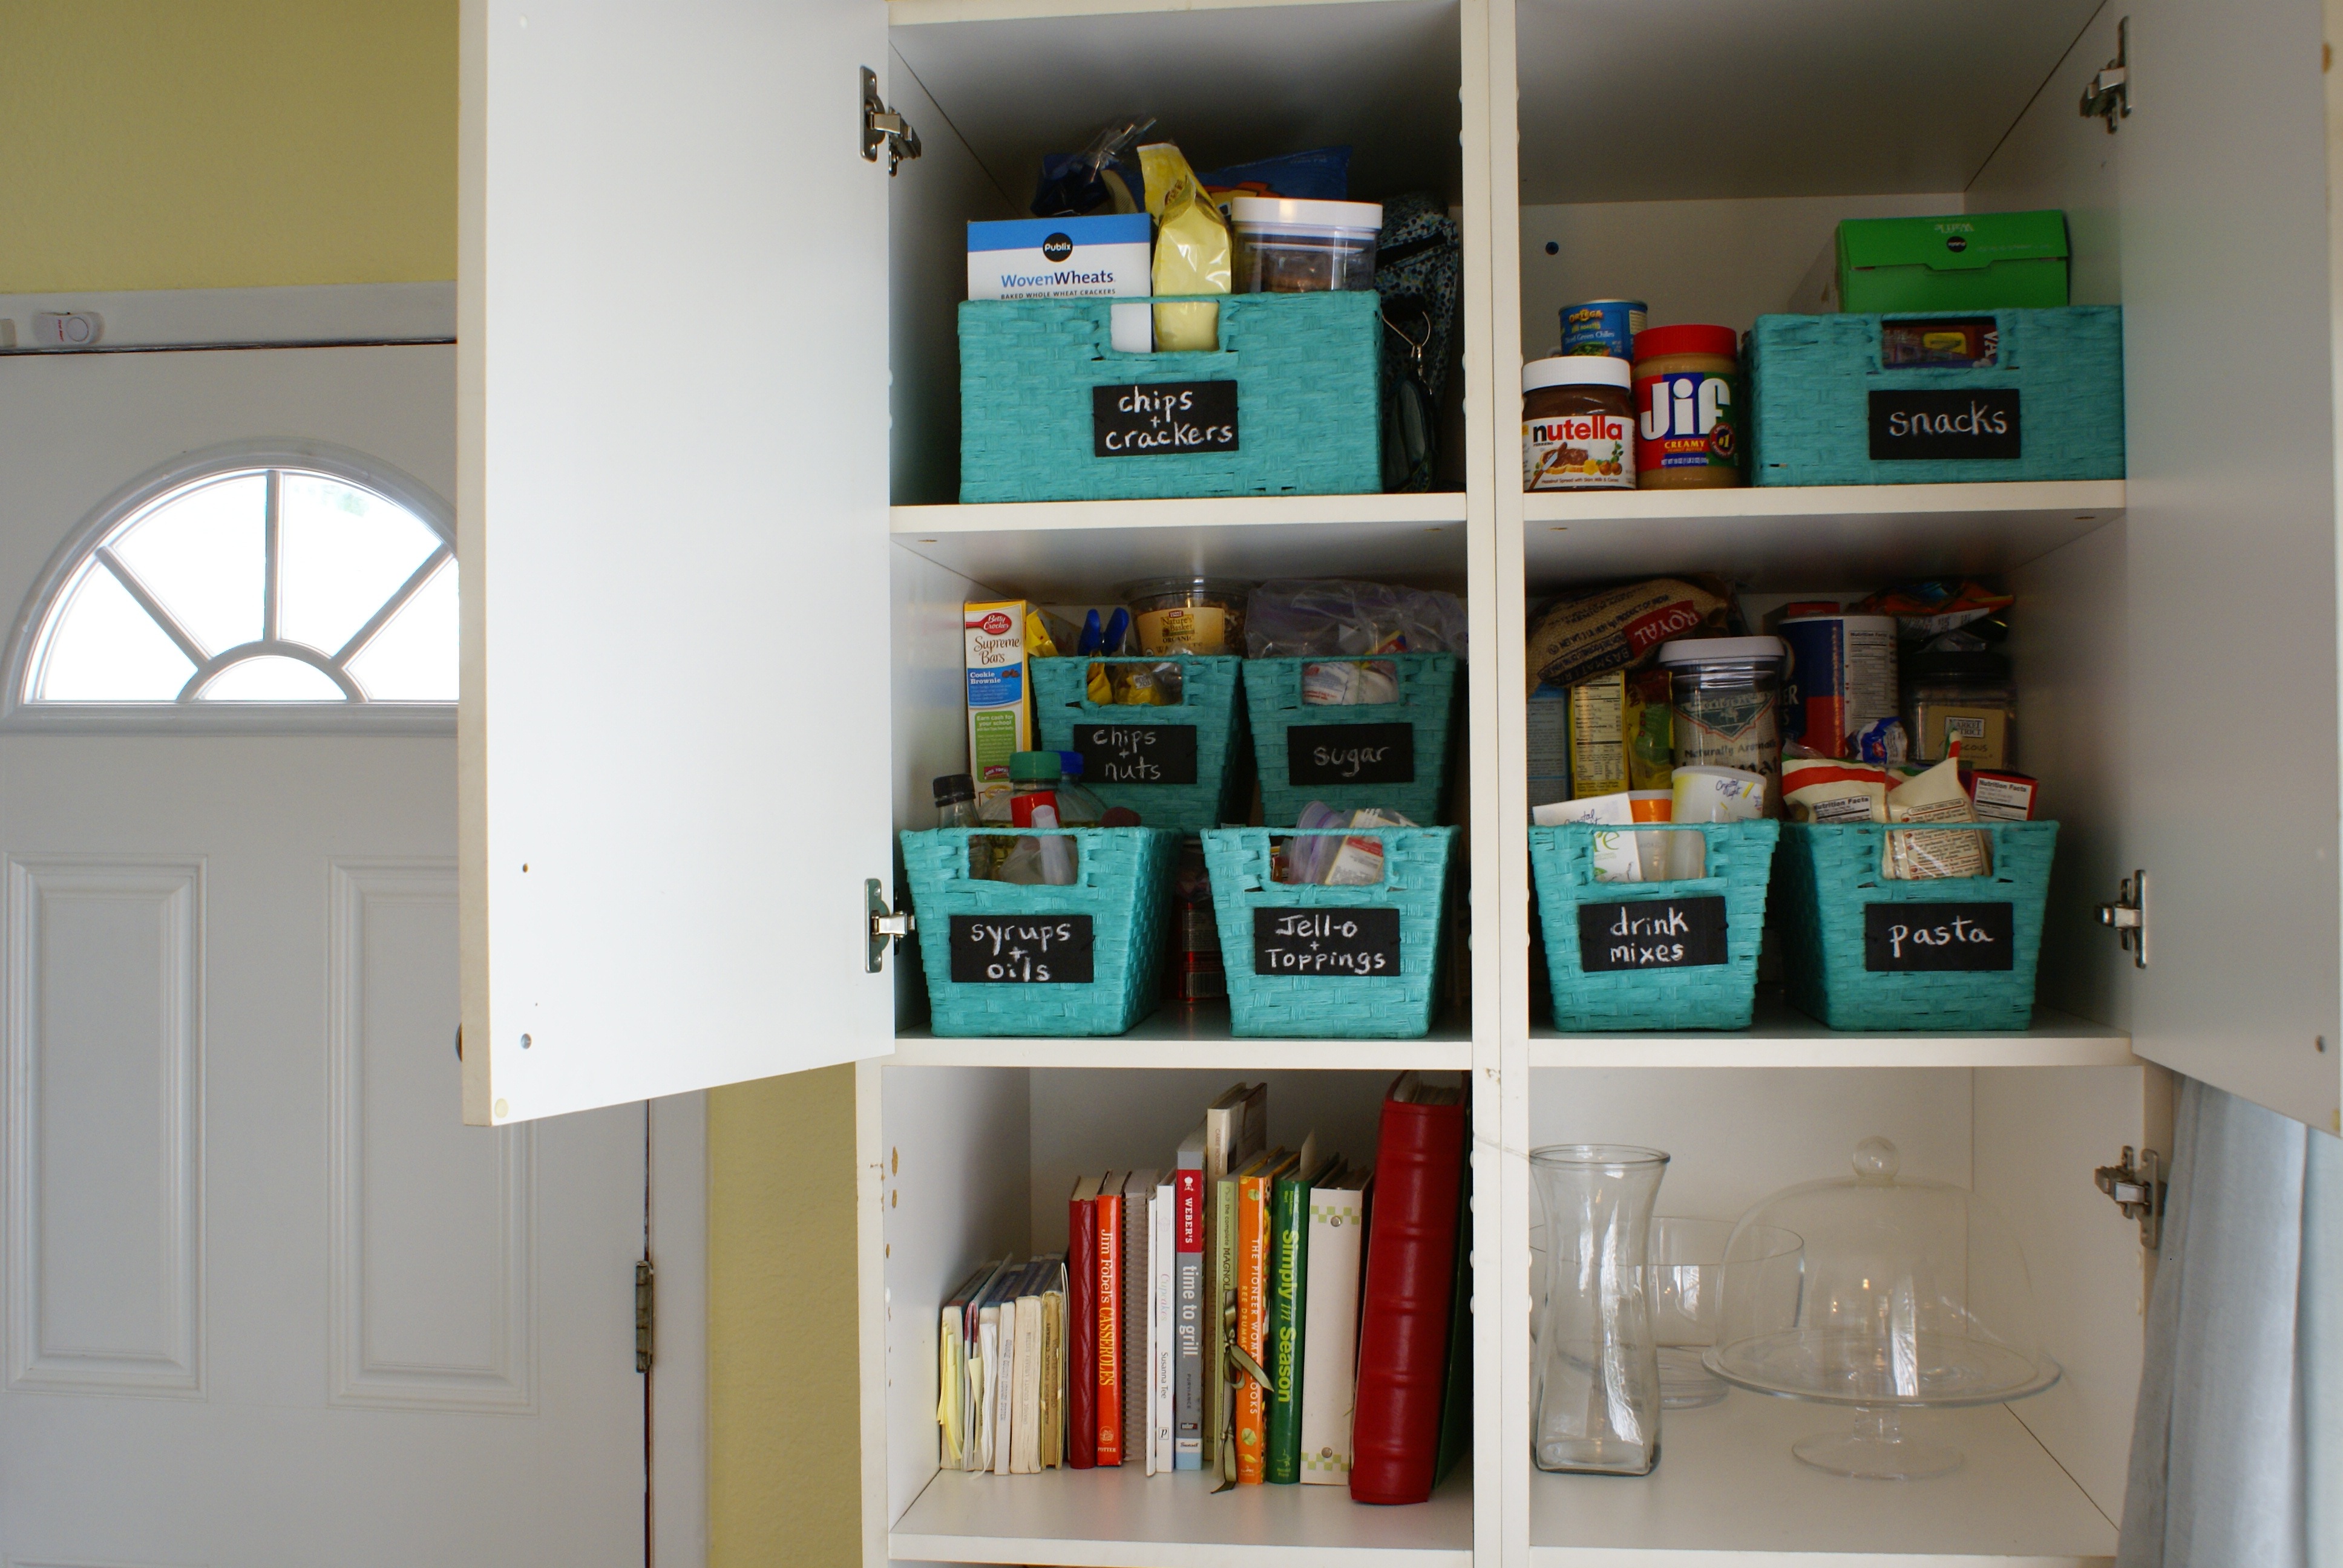
Since moving to our new place in Orlando, we've had to get a bit...creative when it comes to our kitchen. It's a rather small space and the pantry cabinets are tall and deep. I knew right away we'd need to pick up some more cabinet shelves from Bed Bath & Beyond. And then, when we were at Lowe's, I picked up these cute dark turquoise woven baskets to attempt some semblance of organization. All they needed now, were some nifty labels. I saw some inspiration through Pinterest (like this one and this one) that led me to create some chalkboard labels. After some chopping, drilling, sanding, spraying, securing, and writing, here's my finished product:

DIY Chalkboard Labels for Pantry Organization | The Thinking Closet

I love the look of them, as well as the fact that they're re-usable. Need to change the contents? No problem. Just wipe off the old label and chalk on the new one! Below is a tutorial on how I created mine.

 SUPPLIES:
  • Wood ovals or rectangles. Alternatively: enough 1/8" x 4" x 24" craft wood ($1.65 each at a store discount of 50% off) from which to cut your labels. I bought two and had leftover wood.
  • Krylon Chalkboard Spray Paint. Sold at most craft stores. I got mine at Jo-Ann's for $4.19 (40% off using a coupon).
  • Fishing line, thread, or twine.
  • Dust-free chalk or a chalk marker. $1.29 at Jo-Ann's
Step 1. Purchase and prep the wood for your project.
 I was looking for pre-cut wooden ovals or rectangles, but I just couldn't justify buying them for $0.99 each (Hobby Lobby). So, I just picked up two slabs of craft wood (1/8" x 4" x 24") for $1.65 each on sale. Then, I marked the wood at a size that would work best with my baskets (4" x 2") and got a quick tutorial from my hubby on how to use his miter saw. With safety goggles on and ear plugs in, I cut 15 wooden rectangles to serve as my labels, sanding the edges of each to smooth out any rough spots.
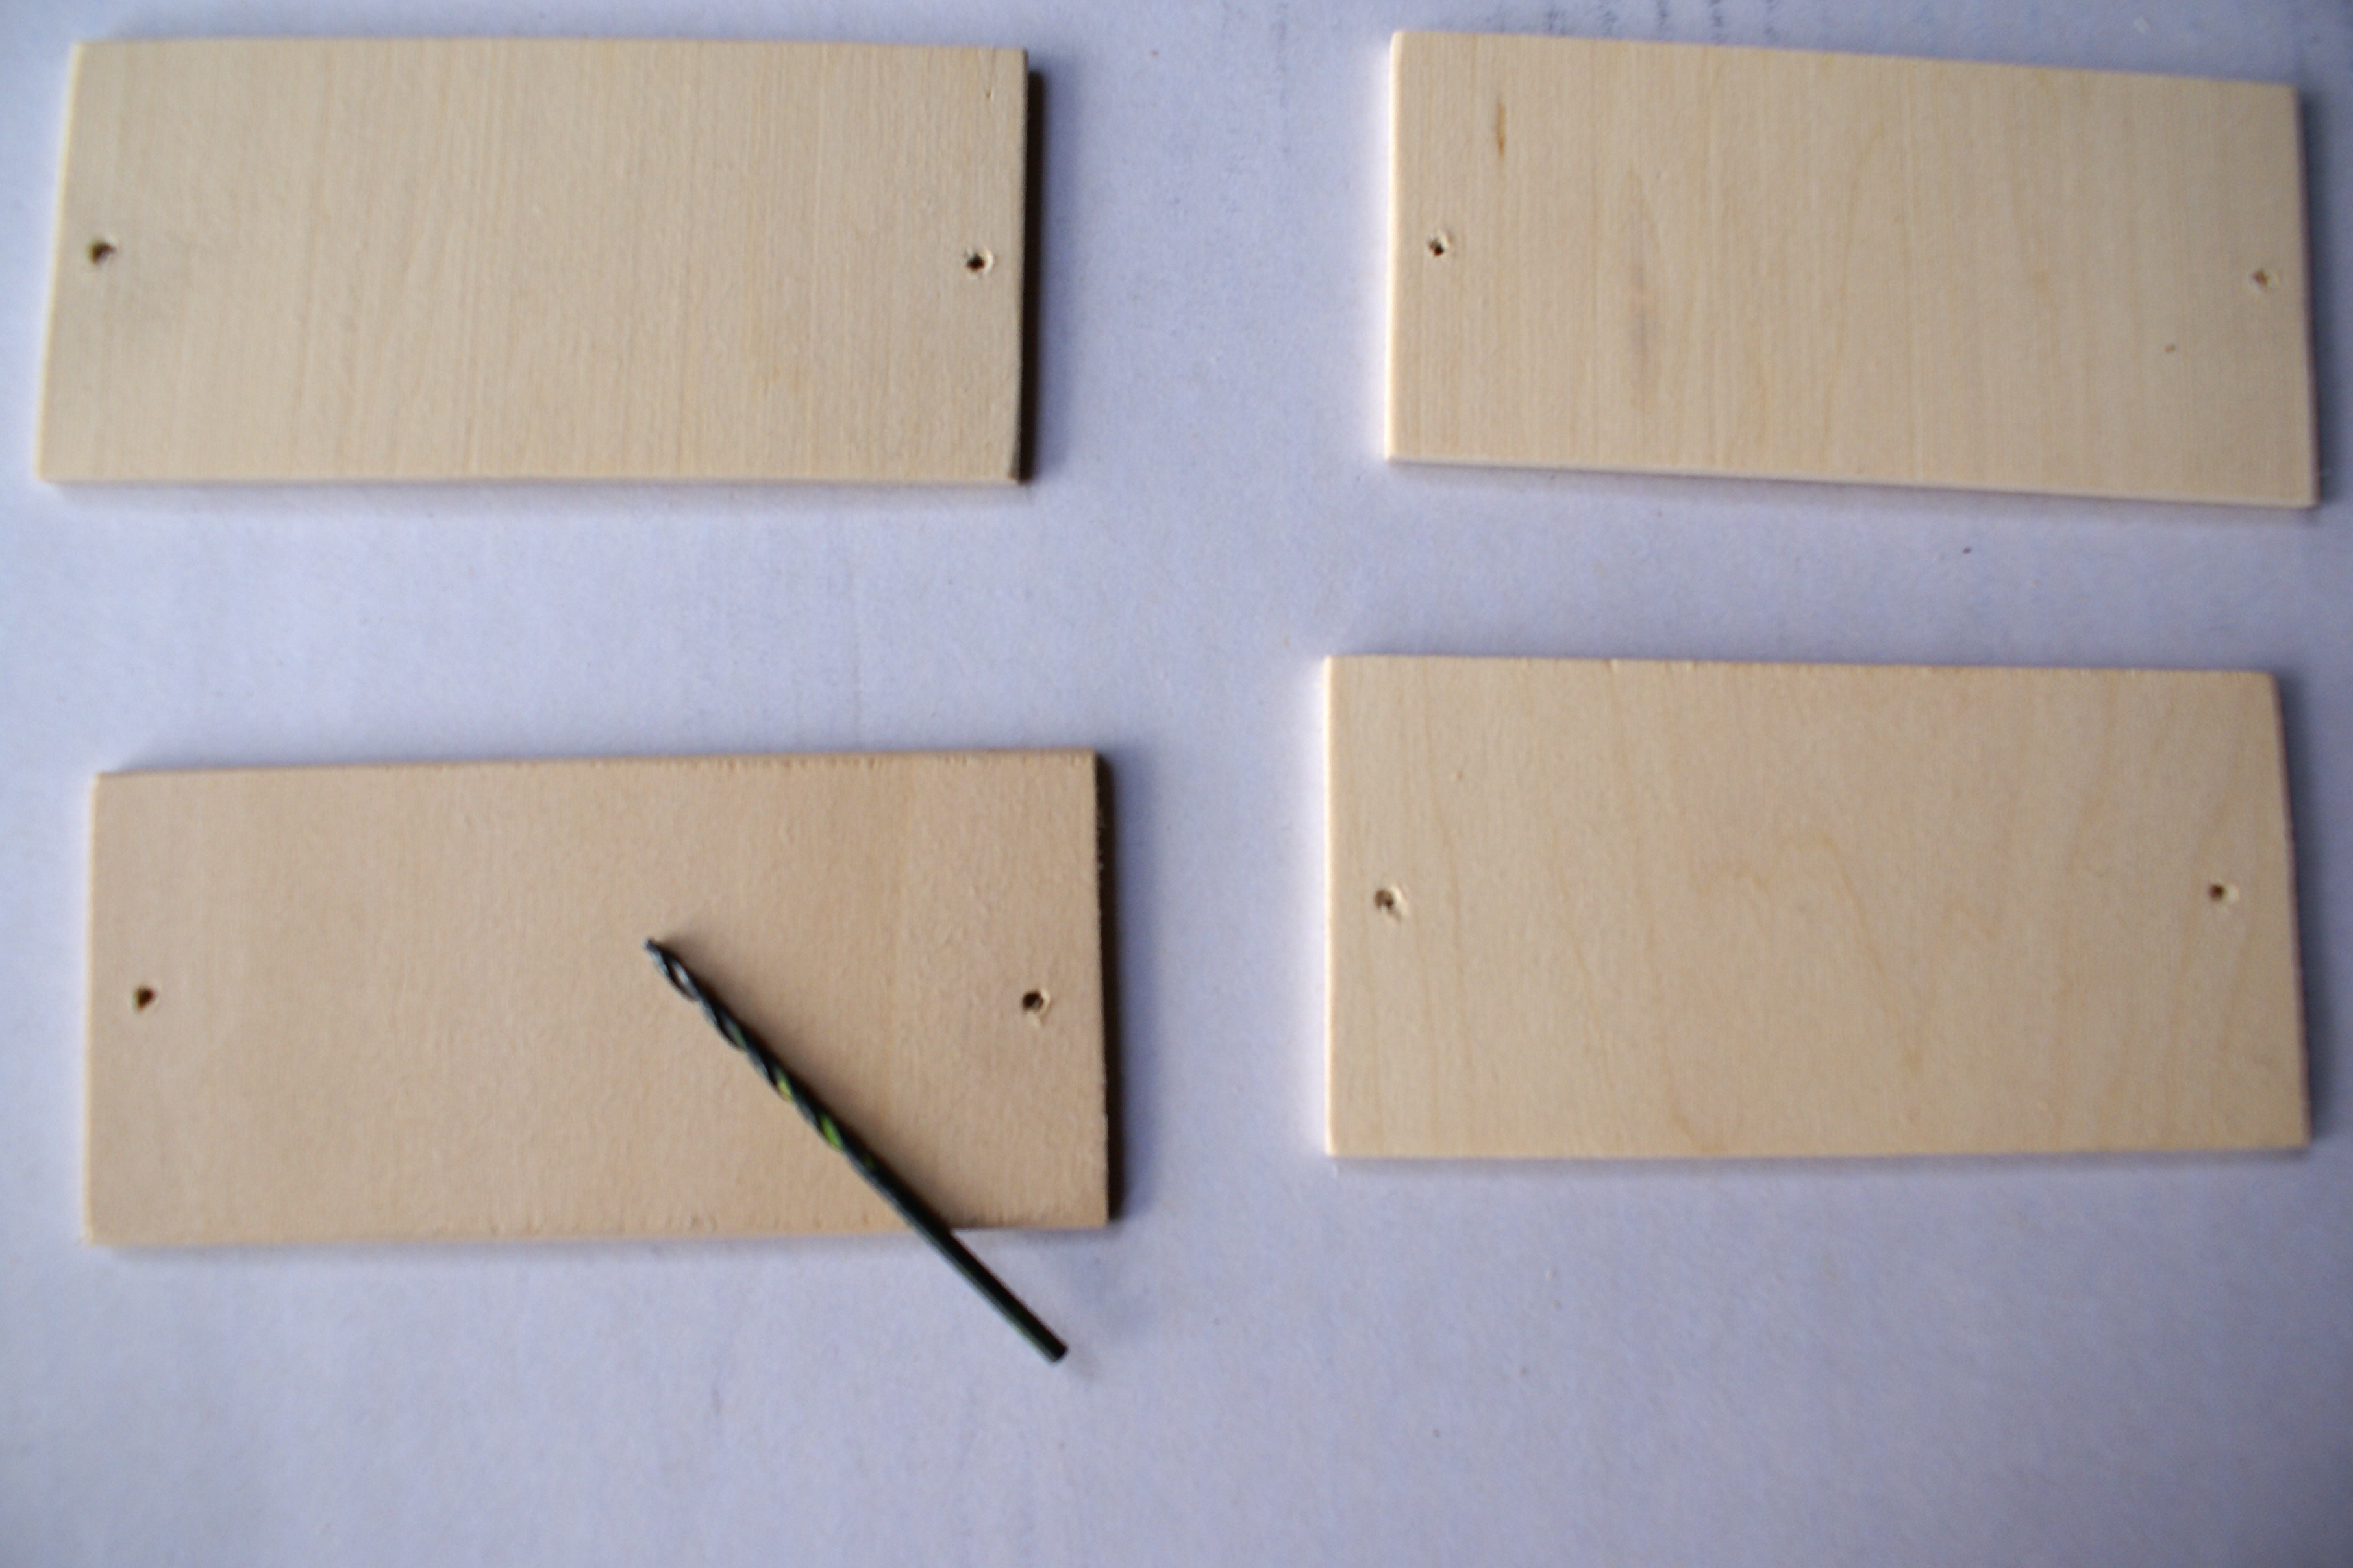
Prepped wooden labels.

Step 2. Drill two holes on either side of the label.
I used a smaller drill bit and was able to drill through three rectangles at a time using a clamp on our workbench. A quick re-sanding around the holes and the pieces were ready for their paint!
DIY Chalkboard Labels for Pantry Organization | The Thinking Closet

Step 3. Give the labels a few coats of the Krylon Chalkboard Spray Paint. 
Make sure to follow the instructions on your can in terms of shaking and spraying several thin coats. I covered mine in 4 coats.
Krylon Chalkboard Paint - several coats on the wooden labels.

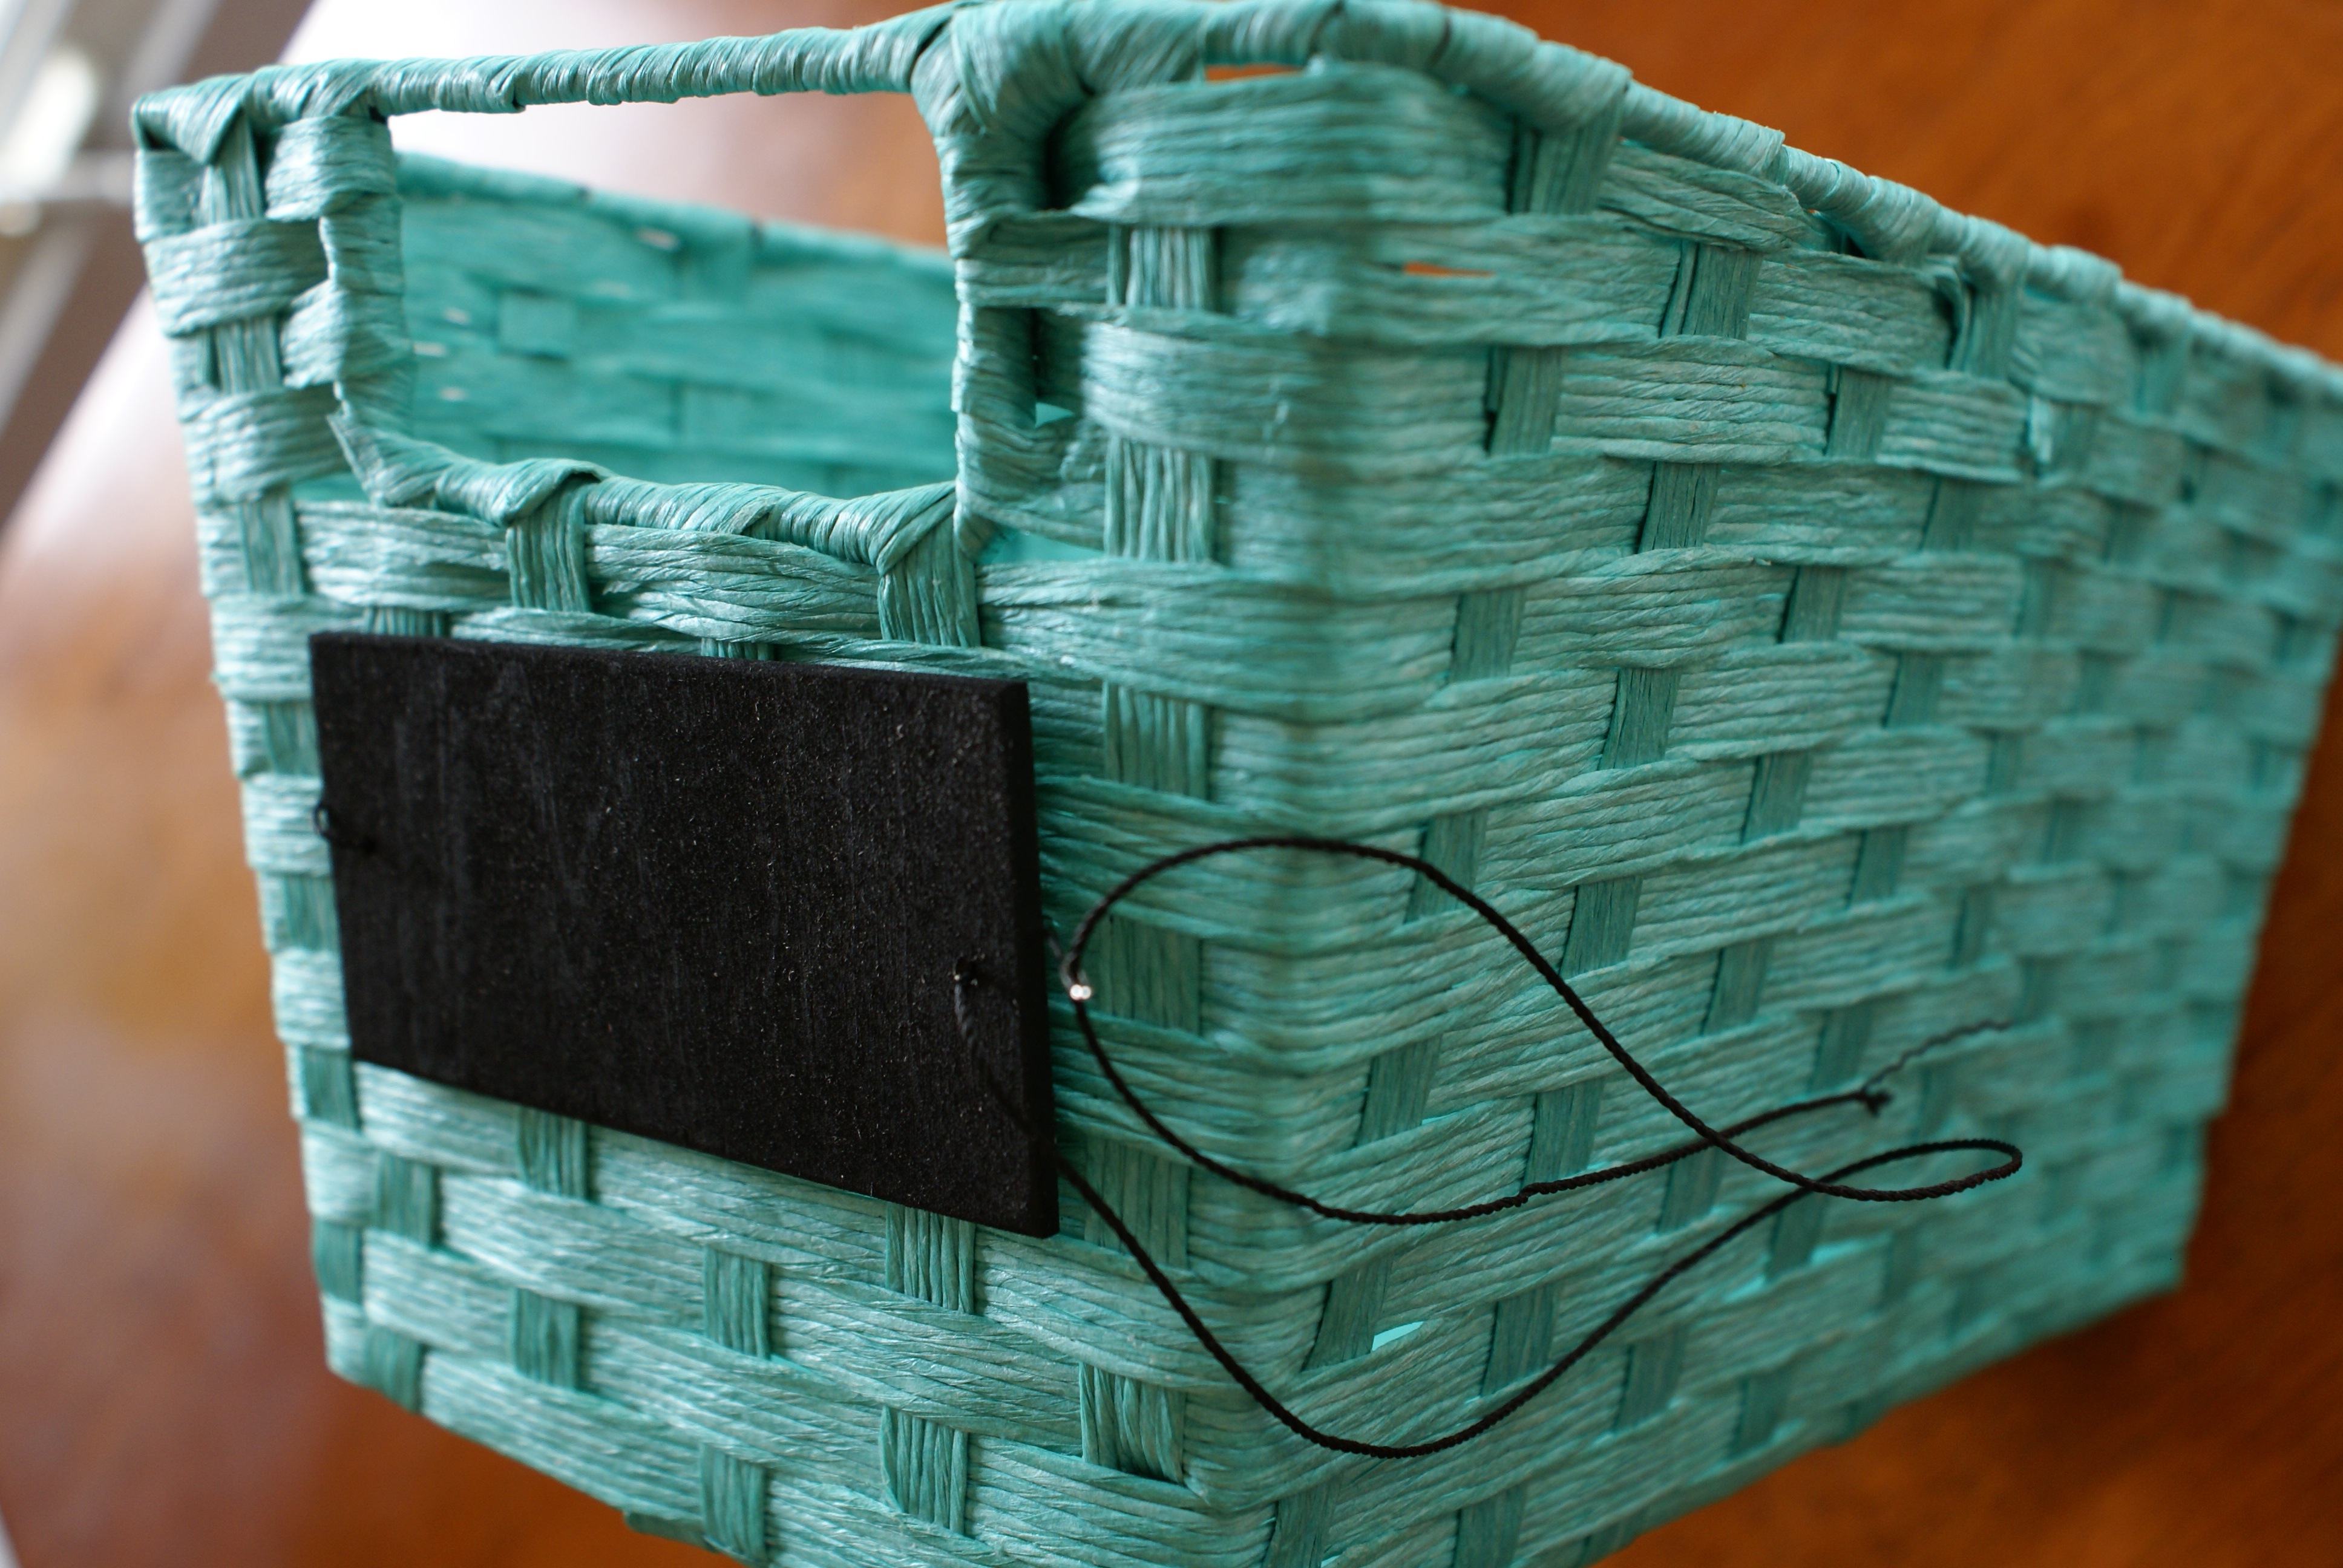
Step 4. Thread some fishing line or twine through the holes and through the basket.
 My basket didn't have a lot of space in the weave, so I used a needle made for mending sail-cloth to punch it through. The string was purchased by my husband in Mongolia, so I don't know its exact type, but it is a very thin black twine. I tied the two ends of the twine together on the back to secure the label. Almost there....
DIY Chalkboard Labels for Pantry Organization | The Thinking Closet

Step 5. Use some dust-free chalk or a chalk marker to complete your label. 
I used chalk, but I'd recommend a marker. I think it will be easier to re-write on the labels if you don't have to press so firmly on the wood.
DIY Chalkboard Label Tutorial by The Thinking Closet

Step 6. Most importantly, grab a glass of peach iced tea, stand back, and admire your hard work!
DIY Chalkboard Labels for Pantry Organization | The Thinking Closet

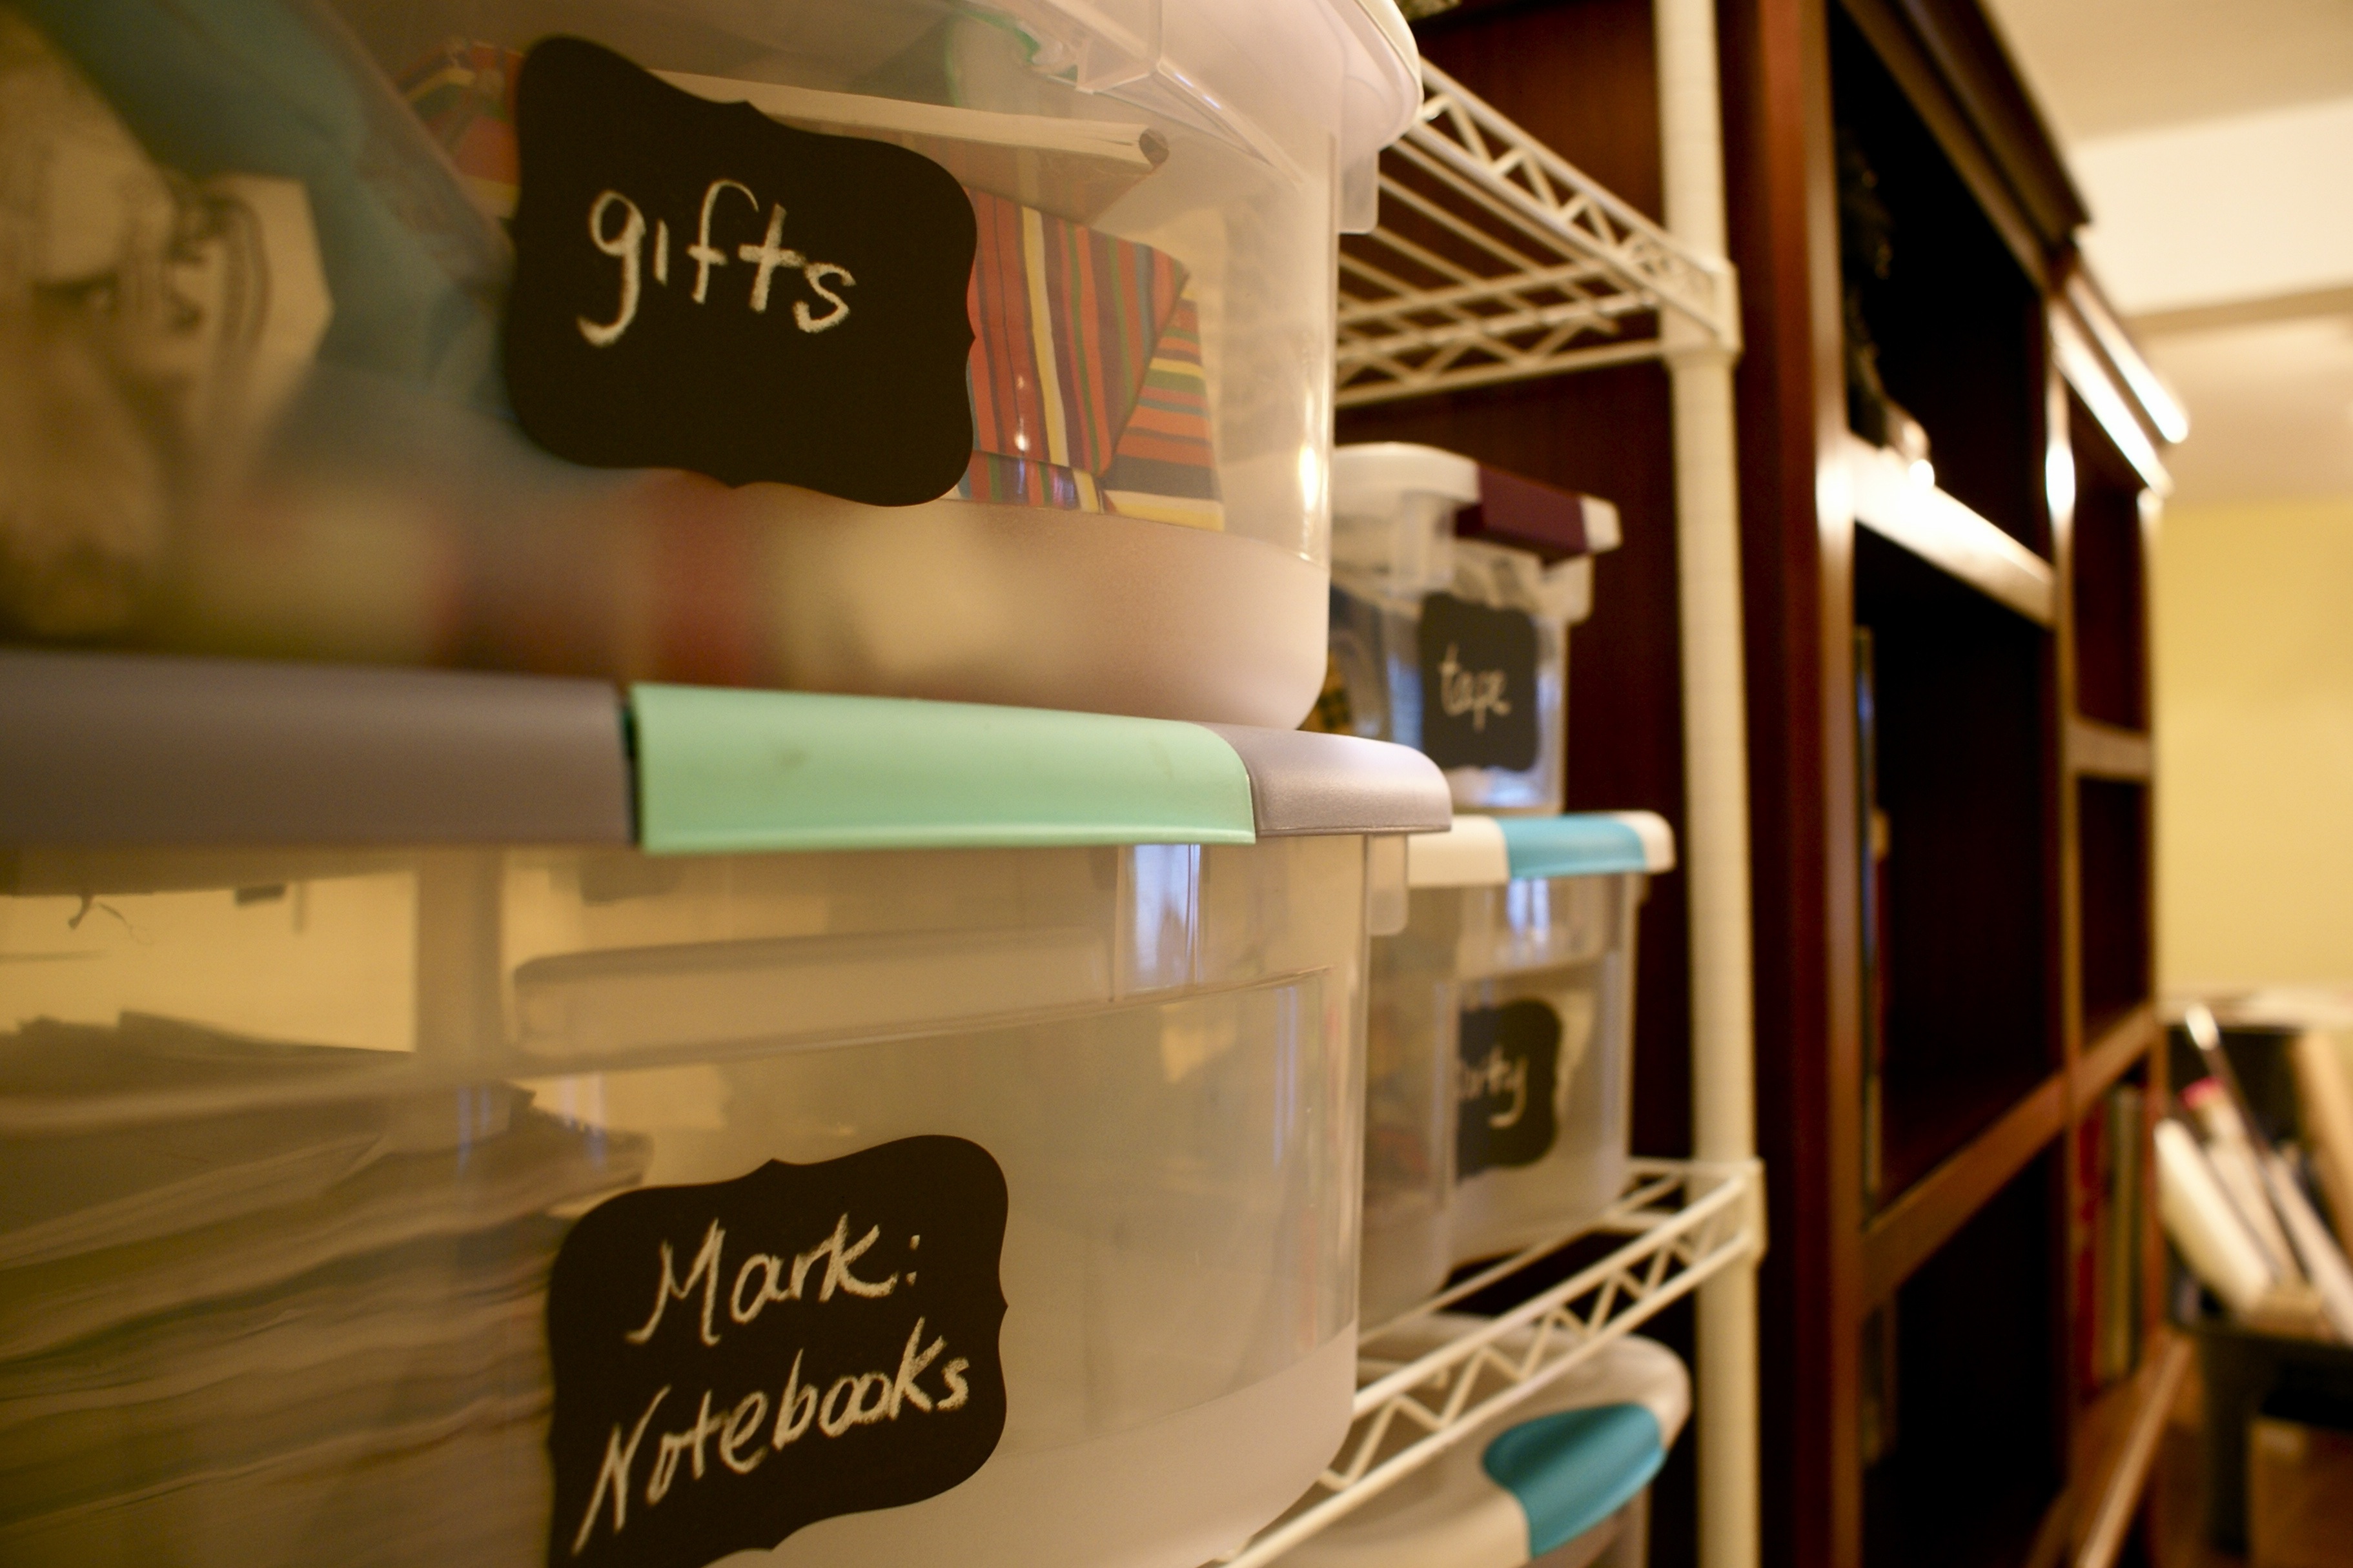
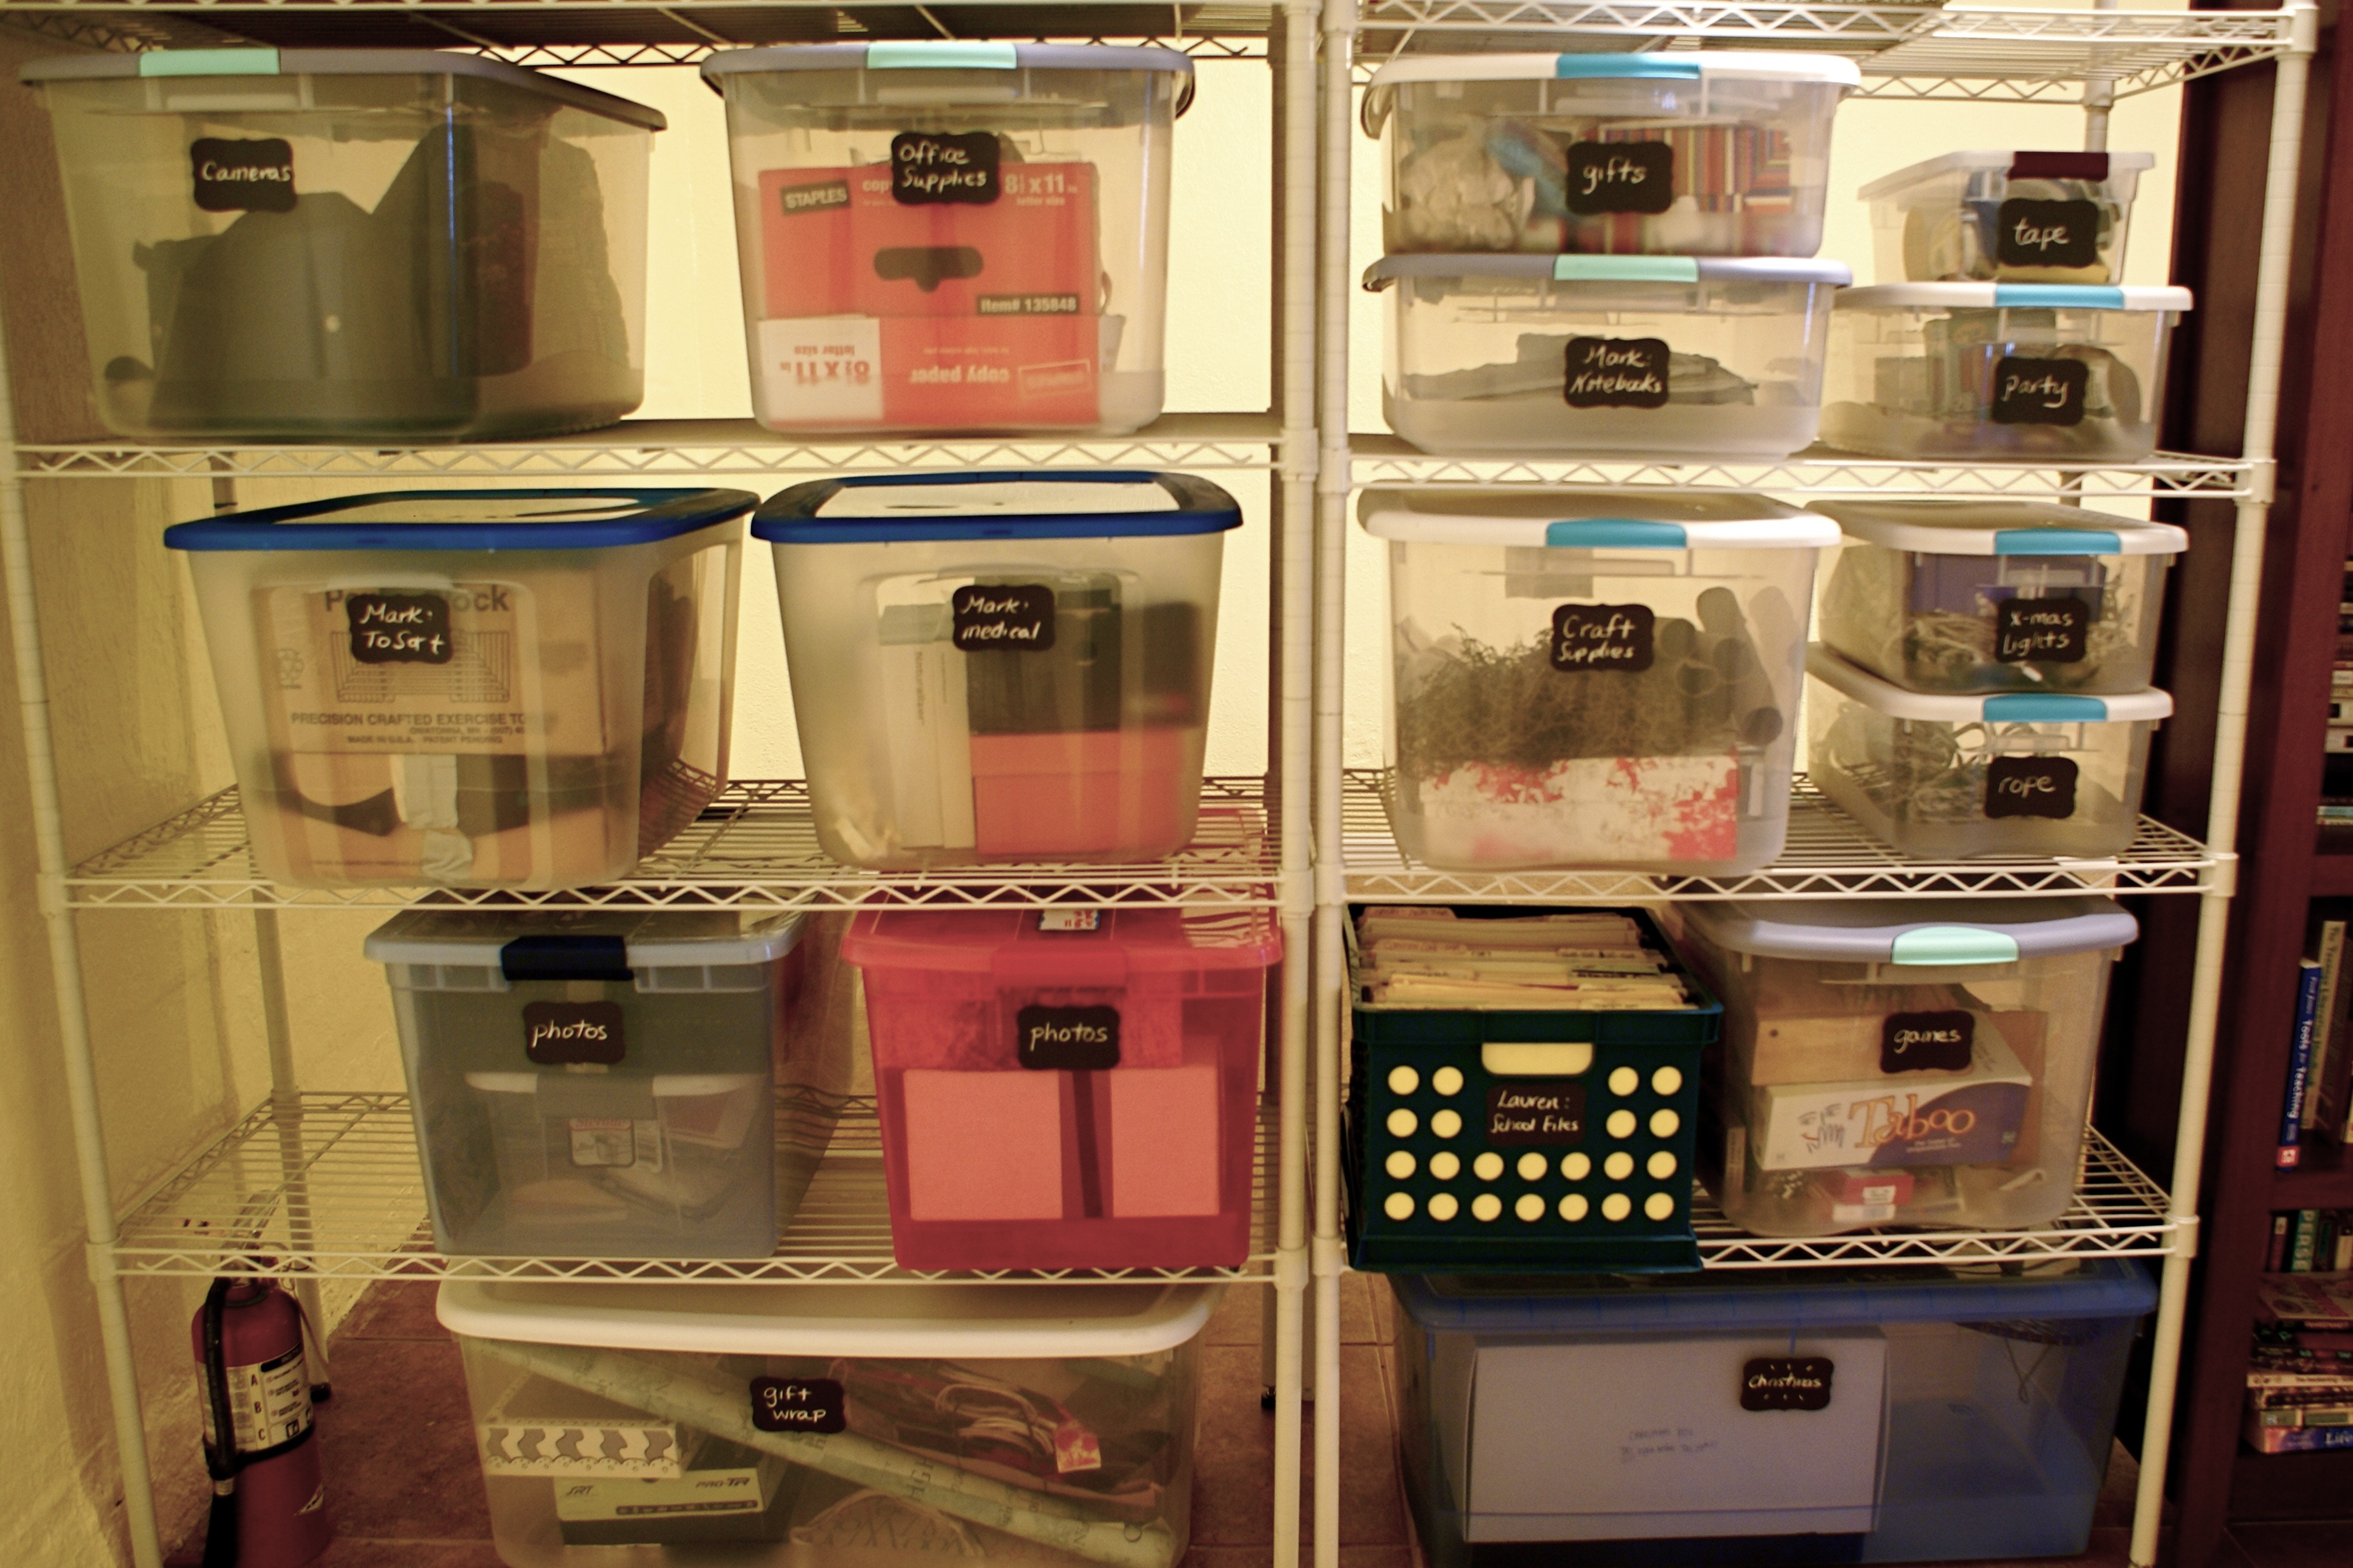
I decided to keep the chalkboard theme going downstairs with our Tupperware storage by purchasing some Martha Stewart Home Office™ with Avery™ Chalkboard Labels; Flourish, 2-1/2" x 3-3/4", 12/Pack. They were $5.99 a pack on Quill.com and were super-easy to write on. I even tested erasing one, as well as removing it from the Tupperware (as they claim to be removable) and both worked great. The lighting downstairs is far from natural, but here are a few pics:

Basement storage organization using chalkboard labels via The Thinking Closet

Basement storage organization using chalkboard labels via The Thinking Closet

Fun fact: they also sell chalkboard contact paper at Jo-Ann's. I mustered up all of the self-control within me and put it back on the shelf...at least until I have an actual project in mind. Here it is on Amazon.com (affiliate link).

Your Turn:

Do you have an organization system for your pantry? Or an idea for how to use some chalkboard labels? Do share!

To close:

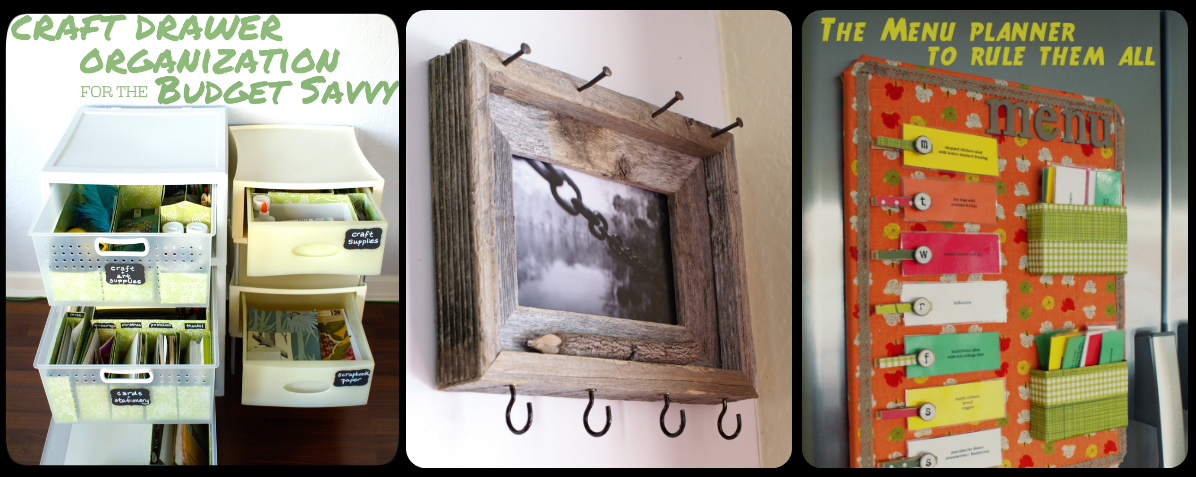
A hearty thanks and a virtual hug to my buddy, Jen, for inviting me over today to share this tutorial with you, lovelies. What a joy it has been. Know that you are always welcome to come and see me anytime at The Thinking Closet. If you've got a hankering for more organization posts, you might want to check out my Craft Drawer Organization for the Budget Savvy, my Rustic Key & Sunglasses Holder, or The Menu Planner to Rule Them All. If you do, be sure to say hi! I love to correspond with readers in the comments; it's how Jen and I got to know each other in the first place.

Organization Posts from Lauren at The Thinking Closet

Thanks for reading, and have a marvelous day, everyone!
  signature

Tuesday, July 2, 2013

Vacation: Texel

Greetings from the island of Texel (pronounced "tessel")! Located in the northwest part of the Netherlands, this little island is nestled in the North Sea.

The parents of our Dutch daughter, Marissa, were generous enough to offer us a few days at their cottage on Texel this week. 
Our home sweet home for the next few days.
We are settling in for our second night, but before I turn in, I thought I'd post a few photos of this beautiful island. 
The lighthouse at the end of the island. 
With all the sheep and greenery, we thought for a moment that we ended up in Ireland!
This morning, we wandered through the market in De Koog.
Headed down to the beach on the North Sea. 
We had to watch our step to avoid stepping on jellyfish. 
Don't mistreat it. This could be YOUR lifeline.
Bikes all over the island, including many like this for younger bikers. 
An old church in town. 

Beautiful wooded drive.
Also, be sure to check out the previous post from our trip to the Netherlands.
Related Posts Plugin for WordPress, Blogger...