***Updated June 29, 2016***
Since first sharing this post 3 years ago, I have made several changes to my craft room, but my table has stayed the same. Since there has been renewed interest in my table, I thought it would be a good time to share a full craft room tour.
In the weeks before our exchange student, Marissa, headed back to her Dutch parents, I found myself thinking about how sad it would be to walk by her empty room every time I went up and down the hallway. In situations when I'm dealing with grief of some sort, I find it helpful to give myself something to look forward to doing. (After our second miscarriage, we planned an Alaskan cruise for our due date).
My sewing experiment has quickly become a sewing passion so I decided that her room would make a great craft room. At the time, I had bins of fabric stacked up in the dining room, and part of prepping for dinner was clearing off whatever project I was immersed in that day. And if company came over, it had to be moved upstairs to our room, like this.

One year ago, when Marissa arrived, her room looked like this:

Not quite ready for quilting! Marissa left on a Thursday, and housekeeper (who comes every other week) was coming the next morning. I really wanted her to be able to deep clean in there. After all, a teenager was living there for a year! (Marissa was actually pretty neat and very respectful of her room).
I did a little bit of brain storming before Marissa left. My original idea was to use Ikea Lack tables, like Brooke from Custom Style. I also saw lots of ideas like what Stef from The Girl Inspired did with a table top over to cubby shelves. I knew I would be standing at the table, so I didn't want to lose the storage space. Finally, I saw an Ikea Hack table using Expedits. It still had space underneath it, but it got me excited. Then I found this Hack using two 4x2 Expedits and I was inspired. (By the way, how cool is using a Ribba shelf for a pencil holder?
After we dropped Marissa off at the airport, we consoled ourselves with our Ikea trip. And when we got home late that night, we took nearly every last thing out of her room. This would have been a great time to replace the carpet with cork, but that we will save that for another day.

The next day, Niels set to work on putting together the Expedits. We bought two 4x2s (currently $69/each) and two 2x2s (currently $39 each) because I wanted the storage on each end. We realized when we started putting it together that we bought glossy white 4x2 and regular 2x2s. Bummer, not only because the glossy is more expensive, but it also shows chips and scratches easier--things that are prone to happen when you are working with scissors, rotary cutters, and seam rippers! However, Ikea is more than hours to our nearest Ikea, we decided to keep it.

Since we'd be making a racket across the hall, D got to stay up late and watch the progress. He thought the Expedit made an excellent mini book nook.

If you're going to travel more than two hours and have to rent a bigger vehicle to buy furniture, it's generally recommended that you know the dimensions of the room. We didn't. We love Expedits and will probably continue to add to our collection as we finish our basement, so I knew I could put them to good use somewhere else if they didn't work in the craft room.
First two Expedits done.

So we put the first 2x2 on the end and realized we wouldn't have room for the other one.

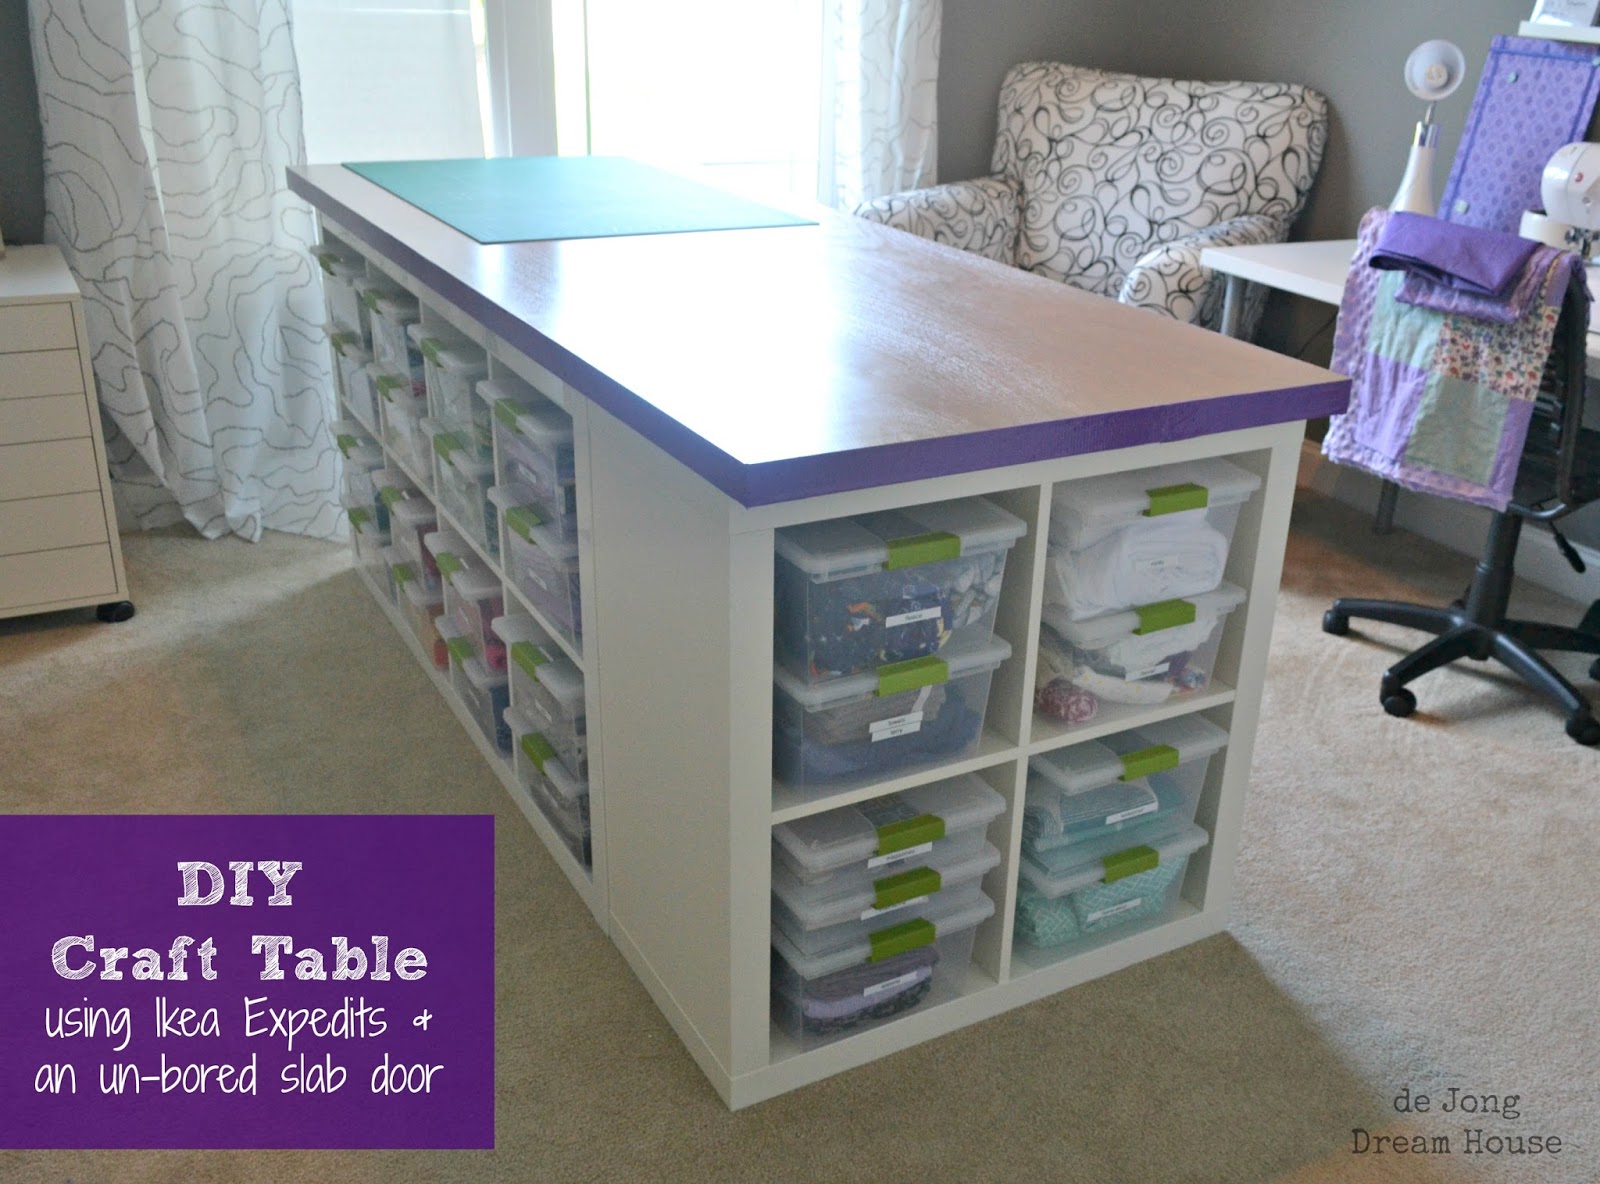
I knew I was going to use some of the Sterilite clip boxes (<---Amazon affiliate ad) I used in my pantry. I can stack two perfectly in one of the Expedit cubbies, which means there is lots of room to built my fabric stash!

Originally, we bought casters at Ikea to make the table a tad higher, but I realized I wanted a table top for a uniform flat surface instead. (I'm short, so I couldn't have both). I really had my heart set on butcher block, but I vastly underestimated the cost. I did find two reasonable options at Ikea and Menards, but they didn't come in a size large enough to cover the table.
It took me a few weeks to figure out a solution. I was walking up and down the aisles at Home Depot looking for inspiration when I saw an unfinished, un-bored door (just the slab, no frame, no hole). We opted for the solid core door so that it would stay on the Expedits better. Only $59
As we wheeled the door to the register, we say this teeny tiny little chip on the edge. I asked if we could get a discount, and we were able to get the door for $45. Score!

Niels helped me pick out the gray stain, and it's perfect: Varathane Sun Bleached Stain + Poly.

It was my first time staining wood, so I was a little nervous. But five coats later, I had a pretty gray door table top.

I love how it turned out!

And I have a craft table!

I probably did something wrong, but I couldn't figure out how to get the edge to take to the stain. I had the idea of trimming it with this super cool purply-gray metallic ribbon, but it was catching on fabric so it had to go. (Don't mind the purple masking tape on the walls marking where I want to put things!)

Plan B was good ol' fashioned duct tape. In my favorite color, purple.

Tour of the final craft table. This side is where I store my fabric stash. Soon I'll show you how I organize my scraps on the wall side.

It's a little scary how addicting it is to build your fabric stash!

The end unit holds my non-cotton fabric, like minky, fleece, flannel, terry, etc.

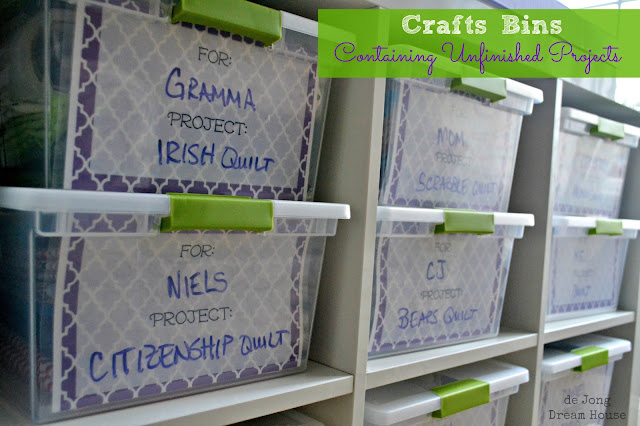
The other side has my project bins. You can see how I use index cards to note the recipient and type of project. You can also see that I have room for one more bin!

At the far cubby, I have my rulers and smaller bins with scissors, tape, pins, etc.

Finally, on the flat short side, I used Command Hooks to hang my rotary cutter, scissor, and rag quilt snipper. (<-- Amazon affiliate link)

Now I get back to quilting!
Updated: I'm made some pretty re-usable project labels!
Linked to:
30 Homemade Days * The 36th Avenue * Balancing Home * A Blossoming Life * Bowl Full of Lemons * Cherished Bliss * Charlie Beth * Craft-O-Maniac * Create Craft Love * Crystal & Co. * The CSI Project * Diana Rambles * DIY Dreamer * DIY Showoff * Ellison Lane * Feeding Big * Fluster Buster * Glitter, Glue & Paint * Grace Langdon * The Grant Life * House of Hepworths * It's Overflowing * Just Us Four * Keep It Simple Crafts * Kitchen Table Art * Krafty Kards, Etc. * Life After Laundry * A Little Clarification * Liz Marie Blog * Memories By the Mile * Mums Make Lists * My Uncommon Slice of Suburbia * Naptime Creations * New Nostalgia * Nifty Thrifty Things * Not Just a Housewife * Org Junkie * Organizing Made Fun * Practically Functional * Real Coake * Remodelaholic * Remodelaholic (turning tables diy week)Serenity Now * Sew Can Do * Sew Many Ways * Sew Much Crafting * And Sew We Craft * Sparkles & A Stove * Tatertots & Jello * That's What Che Said * This Silly Girl's Life * Threading My Way * Thrifty Decor Chick * Tossed Salad Life * Tumbleweed Contessa * Uncommon Designs * VMG206 * Who Needs a Cape * Will Cook for Smiles
http://www.dejongdreamhouse.com/2016/06/my-new-improved-craft-room.html