Tuesday, April 30, 2013

Potatoes to the Rescue

It's a BIG day here at the de Jong Dream House! There's a new King and Queen in the Netherlands and we are celebrating! The Dutch love their royal family. Princess Beatrix (the former Queen, who abdicated today to allow her son to begin his reign), King Willem Alexander, and Queen Maxima strike just the right balance between being regal and still down-to-earth.
Photo: Deel deze foto als je trots bent op Oranje! Ons Oranje!
Regal.
Photo: The new king and his family
Down to Earth.
The ceremony started at 3am our time, so we started our celebration last night with traditional Dutch comfort food, hutspot.

For dessert, Marissa made gevulde speculaas, which translates to stuffed gingerbread. This almond-paste layered bar is really more of a winter treat, but we love it so that's what she made! 

Marissa has had fun learning to cook some of her American (or at least, de Jong family) meals while she has been here. Early on, we set a goal that she would be able to make five meals from scratch by the time she returns home. She has done really well with finding the right ingredients in a second language, but the one thing that has tripped her up more than anything else is tablespoon and teaspoon (often abbreviated as T. and t., or Tbsp and tsp.) If you grow up learning empirical measurements like most Americans, it's easy to miss how confusing those two measurements are to someone accustomed to metric measurements. 

I am often in the kitchen when Marissa is cooking, but yesterday I was not available when she was mixing the dough. As she was tasting the dough before putting it in frig to chill, she noticed that the dough was salty. Very salty. We talked a bit, and we realized she put in a tablespoon of salt, not a teaspoon. Given the time and the fact that we had used the last of our speculaas spice, we couldn't really throw it out and start over. 

Thanks to the wonder of the internet, I learned that potatoes can desalinate dough. 

Skeptical, but desparate, we sliced up a potato and put the pieces over the dough. While we did notice a difference after 15 minutes, we had planned to chill the dough overnight, so we left the potatoes there overnight. It was really salty. 

The next day, the potato slices were a little shiny and soggy. They had been working hard!

The dough was a little stickier too. (This is a dry dough). But it was nothing a little flour couldn't fix. More importantly, it was no longer overwhelmingly salty!

And voila! Our Queens Day dessert is saved!

Linked to: 

Silhouette Cameo Confession


I have a confession to make. Five months ago, my sweet husband took advantage of a Black Friday promotion and bought me the Silhouette Cameo I had been drooling over for almost two years. The confession is the number of times I've used it: none, zero, nada, zippo. 

Sigh.

As far as I know, there is nothing wrong with it other than it didn't come with a talking person who could show me how to use it. I'm a little overwhelmed. Since my brain injury, I have noticed that I have  a harder time learning new things. Where I used to be able to just read a manual and figure things out, now I need to be able to see each step or have someone walk me through it. I started cooking by following blogs that took photos of each step. I learned to sew because my friend Nicole walked me through my first couple projects. I have a bursting board on Pinterest of projects I would love to do with my Cameo. But I just can't figure out how to use it. Grrrr...

I'm hoping to get together with a new friend in the next couple of weeks for some Cameo tutoring. To gear up for our get-together, I put together a list of projects I really, really want to do. 

1. Vinyl lettering and labels

I love the labels we have in our freezer, but the foam stickers I used don't like the cold. They fall off if they're bumped. I would love to make vinyl labels to replace them. 

For that matter, I'd also like to update the labels in our frig, like how Project Simple Home has done. 

Please do NOT pin this photo from our page.  Please pin from the source.
Also, I used foam stickers to put a few friendly reminders around the house for my boys. They work pretty well, except for when my overly-tired son would rather pull off and rearrange stickers than use the toilet before naptime. I'd love to replace my stickers with vinyl. Glamorous, I know.

I have a bajillion other labeling and vinyl ideas.

2. Frosted/Etched Glass

Did you know you can make etched glass with a Silhouette? I'd love to customize our casserole dishes like The Real Coake Family has done. 
Homemade Christmas Gifts
Please do NOT pin this photo from our page.  Please pin from the source.
I also love what Dans Le Townhouse did with her mirror. I have "Imago Deo" (image of God) on our full length mirror, written in puffy paint. Niels loves the sentiment, but not the execution. This would look a lot nicer!
Please do NOT pin this photo from our page.  Please pin from the source.
I also really like this idea from eighteen25.
Please do NOT pin this photo from our page.  Please pin from the source.
Heat Transfer Shirts and Onesies

I would love to be able to make my train and space shuttle-obsessed boy custom tees like this one made by Craftaholics Anonymous.
airplane t-shirt
Please do NOT pin this photo from our page.  Please pin from the source.
And I'd love to make custom onesies like The Thinking Closet has done for all the sweet babies my friends are having. 
Gender Neutral Onesies & Free Cut Files | The Thinking Closet
Please do NOT pin this photo from our page.  Please pin from the source.
Fabric Cutting
I am absolutely giddy about the idea of using the Cameo with my new love of sewing. How cute is this tooth fairy pillow?
Please do NOT pin this photo from our page.  Please pin from the source.
And I'd love to be able to cut out letters for monograms on quilts or to make cute projects like these days of the week dishags from Knitty Bitties.
Please do NOT pin this photo from our page.  Please pin from the source.
Other Projects

As part of my 2013 Pinterest Challenge, I want to make a growth chart ruler like this one from Adventures in Decorating and Design.  
Please do NOT pin this photo from our page.  Please pin from the source.
Click below to follow my ever-growing Silhouette inspiration board on Pinterest.

I'd love to hear from you. Do you have a super simple tutorial to get me started?

Linked to:
Crystal and Co.  * New NostalgiaReal CoakeSew Much Crafting * SNAP!

Wednesday, April 24, 2013

Beach Wrap with Pocket


Long, long ago, before my Pinterest boards were so full, I pinned this beach wrap. 

In these bygone days, Pinterest pins did not always link back to the original source so it took me until last week to realize that Victoria's Secret was the source of this fantastic idea.

When I started sewing a few months back, I didn't think I would ever attempt something I would wear in public, but it looked so easy, I was sure I could figure it out. 

This was not an easy project for me because I was having a bad brain day, so check out tutorials from Pia, DorandaDiary of a Mad Crafter, and all the other brilliant crafters in Pinterland.

I bought 2 yards of a stretchy jersey fabric. I only needed a yard and a half. A good rule of thumb I read was to buy enough to wrap around your body 1.5 times, or as long as your arms will stretch out. 

As you can see, I way overshot on how much fabric that I needed. My fabric cutter at the store advised that I cut the fabric so that the fabric stretch up and down (the way it would hang) rather that side to side so it hangs better. That also requires more fabric. Bummer. 


I ended up cutting a rectangle 60" wide by 30" high. I had a TON of fabric left over!

For the straps, I cut 6 1"x 22" strips. 

I braided two straps and secured the ends with tape. 

I used a zig zag stitch around the entire rectangle to give a finished looked. Some tutorials skip this step. 

Someone woke up from his nap at this point. He was still sleepy so he cuddled against me on my chair. 

For the straps, I measured 8 inches from the top of the wide part of the rectangle down. Some tutorials cut out a C-shape for armholes, but I didn't think it was necessary.

To attach the straps, I just used a straight stitch. Then, I cut off the taped part. 

At this point, the wrap is done...
Marissa was a lovely mannequin while I worked on this wrap.
...Except the one thing. I need a pocket for my key card when I'm at a hotel. So I made one. I used my park card as a template, and cut around it, leaving about an inch on all sides. 


Placement for the pocket will be different on everyone. I put on the wrap, and then pinned the pocket where I wanted it, by my right hip.

I wasn't too concerned about how the pocket was sewn on because it's completely covered up by the front of the wrap. 

All ready for the pool!


Linked to:

Visit thecsiproject.com

Organizing the freezer

Several months ago, I wrote a post describing how I organize our pantry. It's been a really popular post, especially for those who loved my old pantry.

As I was organizing our new pantry, I organized our new freezer, and this idea got lost in the pantry post, so I decided it was time to give it its own post. 

In our old house, we had a small chest freezer. As we continue our journey to eating more and more whole and local foods, we've come to see the value of having a large freezer. Our new pantry was designed to hold a large, stand-up freezer. (We selected a Frigidaire FKFH21F7HW.) We use our freezer primarily for local meat, extra veggies, spices, and other staples we buy in bulk. Now that I make  dairy-free bread for our son, we often keep a couple loaves in there as well.

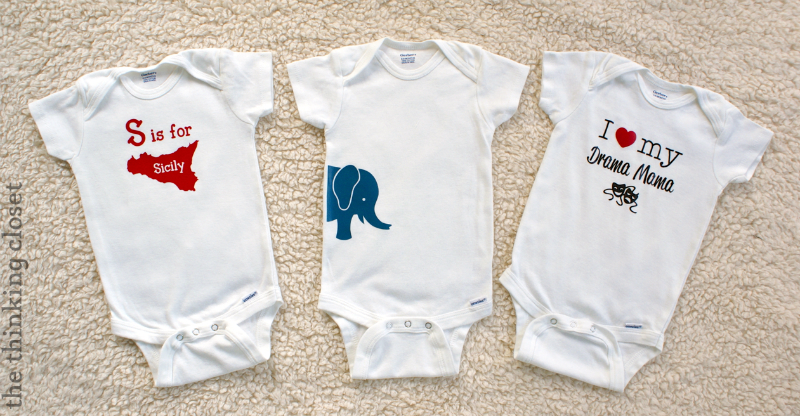
We chose a flat front freezer, rather than textured one, so I can use it as a dry erase board for inventory. I used foam letters similar to these to label the items that I always want to have on hand, and simply write the names of things that fluctuate.  (I now have a Silhouette, and once I learn how to use it, I will make vinyl labels when I update this project). I keep a different colored dry erase markers on the frig to make updates as I take items out. 

Here's a close up of the "meat" section of my inventory.

I also note the last time I did a physical inventory, just in case I happen to get off track.

Inside, I use Target's weave baskets to organize everything. I was using white Sterlite baskets before, but these hold a lot more and make better use of safe. Fun fact: 40 pounds of chicken can be contained in two baskets.


When we buy chicken, we immediately trim it and put it into ziploc bags that are labeled with the date and weight. I used to have trouble with the bags sticking together...until I had the brilliant idea to put a piece of wax paper between each layer. No more sticky chicken!

I used more foam stickers to label each basket.  Helpful hint: the letters stick much better to baskets that are at room temperature than frozen!


The top shelf has vegetables and dairy-free treats for our son. A friend shared the trick of making up safe cupcakes in advance to bring to parties and school events. Whenever he has a special day, I take out a cupcake and let it thaw overnight. In the morning, I frost it with safe nutella and add sprinkles. 

The next shelf holds our beef. We don't eat a lot of beef. We buy 15 pounds of ground beef and 10 pounds of beef cuts from a local farmer every few months.

The next shelf holds our 40 pound chicken buys. This will last us about four months. The baskets are just the right width that I can store my homemade bread in between them.

Under the chicken baskets, we have a drawer that I use to store chopped fruit and veggies. In this case, cabbage that I got at a great deal. (We like to buy up cabbage to make bubble & squeak). Behind the cabbage, we have some frozen bananas.

The next shelf holds sausage and pork. We really like chicken sausage and apple sausage, but we occasionally also get pork chops and bacon. The "misc." basket holds the leftover items. 

The bottom drawer holds our ice cream maker so it is always frozen and ready to go, extra Minty Morroccan tea that my in-laws sent me from the Netherlands because we can't find it in the States, and more leftover staples. 

The door of the pantry holds extra spices and staples. We shop at a bulk store, so we have lots of little bags and containers.

The place where we buy most of our groceries sells spices for a great price. The containers stack up very nicely.

When I buy a spice, I write the date on the container. Since I cook most meals from scratch and make my own spice blends, I find that I rotate through most containers every three to four months.

I keep my spices in a drawer under the cooktop. Cleaning out the freezer gave me a good excuse to top off all the containers.

We don't keep a lot of dairy in the house, but we do keep chocolate mints to put on the pillows of our overnight guests. The other items are dairy substitutes for baking and making ice cream. 

On the side of the freezer, I have this picture of what the pantry will look like someday. 

Related Posts Plugin for WordPress, Blogger...