Tuesday, March 26, 2013

Epilogue


I'm going off topic today. 

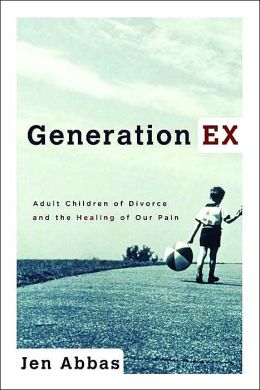
Before I was a wife, a mommy, a blogger, or even a brain-injury survivor. I was a writer. Most of my career consisted of writing in some form. I was a copy writer for several years and then a marketing director for a publisher. I was also constantly writing on my own time: journaling, writing articles for different magazines, and most significantly, I wrote my first book, Generation Ex: Adult Children of Divorce and the Healing of Our Pain. I signed off on the final manuscript in October 2003, and sustained my traumatic brain injury in January of 2004. Generation Ex released in April 2004.

Due to my injury, I was not able to promote the book as much as I (or my publisher) would have liked. It sold a modest number of copies (slightly better than average) before going out of print a year later. I was fortunate to find a smaller publisher who reprinted it despite the fact that at that point, I had sustained my second TBI and was completely unable to market the book. Again, it sold a modest number of copies (slightly less than average) before again going out of print. Used copies have been available for the last nine years as the publishing industry has completely changed in the face of digital media. I have had countless requests for e-book versions of the book, not only for the convenience, but because many of my readers admitted that they covered the book so others wouldn't see what they were reading! 

About a year ago, I started talking to the fine folks at Sozo Media, who have agreed to partner with me to release Generation Ex as an e-book! (Fun fact: Sozo also published my children's book, But I Don't Wanna Go to Bed). 

Because Generation Ex is a pretty personal book--I share a lot of my story in it--and since we're coming up on ten years since I wrote it, we thought it would be fun if I added an epilogue to update readers on how my life has turned out since the last chapter. Easier said than done! My post-injury 
brain does not do well on deadlines, even on very soft ones like Sozo gave me. The beauty of blogging for me is that on days when words aren't playing hide-and-seek, I can regain a little bit of my old life. 

I have been trying, over the last few months, to write out my epilogue. I gathered a few thoughts and cobbled together a few phrases, but I was unable to conjure up the inspiration that fueled so many bursts of writing in the past. Finally, I had the idea that I would set aside a Sunday, when Niels was home to watch our son, and I would camp out at Panera and pound it out. This was the way I got things done in the old deadline days, and I hoped that the familiar setting would jumpstart my brain into action. Thank God, it did! My bottom was parked in that booth from 9am until almost 6pm, but I'm happy to say it is FINISHED!  

It was rather a surreal day as I was free from all the things that concern me in my current day-to-day life. To find inspiration, I dug through the old neglected writing files in my computer. Thanks to my memory deficits, I read paragraph after paragraph of prose more as a reader than the writer. It bummed me out thinking of all the books in progress that I'll never finish, but I really love the life I live today, too.

What surprised me the most about my day of writing is the connection I made between the hardest chapter for me to write--about finding home for ourselves after our family home is dissolved--and my attachment to the home I currently live in with my family, this de Jong Dream House.

I wrote:
Today, the life I am most concerned with shaping is that of our son. At four, his greatest heartbreak is having to say goodnight to Thomas the Train. How I yearn it would always be so. With my brain-injury, his world has been pretty small up until now. He started preschool this year and I know that words like divorce are going to enter his vocabulary and understanding. I pray that words like love, family, trust, marriage, commitment, and home are more meaningful to him. 

When I was writing this book, the chapter I struggled most to write was chapter 5 (Finding Home for Ourselves). I wrote that “While home is a place to others, home is memory to us.” Being married, being a mom, makes home a place to me again. It is a physical place, sure, but it is truly an emotional place, too. When I am with my husband and son, I feel at home

Living with a brain injury means that I don’t get out a lot. The world is a loud, bright, fast-paced place. I can only handle it in small doses. A year ago, Niels and I built our dream home. We built it with the rest of our lives in mind. As we thought out our floor plan, we thought about what we needed with a young son, what we would need when Daniel is older, when he’s a teen, when he leaves for college. We considered what we would need if/when either of us had mobility issues and could no longer master the stairs. We thought about who else would use our house: our parents who may stay for weeks or months at a time, or Daniel staying with us during or after college as he establishes himself, or friends who visit or just need a place to stay on their way to somewhere else. We knew we wanted our house to be the one that our friends—and Daniel’s—wanted to come to and we designed it to be safe and quiet and with room do to all the things we like to do. When we moved in one year ago, there was such a peace knowing that we could live here comfortably for the rest of our lives.

At times during the process, and in the months since, as we have blogged about it , I have occasionally felt a little guilty that maybe I was being a bit too materialistic because I am so attached to our home. What I am realizing at this moment is that our house is the tangible evidence that I have finally found home for myself. It isn’t just the building, but the family, the memories we are making, the long-term perspective of our family being here over the years, the tangible “us-ness” of it. It is our dream house because for nearly forty years I have longed for and dreamt of feeling at home. 

Ten years ago, I wrote Generation Ex in the wee hours of the night, scribbling down analogies and anecdotes in between a very full-time job, church and Bible studies, socializing with friends, first and last dates, and enjoying the ever-affectionate company of my Shih Tzu, Bailey. Today, I am enjoying life in the slow lane. A busy day means my son has to be driven to preschool, or I have a doctor’s appointment, or maybe we have company for dinner. But never all those things. I read books about trains, space shuttles, Curious George, and the Bible. At naptime, we all nap. My writing now comes in rare spurts, rare in frequency and rarely when it’s convenient. Our blog gives me an outlet for the little bits of creativity that manage to shine through. I have become domesticated. I love to cook and decorate our home. I may have an obsession with gallery walls.

One of my favorite word pictures from Generation Ex is “The act of de-mom-ifying or de-dad-ifying took away from us the very things we most yearned to cherish: the artifacts of our history. Ten years later, I now understand that putting photos on the walls of our family home is creating the artifacts of our son’s history. 


This little blog may not have the reach or influence of my book, but I am so grateful for this little place on the web that connects my old and new lives. And I am thankful for the visitors who follow, read, comment, and make my new life so much richer.

Linked to:
Housewife How To's

Friday, March 22, 2013

Stacked Letters


At the beginning of the year, I picked 13 Pinterest Projects that have been pinned in my Project board for awhile and gave myself a goal of completing all 13 by the end of the year. 

I've already posted about my first completed project, the unpaper towels, which also introduced me to my sewing machine. 

This second project has taken nearly as long to complete, mostly because we've had an unseasonably cold winter which has keep me from spray painting. In fact, here we are, first week of spring, and it's snowing! Fortunately, I took advantage of a nice day a few weeks back and sprayed. It only took a few more weeks of procrastination to hang it up, and voila! I'm back on schedule!

The inspiration for my stacked letter art was this photo:
Oliver1_rect540
Please do NOT pin this photo from our site. Pin from the original source: Apartment Therapy
When I first wrote about this project, I said:

Stacked Letters. I will be adding a glue gun to my craft collection this year. My first project will be do make a "de Jong" stack for the corner of our great room. I think I may paint the letters silver or purple.

The photo above links to some cute photos of Oliver's nursery. It does not, however, include a tutorial. It was easy enough to buy the cardboard letters. We bought ours at Hobby Lobby, but most craft stores have them.

The first thing we needed to decide is where we were going to put them. My first thought was the great room, but we really didn't have a spare corner, so I considered the fireplace mantle:

Niels vetoed this idea, and I agreed because it wouldn't really be the stacked letter idea, even if I glued the letters sideways. We definitely like this look better. Note: the letters aren't glued yet. You can tell they are a little off kilter as we considered putting it in the window sill. 
This would be a great tutorial if I showed you all the types of glues and adhesives I tried that didn't work. But it's been too long for me to remember which did what! (This photos were taken exactly two months ago!). 

I know that my new glue gun didn't work. Neither did magnets or velcro. Tacky glue didn't hold. Neither did wood glue. The general problem is that most adhesives would work for one letter, but when I tried the third letter, the weight of the cardboard work against it. Over the course of about two weeks, I'd buy a new glue, try it, watch it fail miserably, grumble about it, be mad at the letters for a day or so, find a new glue...rinse, lather, repeat.

Finally, I had the brilliant idea to ask for help. I asked an employee at Pat Catan, a local craft store, and she recommended both Gorilla Glue and Weld Bond. I was skeptical at this point, but tested both.

Wouldn't you know, both worked! (In the photo above, Gorilla Glue is on the left and Weld Bond is on the right). 

As recommended, I let the glue dry for 24 hours before moving it.  

The next day (or so) we moved up to our bedroom, where we thought we would put it in the corner between our We Do gallery and our album shelves (which we still need to post about).

But as we were coming up the stairs, we had the idea of putting it on this corner, across from our heritage gallery.

As it turned out, it did end up in the corner of our master bedroom for a couple months while we worked on other things, like D's printable gallery. See how sad and neglected it looks in the corner?

Finally we had a nice tease of spring. I took full advantage to spray paint a few things. (Good thing I did since it's been cold ever since!) I used Krylon Dual Paint + Primer.


Once the painted dried, we brought the letters upstairs to sit in the corner for a few weeks until I remembered to buy command strips. I really should buy them in bulk.

The letters are actually pretty light compared to a frame so I only used four for the whole name.

And done!

Wednesday, March 20, 2013

Homemade Nutella (Dairy Free)

We eat a fair share of Nutella in our house. My husband is a Dutch citizen. Our son is a Dutch citizen (as well as American). I'm not going to call it a health food, but Nutella is a mainstay in our home, and for the sake of our marriage, I'm not going to fight Dutch tradition! For the record, Dutchies also put chocolate sprinkles--called hagelslag--on their sandwiches, so you can see what I'm up against.

Our son's dairy allergy was the incentive I needed to find a safe Nutella alternative for our house. It took a few tries until I came up with this recipe, with which I'm quite satisfied. It tastes great, isn't overly sweet, and spreads easily. It does lack the glossy texture of the processed version. Then again, this version doesn't have more palm oil than hazelnuts, either!

Side note: Here is the ingredient list for Nutella, from the Nutella website:
If you've seen the peanut butter recipe I posted a little awhile ago, many of these steps will look familiar because it's basically a glammed up nut butter. 

To make this Nutella, you'll need:
  • 2 cups hazelnuts
  • 1-1/2 Tablespoons vanilla
  • 1/4 cup Dutch cocoa (or cocoa powder)
  • 1/4 cup pure maple syrup
  • 1/4 teaspoon salt
  • 2 teaspoons coconut oil (optional)
  • up to 1/4 cup almond milk

Step 1:
Roast two cups raw hazelnuts at 325 degrees Fahrenheit. Roll them around a bit until they are in a single layer on a baking sheet and  keep them cooking until they start to sweat and turn light brown,about 12 minutes. (If you buy roasted hazelnuts, you can skip this step).

Step 2: 
Let the hazelnuts cool for about ten minutes before adding them to the food processor. 

Step 3:
Blend. I find that hazelnuts need a little more time to turn to butter than peanuts, but the process is the same. You'll want to stop the processor every 30 seconds or so to scrape down the sides. Here we are at one minute. The hazelnuts went from whole, to chopped, to crumbly. It's important that you process the almonds by themselves first. This allows the oil in the hazelnuts to release and turn the powder into butter. 


Step 4:
Add 1-1/2 Tablespoon vanilla. (I made my own. Super easy. I'll have to post about that soon, too). 

Step 5:
Add 1/4 cup Dutch cocoa. I'm very spoiled in that our recent guests from the Netherlands just brought me some Droste Dutch processed cocoa and I prefer it to natural processed cocoa. (You can read about the difference between the two here). 

Step 6: 
Most recipe for homemade Nutella call for 1/2 cup (or more!) of powdered sugar. I prefer to use honey or maple syrup as sweetener. I chose maple syrup for this recipe because of its thinner consistency. 

Step 7: 
Add 1/4 teaspoon salt. You can also add the 2 teaspoons coconut oil at this point, but it's optional. Lately I've been skipping it.

Step 8: 
Blend for 10-30 seconds. At this point, the texture is a little too thick. 

Step 9:
I've learned from experience that oil will not smooth out the texture at this point, but almond milk will (or regular, if you don't need to avoid dairy). Nut butters can be temperamental, so each batch is different. I start with a couple Tablespoons and add slowly under it reaches the desired consistency.

Step 10: 
In my experience, it could take anywhere from 2 Tablespoons to 1/4 cup milk to reach the perfect texture. After that, it tends to get soupy and watered down.When your Nutella looks like chocolate frosting, you've added enough milk.  In fact, I often use it as frosting for my son's cupcakes when he needs a safe treat for school or parties. 

Eet smakelijk!

Other recipes you might like:
If you like what you're reading we'd love for you to follow us on Blog Lovin', Pinterest, and/or Facebook

Linked to:

featured button Pinterest Power Party & Features!

Sunday, March 17, 2013

Busy Weekend!

It's a little quiet on the blog this weekend. We are very happy to be hosting Marissa's parents this weekend. It is a very short, but sweet trip because Marissa hadn't seen her family for more than seven months. We've been busy getting to know each other and introducing Vincent and Jolanda to Marissa's American life.

I've also been fighting my new addiction to quilting. I lost track of time on Friday night and nearly finished D's quilt. All that's left is the cutting, and that will be a good project when company leaves and I set myself up for a movie marathon.

Lastly, the e-book release of my first book, Generation Ex, is nearly ready! Because it's been ten years since I wrote (!!), I'm adding a epilogue, which I hope to finish on Monday...or Tuesday.

So, not too much going on! I hope you're all having a relaxing weekend!

Wednesday, March 13, 2013

My First Quilt: Progress Report

One of the reasons I bought a sewing machine was because I had a goal to sew a quilt. To me, making my own quilt is the pinnacle of domesticity. My bonus dad and his wife made one for me about fifteen years ago and it's one of my favorite things. I just love knowing that they spent so much time together making something just for me. In this high-tech world, quilting is a low key way to make something practical and sentimental.


After I bought my sewing machine, it sat in our new linen closet for a few months until I talked my friend Nicole into teaching me how to use it. The first thing we made was unpaper towels.

I didn't mess those up too badly, so one night inspiration struck and I made a curtain for our flex room out of a bedsheet. 
DIY Bedsheet Curtains

So now that I'm feeling relatively confident in my skills, I'm ready to make my quilt. I credit our son for inspiring me. We were in the fabric store when he spotted some Thomas the Train fabric and asked if I would make him something out of it. I was quite happy with the fabrics I found to go with it.
Fabric bought: February 21, 2013
Then I used PowerPoint to play with patterns. 
Playing with patterns: February 24, 2012. Option 1. 
Option 2
Option 3
Option 4
Option 5
Then I washed the fabric. I learned later that this wasn't necessary.
Washed fabric: February 25, 2012
Next, I recruited my hubby to iron the fabric. 
Ironed fabric: February 26, 2012
And then my pretty pile of fabric sat for three weeks while I dealt with my brain-injury induced headache. (I get injections every three months for my headaches. It wears off toward the end, and I have 2-6 weeks of pain and fatigue until my new shots).
Fabric ready to cut: February 26, 2013
I'm two days away from injection day, but I'm happy to say that Nicole and I got together to cut our squares today!
Cutting squares: March 13, 2013
The only new supply I bought for this project was the 6.5" quilting square. 

Since I bought the fabric on a whim, I didn't have a solid idea of how much fabric I needed, so I just bought a yard and a half of each. D chose option 4 above. I counted it up and found that I needed 19 red, 45 Thomas, 12 yellow, and 12 stripe. I had no idea if I would have enough fabric, so I just started cutting. 

I laid out the original design, but I wasn't quite convinced it was right.

So I added another red/stripe row to make it symmetrical.

And this is when I learned that I needed to have something for the back of the quilt. Um...oops. I only had one Thomas square left, and decent stacks of the rest. I am five squares short of what I need. 


So, Nicole and I have a Joann's date tomorrow to see if I can a little more of the stripe and red fabric. I think I'm going to keep that Thomas square in the middle.

Tonight I went back to PowerPoint and tweaked my front pattern to include the stripe directions. This will be my guide as I start stitching the squares together.

And I made a template for the back.

I would have liked to put some of the Thomas fabric on the back, but the pragmatic side of me wants to buy the least amount of additional fabric as possible. I thought it was interesting that even though I bought the same amount of fabric for each design, I didn't get the same number of squares from each. I tallied up the squares I'll need:
Are you a quilter? Share your best quilting tip for me below!

Check out our "Learning to Sew" board on Pinterest

***Updated 3/20/13*** 
I'm DONE! Photos and an updated post coming soon. Here's a sneak peak:

Linked to: 

Related Posts Plugin for WordPress, Blogger...